Are you tired of store-bought bread that lacks flavor and freshness? Imagine waking up to the irresistible aroma of freshly baked bread filling your kitchen, without the fuss of kneading dough by hand. An automatic bread maker can turn this dream into a daily reality, transforming simple ingredients into delicious loaves with minimal effort. This comprehensive guide will help you navigate the world of bread machines, ensuring you choose the perfect model to suit your baking aspirations and bring the joy of homemade bread to your table.
What is an Automatic Bread Maker?
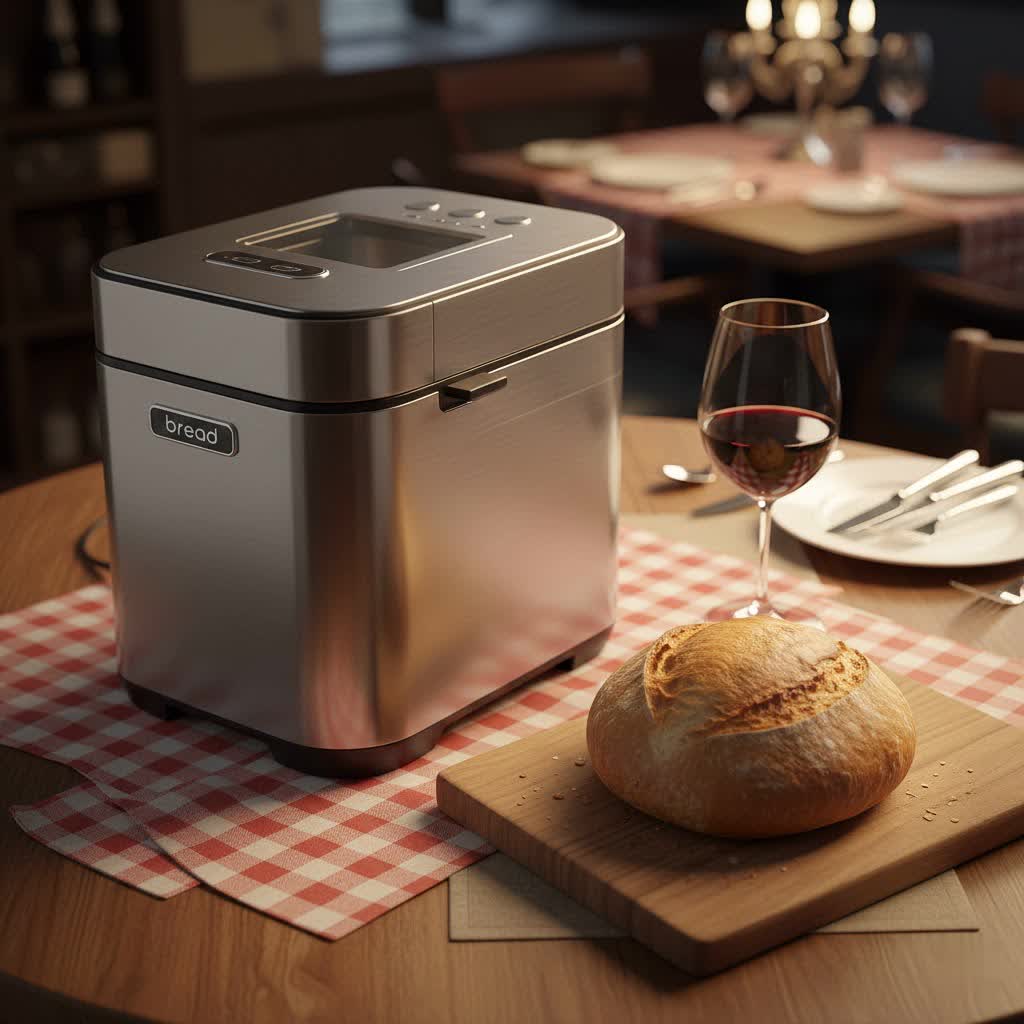
An automatic bread maker is a compact kitchen appliance designed to streamline the bread-making process from start to finish. It combines the functions of mixing, kneading, rising, and baking all within one self-contained unit. Users simply add ingredients into the bread pan, select a program, and the machine handles the rest, delivering a perfectly baked loaf hours later.
The concept of automated bread making dates back to the 1980s, gaining popularity as people sought convenience without sacrificing the quality of homemade food. Early models were basic, primarily producing standard white bread. Today, bread makers have evolved significantly, offering a multitude of programs and features that cater to diverse dietary needs and culinary preferences.
There are several types of automatic bread makers available, varying primarily by capacity, features, and design. Some are compact, ideal for single users or small families, while others boast larger capacities for bigger households or frequent baking. You’ll find models with single or dual kneading paddles, and pans that produce either traditional horizontal loaves or taller, more vertical shapes. The range includes basic, budget-friendly options for entry-level bakers and sophisticated machines with advanced customization for seasoned enthusiasts.
Why Choose an Automatic Bread Maker?
Bringing an automatic bread maker into your kitchen offers a myriad of benefits that extend beyond just convenience. It empowers you to enjoy fresh, wholesome bread tailored to your exact preferences, transforming your daily meals and snacks.
Firstly, convenience and time-saving are paramount. The bread maker handles all the labor-intensive steps—no need for messy flour-dusted countertops or endless kneading. Simply measure your ingredients, toss them into the machine, press a few buttons, and let it work its magic. Many models include delay timers, allowing you to load ingredients in the evening and wake up to a warm loaf for breakfast, or have one ready as you arrive home from work.
Secondly, an automatic bread maker provides unparalleled flexibility for customization and healthier options. You have complete control over the ingredients, enabling you to use organic flours, reduce sugar or salt, and incorporate healthy add-ins like seeds, nuts, or whole grains. This is particularly beneficial for those with dietary restrictions, as many machines offer dedicated settings for gluten-free, whole wheat, or sourdough recipes, ensuring you avoid unwanted additives and allergens often found in commercial breads.
Furthermore, making bread at home with a dedicated machine ensures food safety and hygiene. You know exactly what goes into your bread and can maintain a clean baking environment, providing peace of mind for you and your family.
Ultimately, the most compelling reason is the joy of creating fresh, delicious homemade bread. The taste and texture of a freshly baked loaf are incomparable. With an automatic bread maker, you can easily produce crusty artisan-style bread, fluffy sandwich loaves, sweet brioche, or even dough for pizza and pasta, all infused with that comforting, homemade goodness.
How to Select the Right Automatic Bread Maker
Choosing the ideal automatic bread maker involves considering your personal baking habits and desired features. With so many options available, a thoughtful approach will ensure you invest in a machine that truly meets your needs.
Assess Your Baking Needs
Before diving into features, take a moment to understand what you expect from your bread maker.
- Family Size vs. Personal Use: How many people will you be baking for? Loaf sizes typically range from 1 pound to 3 pounds. A 1-pound or 1.5-pound capacity might suffice for an individual or couple, while a 2-pound or 2.5-pound machine is generally good for a family of four. Larger families might benefit from a 3-pound capacity.
- Preferred Bread Types: Do you mostly enjoy classic white bread, or are you interested in exploring whole wheat, rye, gluten-free, sweet breads, or even sourdough? Ensure the machine you choose has the specific programs or custom settings for the types of bread you plan to make. Some machines also offer settings for jam, cake, or pizza dough.
- Budget: Bread makers vary widely in price. Basic models can be quite affordable, while high-end machines with advanced features and premium materials will naturally cost more. Determine your comfortable spending limit, remembering that a higher price often correlates with greater versatility and durability.
|
Our Picks for the Best Bread Maker in 2026
As an Amazon Associate I earn from qualifying purchases.
|
||
| Num | Product | Action |
|---|---|---|
| 1 | KBS Premium 2LB Convection Bread Maker Dual Heaters, 710W Stainless Steel 17-in-1 Bread Machine Healthy Ceramic Pan, Nut Dispenser,Touch Panel, 3 Loaf Sizes 3 Crust Colors, 15H Timer,Low Noise,Recipes |

|
| 2 | KITCHENARM 29-in-1 SMART Bread Machine with Gluten Free Setting 2LB 1.5LB 1LB Bread Maker Machine with Homemade Cycle - Stainless Steel Breadmaker with Recipes Whole Wheat Bread Making Machine |
|
| 3 | 2LB Bread Maker Machine, OSIPOTO 17 in 1 Automatic Stainless Steel Bread Machine, Non-stick, Beginner-Friendly Controls, 15 Hour Timer, Easy to Clean Low Noise, High Success Rate for Homemade Bread |
|
| 4 | Neretva Bread Maker, 20-IN-1 2LB Bread Machine Dual Heater Bread Maker Machine Automatic with Nonstick Ceramic Pan, 15H Timer & 1H Keep Warm Set, Low Noise, Stainless Steel Breadmaker Recipe-Green |
|
| 5 | Cuisinart Bread Maker Machine, Stainless Steel Convection Bread Machine with 16 Menu Options, 3 Loaf Sizes Up to 2 Lb., 3 Crust Colors, Includes Measuring Cup, Spoon & Kneading Hook, CBK-210 |
|
| 6 | Neretva Bread Maker, 20-in-1 2LB Bread Machine Dual Heater & Nonstick Ceramic Pan Bread Makers Machine All Metal Compact for Gluten Free/Dough Maker/Meat Floss/Jam/Yogurt/Breadmaker Recipe-Light Green |
|
| 7 | Elite Gourmet Programmable Bread Maker, 2 lb Loaf, 3 Sizes, 19 Presets incl. Gluten-Free, Dough & Jam, Delay Timer, Black |
|
| 8 | Cuisinart Bread Maker Machine, Stainless Steel Automatic Bread Machine with 12 Menu Options, 3 Loaf Sizes up to 2 Lb., 3 Crust Colors, Removable Nonstick Baking Pan & Kneading Paddle, CBK-110NAS |
|
| 9 | KBS Pro 710W 2LB Bread Maker, Stainless Steel 17-in-1 Smart Bread Machine with Healthy Ceramic Pan, Automatic Nut Dispenser, Tempered Glass Touch Panel, 3 Crust Colors, 15H Timer& Keep-Warm, Recipes |
|
| 10 | MERIOR 25-IN-1 Bread Maker with Visible Lid - 2lb Automatic Machine, Auto Nut Dispenser, 13-Hour Delay Timer, One-Touch Control & Recipes – Easy Operation, High Success for Homemade Bread |
|
Essential Features to Consider
Once your needs are clear, focus on these critical features when comparing models:
- Capacity and Size: As mentioned, loaf capacity is key. Also, consider the physical footprint of the machine. Bread makers can be bulky, so ensure you have adequate counter or storage space.
- Number of Programs: More programs offer greater versatility. Look for machines with dedicated settings for different bread types, dough-only cycles, bake-only cycles, and quick bread options.
- Delay Timer and Keep-Warm Function: A delay timer is invaluable for scheduling your bake to finish at a specific time, like morning or dinner. A keep-warm function ensures your bread stays warm and fresh for a period after baking.
- Kneading Paddles: Most machines have one, but some larger models, especially those making rectangular loaves, feature dual kneading paddles. Dual paddles often provide more thorough kneading for larger, denser doughs. Some advanced paddles even collapse before baking, minimizing the hole left in the finished loaf.
- Automatic Dispensers: For bakers who love adding fruits, nuts, or seeds, an automatic dispenser is a game-changer. It releases these ingredients at the optimal time during the kneading cycle, preventing them from being crushed or over-mixed. Some high-end machines even have a separate yeast dispenser for perfect activation.
- Crust Settings: Many machines allow you to choose your preferred crust darkness—light, medium, or dark.
- Material and Durability: Look for sturdy construction, often stainless steel, which contributes to longevity. The bread pan material also matters; non-stick coatings are standard, but quality varies.
- Ease of Cleaning and Maintenance: A removable, non-stick bread pan is essential for easy cleanup. Check if the kneading paddles are easily removable as well.
Top Automatic Bread Maker Brands
Several brands consistently receive high praise for their automatic bread makers, each offering unique strengths:
- Zojirushi: Often considered the gold standard, Zojirushi models like the Virtuoso Plus are known for their exceptional performance, durable build, dual kneading paddles, and ability to produce perfectly shaped rectangular loaves. They are a premium choice for serious bakers.
- Breville: The Breville Custom Loaf Bread Maker is a favorite for its versatility, collapsible paddle, smart features, and consistent results. It’s highly customizable and excels in various bread types.
- Cuisinart: Cuisinart offers reliable and user-friendly bread makers, often lauded for their performance with quick breads and their value for money, making them a great choice for beginners or those on a moderate budget.
- Panasonic: Known for innovative electronics, Panasonic bread makers offer a wide array of programs, including advanced gluten-free settings, and are recognized for their consistent baking performance and smart features.
- Hamilton Beach: A popular choice for budget-conscious buyers and beginners, Hamilton Beach bread makers provide solid basic functionality and good results for standard loaves without a hefty price tag.
Comparative Table of Popular Automatic Bread Makers
| Feature | Zojirushi Home Bakery Virtuoso Plus | Breville Custom Loaf Bread Maker | Cuisinart Compact Automatic Bread Maker | Panasonic SD-YR2550 | Hamilton Beach Bread Maker Machine |
|---|---|---|---|---|---|
| Loaf Capacity | 2 lbs | 1, 1.5, 2, 2.5 lbs | 1, 1.5, 2 lbs | 1.5, 2, 2.5 lbs | 1.5, 2 lbs |
| Kneading Paddles | Dual | Single (collapsible) | Single | Single | Single |
| Programs | 15+ (incl. Gluten-Free, Sourdough) | 13 (incl. Custom, Jam, Pasta) | 12 (incl. Quick Bread, Gluten-Free) | 30+ (incl. GF, Yeast Dispenser) | 14 (incl. Jam, Dough) |
| Dispensers | No | Fruit/Nut | No | Fruit/Nut, Yeast | No |
| Loaf Shape | Rectangular | Rectangular | Vertical | Horizontal | Vertical |
| Delay Timer | Yes (13-hour) | Yes (13-hour) | Yes (13-hour) | Yes (13-hour) | Yes (13-hour) |
| Crust Settings | Light, Medium, Dark | Light, Medium, Dark, Rapid | Light, Medium, Dark | Light, Medium, Dark | Light, Medium, Dark |
| Key Advantage | Superior kneading, traditional loaf | Highly customizable, collapsible paddle | Great value, excellent for quick breads | Versatile programs, yeast dispenser | Budget-friendly, easy for beginners |
Using Your Automatic Bread Maker: A Step-by-Step Guide
Operating an automatic bread maker is straightforward, but a few key steps and tips can ensure consistent, delicious results every time.
Pre-Baking Preparations
Always start by ensuring your bread maker’s pan and kneading paddle(s) are clean and properly inserted. Most recipes call for ingredients to be at room temperature, which helps with yeast activation. It’s also crucial to measure all ingredients accurately before beginning.
Ingredient Selection and Measurement
This is arguably the most critical step. Use high-quality, fresh ingredients. For yeast, always check the expiration date. Measure liquids precisely using liquid measuring cups, and dry ingredients using dry measuring cups or, ideally, a kitchen scale for exact weights. Follow the recipe’s order of adding ingredients, which typically involves liquids first, then dry ingredients, and finally yeast on top, ensuring it doesn’t come into direct contact with liquids or salt until the mixing cycle begins.
Program Settings and Delay Timer
Select the program that matches your recipe (e.g., Basic, Whole Wheat, Gluten-Free). Choose your desired loaf size and crust darkness. If you want bread ready later, set the delay timer. This feature calculates the baking time backward from your desired finish time, so you can plan for fresh bread without being present for the whole process.
Tips for Perfect Loaves
- Read the Manual: Each bread maker has unique quirks. Familiarize yourself with your model’s specific instructions.
- Measure Accurately: Baking is a science. Even a slight deviation in measurements can impact results.
- Check Dough Consistency: After initial mixing, observe the dough. It should form a smooth ball that pulls away from the sides of the pan. If too sticky, add flour teaspoon by teaspoon; if too dry, add water teaspoon by teaspoon.
- Avoid Opening Lid: Resist the urge to open the lid during the rising and baking cycles, as temperature fluctuations can cause the bread to deflate.
- Cool Properly: Once baked, immediately remove the bread from the pan and let it cool on a wire rack for at least 30-60 minutes before slicing. This allows steam to escape and sets the crumb, preventing a gummy texture.
Cleaning and Maintenance
Always unplug the machine and allow it to cool completely before cleaning. Remove the bread pan and kneading paddle(s). Wash the pan and paddle(s) with warm, soapy water. Avoid abrasive cleaners or scouring pads, as they can damage the non-stick coating. Wipe down the interior and exterior of the machine with a damp cloth. Regular cleaning ensures longevity and prevents residual dough from affecting future bakes.
Delicious Recipes for Your Automatic Bread Maker
Your automatic bread maker is a versatile tool for creating a wide array of delicious breads. Here are a few essential recipes to get you started:
Basic White Bread
This is the foundational recipe and a great way to get acquainted with your machine.
- Ingredients: 1 cup warm water, 2 tbsp milk powder, 2 tbsp sugar, 1 tsp salt, 3 cups bread flour, 2 tsp active dry yeast, 2 tbsp unsalted butter (softened).
- Instructions: Add ingredients to the bread pan in the order specified by your machine’s manual (usually liquids first, then dry, then yeast). Select the “Basic” program, desired loaf size, and crust setting.
Whole Wheat Bread
A healthier alternative with a robust flavor.
- Ingredients: 1 ¼ cups warm water, 2 tbsp olive oil, 2 tbsp honey or molasses, 1 ½ tsp salt, 2 ½ cups whole wheat flour, ½ cup bread flour, 2 tsp active dry yeast.
- Instructions: Load ingredients. Choose the “Whole Wheat” program, loaf size, and crust setting.
Sweet Bread (e.g., Cinnamon Swirl)
Perfect for breakfast or a sweet treat.
- Ingredients: 1 cup warm milk, 1 large egg (beaten), 1/4 cup melted butter, 1/4 cup sugar, 1/2 tsp salt, 3 cups bread flour, 2 tsp active dry yeast.
- Filling: 2 tbsp melted butter, 2 tbsp brown sugar, 1 tsp ground cinnamon (add during the “add-in” signal or manually after kneading).
- Instructions: Add main ingredients to the pan. Select the “Sweet” or “Basic” program. When the machine signals for add-ins (or manually after the first kneading cycle), add the cinnamon swirl mixture.
Specialty Breads
- Gluten-Free Bread: Many machines have a dedicated “Gluten-Free” program. Always use a gluten-free bread mix or a recipe specifically formulated for bread makers, often requiring extra liquid and a different yeast-to-flour ratio.
- Sourdough Dough: While a bread maker can’t cultivate a sourdough starter, many have a “Dough” cycle perfect for mixing and proofing sourdough dough before you shape and bake it in a conventional oven.
Troubleshooting Common Bread Maker Issues
Even with the best machines, issues can sometimes arise. Knowing how to troubleshoot common problems can save your loaf and your sanity.
- Bread Not Rising: This is often due to inactive yeast (check expiration, ensure water temperature is correct—not too hot or cold), incorrect ingredient measurements, or an expired flour. Ensure yeast isn’t directly exposed to salt or hot liquid initially.
- Bread Too Dense/Heavy: This can be caused by too much flour, too little liquid, insufficient yeast, or the dough not rising properly. Cold ingredients can also inhibit rise.
- Bread Too Crumbly/Dry: Typically results from too much flour or not enough liquid. Ensure accurate measurement and adjust liquids based on environmental humidity.
- Bread Deflates During Baking: This might happen if there’s too much liquid, too much yeast, or if the environment is too humid. Sometimes it’s a sign of over-proofing.
- Bread Has a Large Hole at the Bottom: This is usually where the kneading paddle was. Some advanced paddles collapse to reduce this, but it’s a common characteristic of machine-baked bread.
- Ingredients Not Fully Mixed: Ensure the bread pan and paddle are correctly installed. Sometimes, scraping down the sides with a rubber spatula during the initial mixing can help, especially for thicker doughs.
- Machine Not Starting/Working: Check power connections. Ensure the pan is properly seated. Consult your manual for error codes or specific troubleshooting steps.
Where to Buy Your Automatic Bread Maker
Finding the perfect automatic bread maker is easier than ever with various purchasing options available.
- Retail Stores: Large appliance and electronics retailers such as Best Buy, Target, or Walmart often stock a range of bread makers. This allows you to see the models in person, compare sizes, and speak with sales associates. Kitchen specialty stores might also carry higher-end brands.
- Online Retailers: E-commerce giants like Amazon, Walmart.com, and manufacturer-specific websites (e.g., Zojirushi.com, Breville.com) offer the widest selection, competitive pricing, and often detailed customer reviews. Online shopping provides convenience and the ability to compare numerous models side-by-side from the comfort of your home.
- Department Stores and Home Goods Stores: Stores like Macy’s, Kohl’s, or home goods specialists might carry select models, particularly during holiday sales or kitchenware promotions.
Automatic Bread Maker Buying Guide
Navigating the various models and features can feel overwhelming. This buying guide distills the essential factors to consider, ensuring you make an informed decision for your culinary journey.
When purchasing a bread maker, the primary factors include: loaf size and capacity, the range of programs and settings (especially for specific bread types like gluten-free or sourdough), the presence of automatic dispensers for add-ins, and the type and number of kneading paddles. Consider whether you prefer a traditional rectangular loaf (often requiring dual paddles) or if a vertical loaf shape is acceptable.
Your budget will naturally influence your choice. While high-end models offer advanced features and superior build quality, excellent budget-friendly options exist that perform admirably for basic bread making. Expect to spend anywhere from under $100 for basic models to $300-$500+ for premium, feature-rich machines.
Always compare prices and quality across different retailers and brands. Don’t simply go for the cheapest option; consider the long-term value, durability, and features offered relative to the cost.
Reading user reviews is invaluable. Real-world experiences from other bakers can highlight strengths and weaknesses that specifications alone won’t reveal. Pay attention to comments regarding consistency, ease of use, cleaning, and customer service.
Finally, always check the warranty and return policies of both the manufacturer and the retailer. A good warranty offers peace of mind, protecting your investment against potential defects.
“A bread maker isn’t just a kitchen gadget; it’s an investment in convenience, health, and the sheer delight of fresh, homemade bread.” – Sarah Jenkins, Culinary Technology Expert
Conclusion
Choosing the best automatic bread maker means investing in a lifestyle where the aroma and taste of fresh, homemade bread are just a few button presses away. From simple white loaves to adventurous gluten-free creations, these machines empower you to enjoy bakery-quality results with unmatched convenience. By considering your specific needs, understanding key features, and exploring reputable brands, you can confidently select a bread maker that will become an indispensable tool in your kitchen. Say goodbye to mass-produced loaves and hello to the comforting warmth of artisan bread, baked right in your home.
Are you ready to embrace the simplicity and satisfaction of baking your own bread?
Frequently Asked Questions
Can automatic bread makers make only bread?
No, many automatic bread makers are highly versatile. Beyond various types of bread (white, whole wheat, French, sweet, gluten-free), most models also include programs for making doughs for pizza, pasta, or rolls. Some even have settings for jams, cakes, or yogurt, making them multi-functional kitchen appliances.
Are bread makers worth the counter space?
For many home bakers, yes. If you frequently buy bread or want fresh, customizable loaves without the manual effort, a bread maker is a valuable addition. While they do take up some counter space, the convenience, control over ingredients, and consistent quality of homemade bread often justify the footprint for regular users.
How long does it take to make bread in an automatic bread maker?
The baking time varies depending on the program and loaf size chosen. A basic white bread cycle typically takes between 3 to 4 hours from start to finish. Some machines offer “express” or “rapid” bake settings that can produce a loaf in under 2 hours, while longer cycles for whole wheat or sourdough can extend to 5 hours or more.
Can I use my own recipes in a bread maker?
Yes, you can adapt many conventional bread recipes for your bread maker, though some adjustments might be needed. The key is to maintain the correct ratio of liquids to dry ingredients and yeast, and to follow the loading order specified by your machine. Many bread maker manuals also include a variety of tested recipes to get you started.
How long does machine-baked bread stay fresh?
Homemade bread generally has fewer preservatives than store-bought varieties, so it tends to stay fresh for a shorter period. Typically, machine-baked bread is best consumed within 2-3 days when stored at room temperature in an airtight container or bread box. For longer storage, you can slice and freeze the bread for up to a few months.