The aroma of freshly baked bread is a timeless pleasure, a scent that transforms any house into a home. But for many, the thought of kneading, proofing, and baking from scratch can feel daunting and time-consuming. This is where the humble bread maker shines, transforming complex baking into a simple, automated process. If you’ve ever dreamed of waking up to a warm, crusty loaf without the fuss, your bread maker is the kitchen hero you never knew you needed. This comprehensive guide will equip you with the knowledge and practical tips to create perfect homemade bread effortlessly, demystifying the art of bread making with this indispensable appliance.
Bread Makers: An Overview
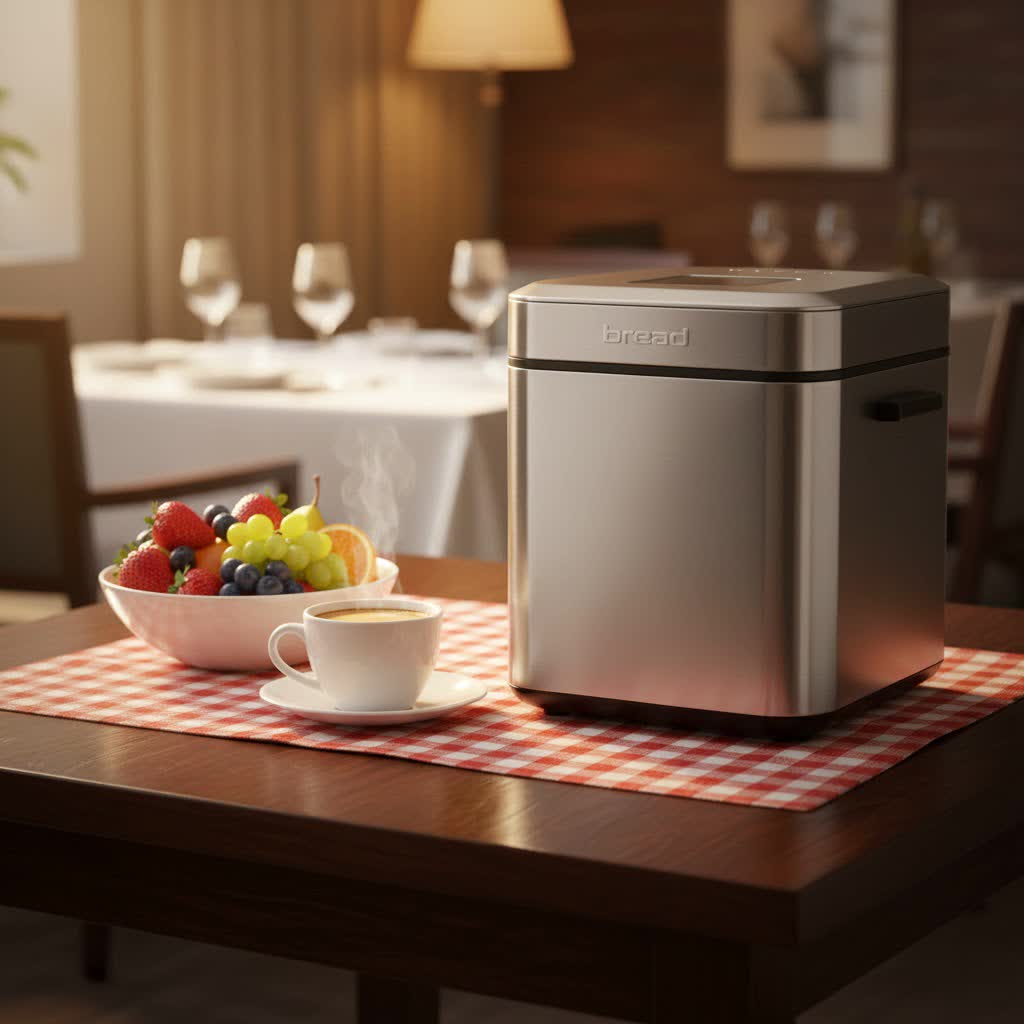
A bread maker is a dedicated kitchen appliance designed to automate the entire bread-making process, from mixing and kneading to rising and baking. Its core function is to produce fresh, homemade loaves with minimal human intervention. While early models were relatively basic, modern bread makers boast advanced technology, offering a variety of programs and customizable settings to cater to diverse baking needs.
The history of bread makers dates back to the late 1980s, when the Japanese company Matsushita Electric Industrial Co. (now Panasonic) introduced the first automatic home bread maker. Initially, these machines were a novelty, but their convenience quickly propelled them into kitchens worldwide, evolving significantly over the decades. Today, the market offers various types, including vertical loaf machines, horizontal loaf machines, and models with advanced features like automatic fruit and nut dispensers, gluten-free settings, and custom cycles. Each type caters to different preferences in loaf shape and functionality, making homemade bread accessible to everyone.
Why Embrace a Bread Maker for Homemade Loaves?
The appeal of a bread maker extends far beyond mere convenience. Bringing the bakery experience into your home offers a multitude of benefits, enhancing both your diet and your lifestyle.
Firstly, bread makers offer unparalleled convenience and time-saving. Simply add your ingredients, select a program, and let the machine handle the rest. This automation frees up your hands and schedule, allowing you to focus on other tasks while your bread bakes. Many models also feature a delay timer, enabling you to load ingredients at night and wake up to a fresh loaf in the morning.
Secondly, you gain complete control over your ingredients and recipes. Making bread at home means you can choose high-quality flours, organic ingredients, and tailor recipes to specific dietary needs or preferences, such as reducing sugar, salt, or adding seeds and grains. This level of customization is invaluable for those with allergies or on restricted diets, like gluten-free.
Moreover, homemade bread ensures superior hygiene and food safety. You know exactly what goes into your bread, avoiding preservatives, artificial additives, and unknown processing methods found in many store-bought options. This transparency offers peace of mind, particularly for families with young children.
Ultimately, the most compelling reason is the joy of creating fresh, delicious bread at home. The taste and texture of a warm, recently baked loaf are simply unmatched by mass-produced alternatives. With a bread maker, you can consistently produce wholesome, flavorful bread that fills your home with an inviting aroma, making every meal a special occasion.
Choosing the Right Bread Maker for Your Kitchen
Selecting a bread maker can feel overwhelming given the array of options available. A thoughtful approach tailored to your specific needs will ensure you find the perfect appliance.
Assess Your Baking Needs
Before diving into features, consider what you truly need from a bread maker. Ask yourself:
- Who are you baking for? If it’s just for yourself or a small family, a compact machine with a 1 to 1.5-pound loaf capacity might suffice. Larger families or those who bake frequently may need a 2 to 2.5-pound capacity machine.
- What types of bread do you enjoy? Most machines handle basic white and whole wheat, but if you love specialty breads like sourdough, sweet breads, or gluten-free options, ensure the machine has dedicated programs.
- What’s your budget? Bread makers range widely in price. Determine how much you’re willing to invest, balancing features with cost. Entry-level models are excellent for basic baking, while higher-end machines offer more versatility and durability.
|
Our Picks for the Best Bread Maker in 2026
As an Amazon Associate I earn from qualifying purchases.
|
||
| Num | Product | Action |
|---|---|---|
| 1 | 2LB Bread Maker Machine, OSIPOTO 17 in 1 Automatic Stainless Steel Bread Machine, Non-stick, Beginner-Friendly Controls, 15 Hour Timer, Easy to Clean Low Noise, High Success Rate for Homemade Bread |

|
| 2 | Cuisinart Bread Maker Machine, Stainless Steel Convection Bread Machine with 16 Menu Options, 3 Loaf Sizes Up to 2 Lb., 3 Crust Colors, Includes Measuring Cup, Spoon & Kneading Hook, CBK-210 |
|
| 3 | Cuisinart Bread Maker Machine, Stainless Steel Automatic Bread Machine with 12 Menu Options, 3 Loaf Sizes up to 2 Lb., 3 Crust Colors, Removable Nonstick Baking Pan & Kneading Paddle, CBK-110NAS |
|
| 4 | KITCHENARM 29-in-1 SMART Bread Machine with Gluten Free Setting 2LB 1.5LB 1LB Bread Maker Machine with Homemade Cycle - Stainless Steel Breadmaker with Recipes Whole Wheat Bread Making Machine |
|
| 5 | KBS Pro 710W 2LB Bread Maker, Stainless Steel 17-in-1 Smart Bread Machine with Healthy Ceramic Pan, Automatic Nut Dispenser, Tempered Glass Touch Panel, 3 Crust Colors, 15H Timer& Keep-Warm, Recipes |
|
| 6 | KBS Premium 2LB Convection Bread Maker Dual Heaters, 710W Stainless Steel 17-in-1 Bread Machine Healthy Ceramic Pan, Nut Dispenser,Touch Panel, 3 Loaf Sizes 3 Crust Colors, 15H Timer,Low Noise,Recipes |
|
| 7 | Neretva Bread Maker, 20-IN-1 2LB Bread Machine Dual Heater Bread Maker Machine Automatic with Nonstick Ceramic Pan, 15H Timer & 1H Keep Warm Set, Low Noise, Stainless Steel Breadmaker Recipe-Green |
|
| 8 | Neretva Bread Maker, 20-in-1 2LB Bread Machine Dual Heater & Nonstick Ceramic Pan Bread Makers Machine All Metal Compact for Gluten Free/Dough Maker/Meat Floss/Jam/Yogurt/Breadmaker Recipe-Light Green |
|
| 9 | Elite Gourmet Programmable Bread Maker, 2 lb Loaf, 3 Sizes, 19 Presets incl. Gluten-Free, Dough & Jam, Delay Timer, Black |
|
| 10 | MERIOR 25-IN-1 Bread Maker with Visible Lid - 2lb Automatic Machine, Auto Nut Dispenser, 13-Hour Delay Timer, One-Touch Control & Recipes – Easy Operation, High Success for Homemade Bread |
|
Key Features to Look For
Once you understand your needs, evaluate these important features:
- Capacity and Size: Match the loaf size to your consumption. Also, consider the physical footprint of the machine in your kitchen.
- Number of Programs: Look for variety. Standard programs include basic, whole wheat, French, sweet, dough, and rapid bake. Advanced machines might offer gluten-free, jam, cake, or custom cycles.
- Delay Timer and Keep Warm Function: A delay timer is fantastic for overnight baking, letting you set it hours in advance. A “keep warm” function ensures your bread stays fresh until you’re ready to slice it.
- Crust Control: Most machines offer light, medium, and dark crust settings, allowing you to personalize your loaf.
- Automatic Dispensers: Some models include dispensers for adding fruits, nuts, or seeds at the optimal time during the kneading cycle, preventing them from being over-processed.
- Material and Durability: Stainless steel exteriors often indicate a more robust build. Look for a non-stick bread pan for easy loaf release and cleaning.
- Ease of Cleaning: Removable parts, especially the bread pan and kneading paddle, should be easy to clean.
Reputable Bread Maker Brands
Several brands have established themselves as leaders in the bread maker market, known for reliability and innovative features.
- Panasonic: Often praised for consistent results and durability, Panasonic bread makers are frequently recommended for their quality build and intelligent temperature controls.
- Zojirushi: Known for producing excellent vertical and horizontal loaves, Zojirushi models are celebrated for their comprehensive features, quiet operation, and ability to handle various doughs, including gluten-free.
- Cuisinart: Cuisinart offers a range of bread makers that balance features with affordability, making them a popular choice for home bakers.
- Breville: As seen in expert recommendations, Breville’s Custom Loaf bread maker is noted for its precision and robust performance, often considered a workhorse in the kitchen.
When choosing, read recent reviews and compare the specific features offered by each brand against your baking priorities.
Comparative Table: Popular Bread Maker Models
While specific model numbers constantly evolve, understanding common feature sets across popular bread makers can guide your decision. Here’s a generalized comparison of what you might find in different tiers of bread machines:
| Feature/Category | Entry-Level Models | Mid-Range Models | Premium Models |
|---|---|---|---|
| Price Range | $50 – $100 | $100 – $200 | $200+ |
| Loaf Capacity | 1 lb, 1.5 lb | 1 lb, 1.5 lb, 2 lb | 1 lb, 1.5 lb, 2 lb, 2.5 lb |
| Programs | 8-12 (Basic, Whole Wheat, Dough, French, Rapid) | 12-18 (Adds Sweet, Gluten-Free, Jam, Cake) | 18+ (Adds Custom, Sourdough, Yogurt, Auto-Delay) |
| Crust Control | Light, Medium, Dark | Light, Medium, Dark | Light, Medium, Dark, Extra Dark |
| Delay Timer | Up to 13 hours | Up to 15 hours | Up to 18 hours or more |
| Automatic Dispenser | Rarely | Sometimes (for fruits/nuts) | Usually (for fruits/nuts, yeast) |
| Pan & Paddle | Single paddle, basic non-stick | Single or dual paddles, enhanced non-stick | Dual paddles, durable non-stick, collapsible paddle |
| Exterior Material | Plastic | Plastic, some stainless steel accents | Stainless steel |
| Noise Level | Moderate to high during kneading | Moderate | Low |
| Special Features | Basic functionality, compact | View window, recipe booklet, basic troubleshooting | LCD display, advanced sensors, precise temperature control |
This table provides a general overview. Always check specific product details for the most accurate information.
Mastering Your Bread Maker: A Step-by-Step Guide
Using a bread maker is remarkably straightforward, but following a few key steps and tips will ensure consistently delicious results.
Preparation Before Baking
Always ensure your bread maker pan and paddle are clean and correctly assembled in the machine. Gather all your ingredients and measure them accurately. For best results, most ingredients, especially liquids, should be at room temperature unless the recipe specifies otherwise.
Choosing and Measuring Ingredients
Precision is paramount in bread making.
- Liquids: Use liquid measuring cups for water, milk, or oil. Warm water (around 90-100°F or comfortable to the touch like a baby bottle) is ideal for activating yeast, but never hot, as it can kill the yeast. Some recipes might call for filtered water if your tap water contains high levels of chlorine.
- Dry Ingredients: Use dry measuring cups for flour, sugar, and salt. For flour, stir the flour in its bag or container, then spoon it lightly into the measuring cup, leveling it off with a straight edge like a knife. Avoid scooping directly with the cup or compacting the flour, as this can lead to too much flour and a dense loaf.
- Yeast: Always check the expiration date on your yeast. If unsure about its freshness, proof a small amount: dissolve it in a little warm water with a pinch of sugar. If it foams after 10-15 minutes, it’s active. Use the correct type of yeast for your machine’s cycle—active dry yeast for full cycles and instant or bread machine yeast for rapid cycles.
Loading Ingredients and Setting the Program
The order of ingredients is crucial to prevent yeast from prematurely reacting with salt or liquid. Typically, the order is:
- Liquids: Water, milk, oil.
- Dry Ingredients: Sugar, salt, then flour.
- Add-ins: Nuts, seeds, dried fruits (if applicable, often added later by an automatic dispenser or prompt).
- Yeast: Placed on top of the flour, usually in a small well, away from liquids and salt until the mixing begins.
After adding ingredients, close the lid, select your desired program (e.g., “Basic,” “Whole Wheat,” “Dough”), choose your crust setting (light, medium, dark), and set any delay timers if needed.
Monitoring Dough Consistency (The Crucial Check)
This is a pro tip that significantly improves results. About 5-10 minutes into the first kneading cycle, open the lid and observe the dough.
- It should form a cohesive, slightly tacky ball that cleans the sides of the pan as it kneads.
- If the dough is too dry and crumbly, add water, 1 tablespoon at a time, allowing it to mix in before adding more.
- If it’s too wet and sticky, add flour, 1 tablespoon at a time, until the correct consistency is achieved. This simple adjustment can save a loaf from becoming dense or collapsed.
Cooling and Storage
Once the baking cycle is complete, promptly remove the bread pan from the machine. Allow the loaf to cool in the pan for a few minutes before carefully turning it out onto a wire rack to cool completely. Cooling on a rack prevents condensation, which can lead to a soggy bottom or a wrinkly crust. Slice once cooled for the best texture.
Delicious Bread Maker Recipes for Every Palate
Your bread maker is a versatile tool for creating a wide range of breads. Here are some fundamental recipes to get you started:
Basic White Bread
This is the cornerstone of bread maker baking, perfect for sandwiches and toast.
- Ingredients (for a 1.5 lb loaf):
- 1 cup warm water (90-100°F)
- 2 tbsp milk powder (optional, for softness)
- 2 tbsp sugar
- 1.5 tsp salt
- 2 tbsp vegetable oil or butter
- 3 cups bread flour
- 2 tsp active dry yeast or bread machine yeast
- Instructions: Add ingredients to the bread pan in the order specified by your machine (liquids first, then dry, yeast last). Select the “Basic” or “White Bread” program and crust setting. Press start.
Wholesome Whole Wheat Bread
A healthier alternative, rich in fiber and nutty flavor.
- Ingredients (for a 1.5 lb loaf):
- 1 ¼ cups warm water
- ¼ cup honey or molasses
- 2 tbsp vegetable oil
- 1.5 tsp salt
- 3 cups whole wheat flour
- 2 tsp bread machine yeast
- Instructions: Follow the layering method. Select the “Whole Wheat” program. Whole wheat flour can be denser, so a slightly higher liquid ratio and specific program are beneficial.
Sweet Bread Delights
Explore options like Cinnamon Raisin or Banana Bread (using a “Sweet” or “Cake” program, or even the “Dough” cycle for forming and then baking in a traditional oven).
- Cinnamon Raisin Bread (using “Sweet Bread” program):
- Basic white bread recipe base with 1 tsp cinnamon and ½ cup raisins added at the designated “add-in” beep or during the kneading check.
- Banana Bread (using “Cake” or “Quick Bread” program if available, or just the mixing cycle):
- Many bread makers have a “cake” or “quick bread” setting that mixes and bakes batters that don’t require yeast. You can adapt traditional banana bread recipes for this, ensuring the batter isn’t too thick.
Specialty Breads and Doughs
Your machine can also make dough for pizza, rolls, or baguettes which you can then shape and bake in a conventional oven. Use the “Dough” cycle, which completes mixing and rising, then you simply remove the dough, shape, proof, and bake as usual.
Troubleshooting Common Bread Maker Issues
Even experienced bakers encounter challenges. Understanding how to troubleshoot common problems can save your loaf and your sanity.
- Collapsed or Sunken Loaf: This is often due to too much liquid, too much yeast, too much sugar, or not enough salt (which strengthens gluten). Low-protein flour can also be a culprit. In humid weather, yeast can become overactive, leading to a collapse; try using cooler liquids or the rapid cycle.
- Dense or Small Loaf: A loaf that doesn’t rise well might indicate expired or insufficient yeast, water that was too hot (killing the yeast), too much flour, or low-protein all-purpose flour instead of bread flour. Ensure ingredients are measured precisely.
- Gummy Texture: This usually points to underbaking or too much liquid. Ensure your pan size is appropriate for the recipe and try a darker crust setting for longer baking.
- Open, Holey Crumb (Swiss-Cheese like): Often caused by too much water or not enough salt to properly develop gluten structure.
- Mushroom-Shaped Top: This happens when the dough rises excessively before baking, usually from too much yeast or too much water.
- Bumpy, Uneven Top: Can result from incorrect flour measurement or dough consistency issues during kneading.
- Pale Crust: If your crust isn’t browning, you might need to increase the amount of sugar slightly in your recipe, as sugar aids in browning.
- Thick Crust: Leaving the bread in the machine too long after baking can lead to a thick crust. Remove it promptly and cool on a wire rack.
- Sticky Dough (during kneading): Add flour, 1 tablespoon at a time, until the dough forms a cohesive, tacky ball.
“Many common bread machine issues stem from improper ingredient ratios, especially concerning yeast, flour, and liquid. A slight adjustment can make all the difference.” – Allyson Letal, Food Stylist and Recipe Developer
Where to Buy Your Next Bread Maker
If you’re ready to invest in a bread maker, you have several reliable purchasing options:
- Major Appliance Retailers: Stores like Best Buy, Target, or Walmart often carry a selection of popular bread maker brands.
- Home Goods Stores: Retailers specializing in kitchenware, such as Williams Sonoma or Sur La Table, might offer higher-end models with expert advice.
- Online Marketplaces: Amazon, eBay, and directly from manufacturer websites (e.g., Panasonic, Zojirushi) offer the widest selection, competitive pricing, and user reviews. Be sure to check shipping policies and return options.
Your Comprehensive Bread Maker Buying Guide
Making a well-informed decision for your bread maker purchase involves considering several key factors to ensure it meets your long-term baking aspirations.
- Re-evaluate Your Needs: Revisit your initial assessment of family size, desired bread types, and frequency of use. This is the foundation of your decision.
- Set a Realistic Budget: Determine your financial comfort zone. Remember, a higher price often correlates with more features, better durability, and consistent performance, but excellent entry-level machines exist.
- Compare Features and Specifications: Create a checklist of essential features (capacity, programs, delay timer, crust control) and compare them across models within your budget. Don’t pay for features you won’t use.
- Read User Reviews: Customer reviews on retail sites and dedicated appliance review platforms offer invaluable insights into real-world performance, durability, and common issues. Look for consistent feedback on loaf quality, ease of use, and noise levels.
- Check Warranty and Customer Support: A good warranty provides peace of mind. Understand the manufacturer’s policy on repairs and returns, and assess the availability of customer support should you encounter problems.
By following these guidelines, you can confidently select a bread maker that will serve you well, transforming your kitchen into a personal bakery.
Conclusion
The bread maker is a fantastic kitchen companion, simplifying the art of homemade bread and bringing the joy of freshly baked loaves to your table with minimal effort. From mastering essential ingredients and understanding the nuances of machine operation to troubleshooting common issues and discovering new recipes, this guide has provided a pathway to consistent baking success. With a reliable bread maker, you gain control over ingredients, save time, and elevate your meals with the unmatched taste and aroma of bread made right in your home.
Are you ready to embark on your homemade bread journey and discover the endless possibilities your bread maker holds?
Frequently Asked Questions
Why did my homemade bread collapse in the bread maker?
A collapsed loaf often indicates an imbalance in ingredients. Too much liquid, yeast, or sugar, or too little salt can weaken the dough’s structure, causing it to over-rise and then collapse during baking. Environmental factors like high humidity can also contribute.
What type of flour is best for bread machines?
Bread flour, with its higher protein content (typically over 12%), is generally recommended for bread machines. It develops more gluten, which provides the necessary structure for a good rise and an airy crumb, unlike all-purpose flour, which can result in a denser loaf.
How do I ensure a good rise in my bread maker?
To ensure a good rise, always use fresh, active yeast, measure ingredients precisely, and ensure your water is warm (not hot) to activate the yeast properly. Monitoring dough consistency during the initial kneading and adjusting with small amounts of flour or water if needed can also significantly improve the rise.
Can I make gluten-free bread in a bread maker?
Yes, many modern bread makers have a dedicated “Gluten-Free” program. Gluten-free flours behave differently than wheat flour, so using specific gluten-free recipes and the appropriate machine setting is crucial for successful results.
Is it necessary to remove the bread immediately after the bread maker finishes?
It is highly recommended to remove the bread from the pan and place it on a wire rack to cool as soon as the baking cycle completes. This prevents the bottom of the loaf from becoming soggy due to condensation and helps ensure a crispier, more desirable crust.
