Imagine the aroma of freshly baked Italian bread wafting through your kitchen – a warm, crusty exterior giving way to a soft, airy interior, ready to be slathered with olive oil or paired with your favorite pasta. Achieving this culinary delight might seem like a labor-intensive task, but with the convenience of a modern bread maker, it’s more accessible than ever. This guide will walk you through everything you need to know about transforming simple ingredients into a delectable Italian loaf using your trusty bread machine, covering optimal settings, ingredient choices, and expert tips for perfect results every time.
Understanding Your Bread Maker: An Overview
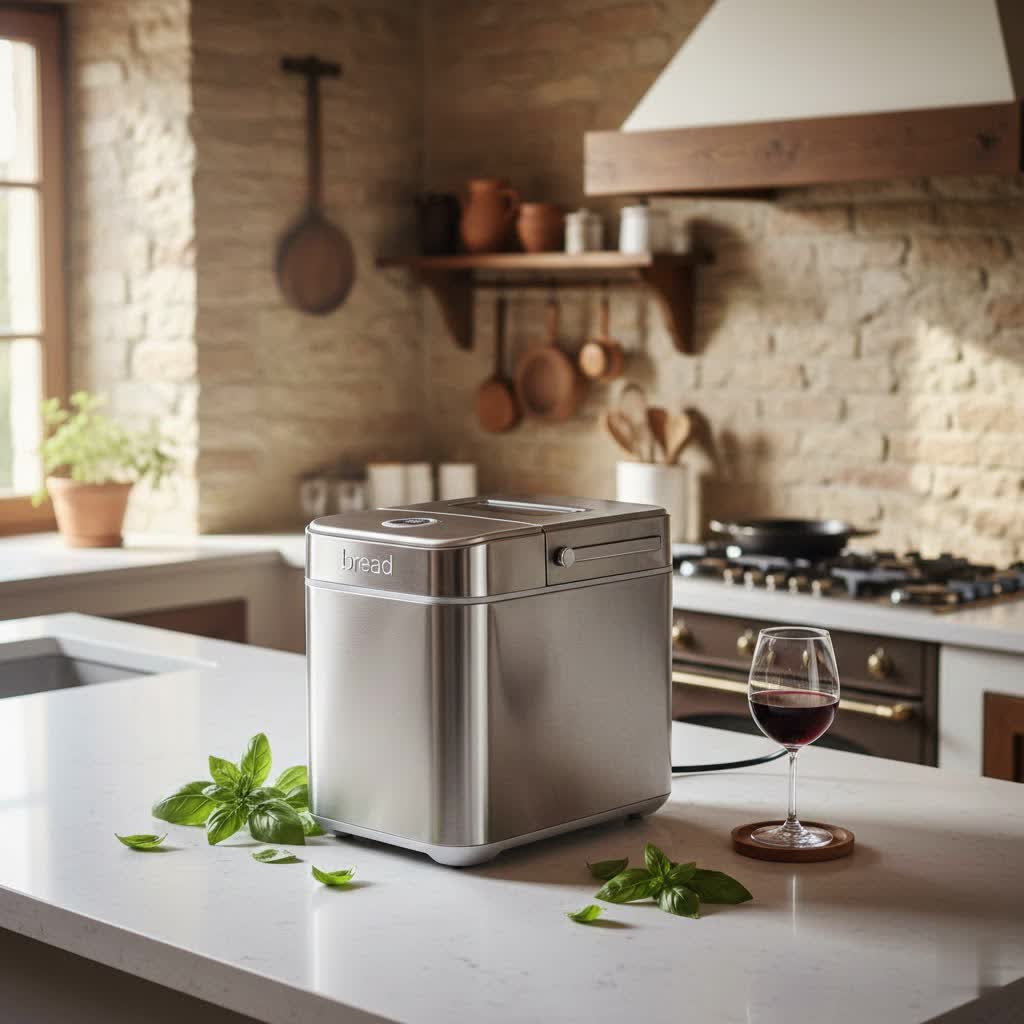
A bread maker is a countertop appliance designed to automate the entire bread-making process. From mixing and kneading the dough to allowing it to rise (proofing) and finally baking it, a bread maker handles all the hard work. This automation not only simplifies baking but also makes it consistent.
The concept of automated bread making dates back several decades, evolving from basic machines that produced a simple loaf to sophisticated models with multiple settings for various bread types, doughs, jams, and even cakes. Modern bread makers offer a hands-off approach, allowing busy individuals to enjoy homemade bread without the time commitment traditional baking requires.
Today, the market offers a diverse range of bread makers, varying in capacity (commonly 1, 1.5, or 2 pounds), design (vertical or horizontal loaf pans), and features. Some come with single paddles, while others boast dual paddles for more thorough kneading. Understanding these variations is key to selecting the ideal machine for your Italian bread aspirations.
Why Bake Italian Bread in a Bread Maker?
The allure of homemade Italian bread is undeniable, and a bread maker makes this dream a delicious reality for several compelling reasons:
- Unmatched Convenience and Time-Saving: The most significant advantage is the minimal effort required. Simply add your ingredients, select a program, and let the machine do the rest. This frees up your time for other tasks, delivering fresh bread with practically no hands-on work.
- Complete Control Over Ingredients: Baking at home means you dictate what goes into your bread. You can choose high-quality flours, organic olive oils, and precisely control salt and sugar content, avoiding preservatives and artificial additives often found in store-bought loaves. This is particularly beneficial for those with dietary restrictions or specific health goals.
- Superior Freshness and Taste: There’s nothing quite like the taste and texture of bread fresh from the oven. Bread maker Italian bread offers a level of freshness and warmth that pre-packaged alternatives simply cannot match, enhancing any meal.
- Consistent and Reliable Results: Once you find a recipe and settings that work for your machine, you can achieve consistently perfect loaves. The controlled environment of a bread maker ensures optimal kneading, rising, and baking temperatures, leading to predictable outcomes batch after batch.
Choosing the Right Bread Maker for Italian Bread
Selecting the perfect bread maker is crucial for consistently delicious Italian bread. Consider these factors to align the machine with your baking habits and desired results.
Assessing Your Baking Needs
Before diving into features, think about how you’ll use your bread maker:
- Family Size or Personal Use? For a single person or small family, a 1-pound or 1.5-pound capacity machine might suffice. Larger families or those who entertain frequently may prefer a 2-pound capacity.
- What Types of Bread Do You Enjoy? While Italian bread is the focus, consider if you’ll also bake whole wheat, gluten-free, or sweet breads. Most machines offer versatile programs.
- What’s Your Budget? Bread makers range from entry-level models to high-end appliances with extensive features. Define your budget early to narrow down options.
|
Our Picks for the Best Bread Maker in 2026
As an Amazon Associate I earn from qualifying purchases.
|
||
| Num | Product | Action |
|---|---|---|
| 1 | Cuisinart Bread Maker Machine, Stainless Steel Automatic Bread Machine with 12 Menu Options, 3 Loaf Sizes up to 2 Lb., 3 Crust Colors, Removable Nonstick Baking Pan & Kneading Paddle, CBK-110NAS |

|
| 2 | 2LB Bread Maker Machine, OSIPOTO 17 in 1 Automatic Stainless Steel Bread Machine, Non-stick, Beginner-Friendly Controls, 15 Hour Timer, Easy to Clean Low Noise, High Success Rate for Homemade Bread |
|
| 3 | KITCHENARM 29-in-1 SMART Bread Machine with Gluten Free Setting 2LB 1.5LB 1LB Bread Maker Machine with Homemade Cycle - Stainless Steel Breadmaker with Recipes Whole Wheat Bread Making Machine |
|
| 4 | KBS Premium 2LB Convection Bread Maker Dual Heaters, 710W Stainless Steel 17-in-1 Bread Machine Healthy Ceramic Pan, Nut Dispenser,Touch Panel, 3 Loaf Sizes 3 Crust Colors, 15H Timer,Low Noise,Recipes |
|
| 5 | Elite Gourmet Programmable Bread Maker, 2 lb Loaf, 3 Sizes, 19 Presets incl. Gluten-Free, Dough & Jam, Delay Timer, Black |
|
| 6 | Neretva Bread Maker, 20-in-1 2LB Bread Machine Dual Heater & Nonstick Ceramic Pan Bread Makers Machine All Metal Compact for Gluten Free/Dough Maker/Meat Floss/Jam/Yogurt/Breadmaker Recipe-Light Green |
|
| 7 | MERIOR 25-IN-1 Bread Maker with Visible Lid - 2lb Automatic Machine, Auto Nut Dispenser, 13-Hour Delay Timer, One-Touch Control & Recipes – Easy Operation, High Success for Homemade Bread |
|
| 8 | KBS Pro 710W 2LB Bread Maker, Stainless Steel 17-in-1 Smart Bread Machine with Healthy Ceramic Pan, Automatic Nut Dispenser, Tempered Glass Touch Panel, 3 Crust Colors, 15H Timer& Keep-Warm, Recipes |
|
| 9 | Neretva Bread Maker, 20-IN-1 2LB Bread Machine Dual Heater Bread Maker Machine Automatic with Nonstick Ceramic Pan, 15H Timer & 1H Keep Warm Set, Low Noise, Stainless Steel Breadmaker Recipe-Green |
|
| 10 | Cuisinart Bread Maker Machine, Stainless Steel Convection Bread Machine with 16 Menu Options, 3 Loaf Sizes Up to 2 Lb., 3 Crust Colors, Includes Measuring Cup, Spoon & Kneading Hook, CBK-210 |
|
Key Features to Look For
The right features can significantly enhance your Italian bread-making experience:
- Capacity and Loaf Shape: Some machines produce a taller, squarer loaf, while others, like certain Zojirushi models, are designed for a more traditional, horizontal, rectangular loaf shape, which can be ideal for Italian bread.
- Program Variety: Look for “Basic” or “White Bread” cycles, which are commonly used for Italian bread. A dedicated “Dough” cycle is particularly useful if you plan to shape your bread by hand and bake it in a conventional oven for a crisper crust. Some advanced machines even offer specific “Italian bread” settings.
- Delay Timer and Keep Warm Function: A delay timer allows you to add ingredients in the evening and wake up to freshly baked bread. A “keep warm” function ensures your loaf stays at an optimal temperature after baking.
- Material and Durability: Quality non-stick bread pans and sturdy kneading paddles contribute to the longevity and performance of your machine. Stainless steel exteriors often indicate better durability.
- Ease of Cleaning: Non-stick pans are generally easier to clean. Removable parts simplify maintenance.
- Automatic Dispensers: Some premium models include automatic dispensers for yeast or mix-ins like herbs, adding ingredients at the precise moment in the cycle.
Top Brands for Italian Bread Makers
While many brands produce excellent bread makers, some consistently stand out for their reliability and performance, especially for Italian bread:
- Panasonic: Known for their robust construction and consistent baking results over many years. Many users report these machines lasting decades.
- Zojirushi: Often considered a premium brand, Zojirushi bread makers are celebrated for their dual kneading paddles (for superior dough development) and their ability to produce loaves with a more traditional, horizontal shape. Their “Virtuoso Plus” model is frequently recommended for those seeking an authentic-looking loaf.
- Breville: The “Custom Loaf Bread Maker” by Breville offers extensive customization options, including collapsible paddles that minimize holes in the bottom of the loaf and a mix-in dispenser, appealing to those who love to experiment.
- Cuisinart and Hamilton Beach: These brands offer reliable, often more budget-friendly options that are excellent for beginners or those seeking a solid performer without all the advanced features.
“A good bread machine doesn’t just bake bread; it empowers you to be a baker, turning complex recipes into everyday joys. For Italian bread, the nuances of texture and crust are paramount, and choosing a machine with the right cycles and features can make all the difference.” – Chef Isabella Rossi, Artisan Bread Specialist
Popular Bread Makers for Italian Bread: A Comparison Table
Here’s a comparison of some highly-regarded bread makers, focusing on features relevant to baking excellent Italian bread:
| Brand | Model | Key Features (Relevant to Italian Bread) | Loaf Size (Max) | Typical Price Range | Pros | Cons |
|---|---|---|---|---|---|---|
| Zojirushi | Home Bakery Virtuoso Plus | Dual kneading paddles, traditional rectangular loaf, custom settings, quick bake | 2 lb | $$$$ | Excellent kneading, ideal loaf shape, consistent results | Expensive, larger footprint |
| Breville | Custom Loaf Bread Maker | Collapsible paddle, automatic fruit/nut dispenser, customizable programs | 2.5 lb | $$$$ | High versatility, minimal paddle hole, good for various recipes | Can be noisy, high price point |
| Panasonic | Automatic Bread Maker | Yeast dispenser, raisin/nut dispenser, consistent performance | 2 lb | $$$ | Durable, reliable, quiet operation, good for “set and forget” | Loaf shape can be taller/squarer than traditional |
| Cuisinart | Compact Automatic CBK-110 | Compact design, 12 pre-programmed menu options, 3 crust settings | 2 lb | $$ | Good value, space-saving, user-friendly for beginners | Less advanced features, may not achieve artisan crust as easily |
| Hamilton Beach | Bread Maker Machine | Large digital display, easy to use, multiple settings | 2 lb | $ | Budget-friendly, good for basic loaves, simple operation | Less durable, fewer advanced features |
Price Guide: $ = under $100, $$ = $100-$200, $$$ = $200-$300, $$$$ = over $300
Mastering Italian Bread with Your Bread Maker: A Step-by-Step Guide
Baking delicious Italian bread in your bread machine is a straightforward process, but paying attention to a few details can elevate your results from good to exceptional.
Preparation
Always start by ensuring your bread pan is clean and the kneading paddle(s) are securely in place at the bottom. It’s much harder to fix this once ingredients are added.
Ingredient Selection and Measurement
Precise measurement is paramount in bread making. Use kitchen scales for accuracy, especially for flour.
- Flour: Bread flour is highly recommended for Italian bread. Its higher protein content (12-14%) develops more gluten, resulting in a chewier texture and a better rise compared to all-purpose flour. If you must use all-purpose, your bread may be slightly denser.
- Yeast: You can use instant yeast, active dry yeast, or bread machine yeast. Instant yeast and bread machine yeast are quick-acting and don’t require proofing. If using active dry yeast, ensure it’s fresh by testing it: mix 1 teaspoon with ¼ cup warm water and a pinch of sugar; it should foam within 5 minutes.
- Liquid: Most Italian bread recipes call for warm water or milk. The ideal temperature for activating yeast is usually between 105-115°F (40-46°C). Too cold, and the yeast won’t activate; too hot, and it will die. Whole milk can add richness and a softer crumb. Olive oil is crucial for Italian bread flavor and tenderness; use a good quality extra virgin olive oil.
- Sweetener and Salt: A small amount of sugar (granulated or brown) feeds the yeast, aiding the rise and adding subtle flavor. Salt is essential for flavor and to regulate yeast activity; do not omit or drastically reduce it.
- Optional Add-ins: For Italian Herb Bread, consider dried rosemary, oregano, basil, or a pre-mixed Italian seasoning blend. A pinch of garlic powder can also enhance the savory profile.
Ingredient Order
While specific bread makers may have slightly different recommendations, a common order is:
- Liquids (water/milk, olive oil)
- Dry Ingredients (flour, sugar, salt, herbs)
- Yeast (placed last, often in a small well created in the flour, away from direct contact with liquids and salt, which can inhibit its activation).
Always consult your bread machine’s manual for its recommended layering to ensure optimal mixing and yeast activation.
Selecting the Cycle
For most Italian bread recipes, the “Basic” or “White Bread” cycle is appropriate. If your machine has a dedicated “Italian Bread” setting, use that. Choose the crust setting you prefer (light, medium, or dark). If you plan to finish the bread in a conventional oven, select the “Dough” cycle. This will mix, knead, and complete the first rise.
Monitoring and Adjusting Dough
During the first kneading cycle, observe the dough ball. It should be smooth, elastic, and form a soft ball. If it looks too dry and crumbly, add a teaspoon of warm water at a time until the consistency is right. If it’s too sticky or wet, add a teaspoon of bread flour. This small adjustment can prevent issues with the final loaf.
Optional Oven Finish for an Authentic Crust
Many traditional Italian bread recipes feature a golden, crispy crust. A bread machine alone might not achieve this, as it bakes in an enclosed environment. For a truly authentic Italian bread, consider using the “Dough” cycle. Once the cycle finishes:
- Remove the dough, punch it down gently, and shape it into your desired Italian loaf (e.g., oval, baguette-like).
- Place the shaped dough on a parchment-lined baking sheet, allowing it to rise again in a warm, draft-free place for 30-60 minutes, or until doubled in size.
- Preheat your conventional oven to 400-450°F (200-230°C). You can place a pan of hot water on the bottom rack to create steam, which aids in developing a crispy crust.
- Bake for 15-25 minutes, or until golden brown and cooked through.
Cooling and Storage
Always allow your bread to cool on a wire rack for at least 30 minutes before slicing. This allows the internal structure to set. Store cooled bread in an airtight container or bread bag at room temperature for 2-3 days, or freeze for longer storage.
Delicious Bread Maker Italian Bread Recipes
Here are a few popular Italian bread recipes you can easily adapt for your bread maker:
Classic Italian White Bread
This fundamental recipe yields a soft, flavorful loaf perfect for sandwiches or dipping.
- Ingredients (for a 1.5 lb loaf):
- 1 cup warm water or milk (105-115°F)
- 2 tbsp olive oil
- 3 cups bread flour
- 1.5 tsp sugar
- 1 tsp salt
- 2 tsp instant yeast
- Instructions:
- Add ingredients to your bread machine pan in the order recommended by your machine’s manual (typically liquids first, then dry, yeast last).
- Select the “Basic” or “White Bread” cycle and your preferred crust setting (medium or dark).
- Press start and let the machine work its magic.
- Once done, remove the loaf and cool on a wire rack.
Italian Herb Bread
Infuse your loaf with aromatic herbs for an extra layer of flavor.
- Ingredients (for a 1.5 lb loaf):
- 1 cup warm water
- 2 tbsp olive oil
- 3 cups bread flour
- 1.5 tsp sugar
- 1 tsp salt
- 2 tsp instant yeast
- 2 tsp dried Italian seasoning (oregano, basil, rosemary, thyme blend)
- ½ tsp garlic powder (optional)
- Instructions:
- Add water and olive oil to the bread pan.
- Add flour, sugar, salt, Italian seasoning, and garlic powder.
- Make a small well in the flour and add the yeast.
- Select the “Basic” or “White Bread” cycle and a medium/dark crust.
- Bake, cool, and enjoy!
Whole Wheat Italian Bread (Using Dough Cycle)
For a heartier, rustic Italian bread that finishes in the oven.
- Ingredients (for a 2 lb loaf):
- 1.25 cups warm water
- 2 tbsp olive oil
- 1.5 cups bread flour
- 1.5 cups whole wheat flour
- 2 tbsp brown sugar
- 1.5 tsp salt
- 2.25 tsp active dry yeast
- Instructions:
- Add liquids to the bread pan, then flours, sugar, and salt. Make a well for the yeast.
- Select the “Dough” cycle.
- When the cycle finishes, remove the dough. Gently punch down and shape into one large or two smaller Italian loaves.
- Place on a cornmeal-dusted baking sheet, cover loosely, and let rise for 45-60 minutes in a warm place until nearly doubled.
- Preheat oven to 425°F (220°C). Score the top of the loaves with a sharp knife.
- Bake for 20-25 minutes, or until golden brown. Cool completely on a wire rack.
Troubleshooting Common Bread Machine Italian Bread Issues
Even experienced bakers encounter hiccups. Here’s how to address common problems with your bread machine Italian bread:
- Bread Not Rising or Dense Loaf: This is often due to inactive yeast (check expiration date, test for activity), water/milk temperature being too hot or too cold, or incorrect flour-to-liquid ratio (too much flour makes it heavy). Ensure ingredients are measured precisely.
- Crust Too Pale or Too Dark: Most bread machines have crust settings (light, medium, dark). Adjust this setting. If you’re finishing in the oven, you have more control over the final browning.
- Sticky or Gummy Interior: This usually means the bread is underbaked or has too much liquid. Check your recipe’s liquid-to-flour ratio and ensure the machine completes its full baking cycle.
- Large Hole at the Bottom of the Loaf: This is caused by the kneading paddle. Some advanced machines feature collapsible paddles to minimize this. If not, you can remove the paddle after the final kneading cycle (before the final rise/bake) if your machine allows, though this requires careful timing.
- Bread Collapses During Baking: Too much liquid, too much yeast, or proofing in a too-warm environment can cause this.
Where to Buy a Bread Maker
Bread makers are widely available, making it easy to find one that fits your needs:
- Online Retailers: Websites like Amazon, Walmart, Best Buy, and directly from manufacturer sites (e.g., Zojirushi, Breville) offer a broad selection, competitive pricing, and user reviews.
- Department Stores: Major department stores often carry a range of kitchen appliances, including bread makers from popular brands.
- Specialty Kitchen Stores: Stores focusing on kitchenware may offer higher-end models and expert advice.
Your Comprehensive Bread Maker Buying Guide
When investing in a bread maker, consider these factors to ensure you make the best choice for your Italian bread adventures:
- Prioritize Budget vs. Features: Decide which features are “must-haves” (e.g., specific loaf shape, dough cycle) and which are “nice-to-haves.” This will help you balance cost with functionality.
- Read User Reviews: Online reviews provide valuable insights into real-world performance, durability, and common issues. Pay attention to comments specifically related to bread quality and ease of use.
- Check Warranty and Customer Support: A good warranty and responsive customer service are important, especially for larger appliances.
- Consider Loaf Size and Shape: If a traditional rectangular Italian loaf is important to you, look for machines designed for that specific output, such as the Zojirushi Virtuoso Plus. Otherwise, most machines will produce a taller, more compact loaf.
Conclusion
Baking Italian bread with a bread maker transforms what could be a daunting task into a simple, enjoyable process. This versatile appliance empowers you to create fresh, flavorful, and customizable loaves with minimal effort, bringing the comforting aroma and taste of Italy right into your home. By understanding your machine, selecting quality ingredients, and following a few key tips, you can consistently achieve the perfect crust, tender crumb, and authentic flavor that makes Italian bread so beloved. Embrace the convenience and joy of homemade baking.
What delicious Italian bread will you make first in your bread maker?
Frequently Asked Questions
Can I make sourdough Italian bread in a bread machine?
Yes, you can use your bread machine to make sourdough Italian bread, typically by using its “Dough” cycle. You would mix your sourdough starter and other ingredients in the machine, let it complete the kneading and first rise, then remove the dough to shape and bake in a conventional oven for the best crust.
What’s the difference between Italian and French bread?
While both are European white breads, Italian bread often incorporates olive oil and sometimes milk or sugar, resulting in a slightly softer crumb and richer flavor. French baguettes, in contrast, traditionally use only flour, water, yeast, and salt, leading to a crisper crust and chewier interior. Italian bread also tends to be wider and more oval-shaped.
How long does homemade Italian bread last?
Homemade Italian bread, when stored properly in an airtight container or bread bag at room temperature, typically stays fresh for 2-3 days. For longer storage, it can be tightly wrapped and frozen for up to 3 months; simply thaw and warm before serving.
Do I need a special bread machine for Italian bread?
No, most standard bread machines with a “Basic,” “White Bread,” or “Dough” cycle can be used to make Italian bread. While some advanced models might offer specific “Italian bread” settings or produce a more traditional loaf shape, they are not strictly necessary for delicious results.
Can I use olive oil instead of butter in Italian bread recipes?
Absolutely. Olive oil is a characteristic ingredient in many authentic Italian bread recipes, contributing to the bread’s flavor, tenderness, and crust. Substituting olive oil for butter is often preferred in Italian bread making and is perfectly suitable for most bread machine recipes.
