Imagine waking up to the irresistible aroma of freshly baked bread filling your home. With a bread maker, this delightful dream becomes an everyday reality, transforming simple ingredients into warm, crusty loaves with minimal effort. Whether you’re a seasoned baker or just starting your culinary journey, understanding the nuances of bread maker bread unlocks a world of delicious possibilities.
Bread Makers: An Overview
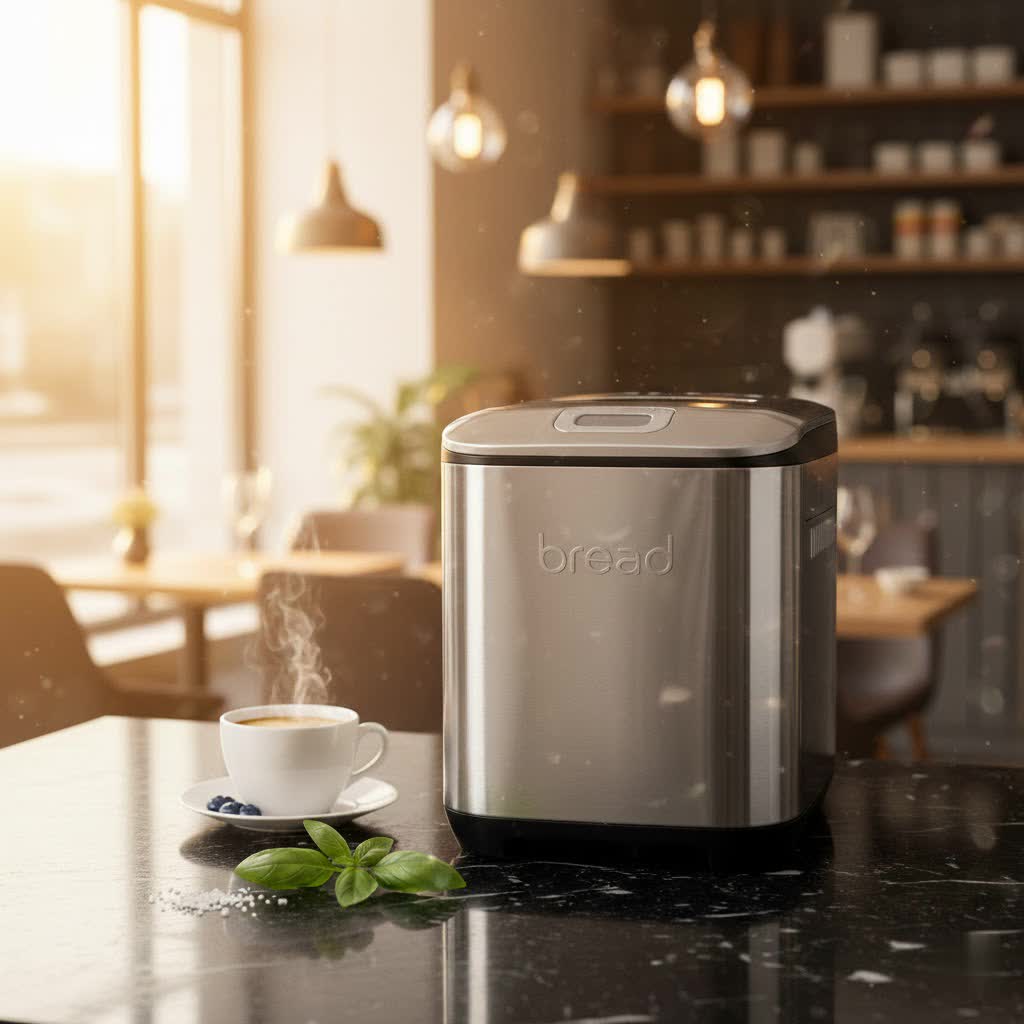
A bread maker is a compact kitchen appliance designed to automate the entire bread-making process, from mixing and kneading to proofing and baking. Its primary purpose is to simplify home baking, offering a convenient alternative to the often time-consuming traditional methods. These machines typically feature a removable bread pan with a kneading paddle, a heating element, and a control panel for selecting various programs and settings.
The history of the bread maker dates back to the late 1980s, with Panasonic introducing the first commercial model in Japan in 1986. This innovation quickly spread globally, revolutionizing home baking by making it accessible to individuals with busy lifestyles or limited baking experience. Over the decades, bread makers have evolved significantly, incorporating advanced features like delayed start timers, specialized cycles for different types of bread, and improved design for better performance and durability.
Today, the market offers several types of bread makers to suit diverse needs. Basic models are ideal for everyday white or whole wheat loaves, while more advanced machines include settings for gluten-free bread, artisanal dough, jams, and even cakes. Compact vertical loaf machines are popular for smaller kitchens, while horizontal loaf models often produce a more traditional-shaped bread. Some high-end models even include automatic ingredient dispensers for yeast, nuts, or fruit, adding convenience and consistency to your baking.
Why You Should Use a Bread Maker?
The convenience and time-saving aspects of a bread maker are arguably its most compelling advantages. Simply add your ingredients, select a program, and let the machine handle the rest. This automation frees up your valuable time, allowing you to focus on other tasks while still enjoying fresh, homemade bread. No more messy flour on the countertop or endless kneading by hand – the bread maker manages it all efficiently.
Furthermore, a bread maker offers unparalleled control over your recipes and ingredients. You can easily customize the types of flour, yeast, and additional components like seeds, nuts, or dried fruits to tailor the bread to your exact preferences and dietary needs. This level of customization is particularly beneficial for those with allergies or specific dietary requirements, as you can avoid common additives or preservatives often found in store-bought bread.
Ensuring food hygiene and safety is another significant benefit of baking with a bread maker. When you make bread at home, you have complete oversight of the entire process, from ingredient sourcing to the final bake. This allows you to maintain high standards of cleanliness and quality, guaranteeing that your family consumes wholesome, uncontaminated food. You know exactly what goes into your bread, providing peace of mind.
Ultimately, using a bread maker allows you to consistently create delicious, fresh bread right in your own kitchen. The superior taste and texture of warm, homemade bread are incomparable to pre-packaged alternatives. Beyond the culinary delight, the simple act of baking bread can be a therapeutic and rewarding experience, filling your home with comforting aromas and bringing joy to every meal.
How to Choose the Right Bread Maker
Selecting the perfect bread maker involves understanding your specific needs and evaluating various features. A thoughtful approach ensures you invest in a machine that will serve you well for years to come.
Determine Your Usage Needs
|
Our Picks for the Best Bread Maker in 2026
As an Amazon Associate I earn from qualifying purchases.
|
||
| Num | Product | Action |
|---|---|---|
| 1 | Cuisinart Bread Maker Machine, Stainless Steel Convection Bread Machine with 16 Menu Options, 3 Loaf Sizes Up to 2 Lb., 3 Crust Colors, Includes Measuring Cup, Spoon & Kneading Hook, CBK-210 |

|
| 2 | Neretva Bread Maker, 20-in-1 2LB Bread Machine Dual Heater & Nonstick Ceramic Pan Bread Makers Machine All Metal Compact for Gluten Free/Dough Maker/Meat Floss/Jam/Yogurt/Breadmaker Recipe-Light Green |
|
| 3 | 2LB Bread Maker Machine, OSIPOTO 17 in 1 Automatic Stainless Steel Bread Machine, Non-stick, Beginner-Friendly Controls, 15 Hour Timer, Easy to Clean Low Noise, High Success Rate for Homemade Bread |
|
| 4 | Cuisinart Bread Maker Machine, Stainless Steel Automatic Bread Machine with 12 Menu Options, 3 Loaf Sizes up to 2 Lb., 3 Crust Colors, Removable Nonstick Baking Pan & Kneading Paddle, CBK-110NAS |
|
| 5 | KBS Premium 2LB Convection Bread Maker Dual Heaters, 710W Stainless Steel 17-in-1 Bread Machine Healthy Ceramic Pan, Nut Dispenser,Touch Panel, 3 Loaf Sizes 3 Crust Colors, 15H Timer,Low Noise,Recipes |
|
| 6 | Neretva Bread Maker, 20-IN-1 2LB Bread Machine Dual Heater Bread Maker Machine Automatic with Nonstick Ceramic Pan, 15H Timer & 1H Keep Warm Set, Low Noise, Stainless Steel Breadmaker Recipe-Green |
|
| 7 | MERIOR 25-IN-1 Bread Maker with Visible Lid - 2lb Automatic Machine, Auto Nut Dispenser, 13-Hour Delay Timer, One-Touch Control & Recipes – Easy Operation, High Success for Homemade Bread |
|
| 8 | KITCHENARM 29-in-1 SMART Bread Machine with Gluten Free Setting 2LB 1.5LB 1LB Bread Maker Machine with Homemade Cycle - Stainless Steel Breadmaker with Recipes Whole Wheat Bread Making Machine |
|
| 9 | Elite Gourmet Programmable Bread Maker, 2 lb Loaf, 3 Sizes, 19 Presets incl. Gluten-Free, Dough & Jam, Delay Timer, Black |
|
| 10 | KBS Pro 710W 2LB Bread Maker, Stainless Steel 17-in-1 Smart Bread Machine with Healthy Ceramic Pan, Automatic Nut Dispenser, Tempered Glass Touch Panel, 3 Crust Colors, 15H Timer& Keep-Warm, Recipes |
|
Before diving into specifications, consider your baking habits. Are you baking for a small family or a larger household? This will influence the ideal loaf size and capacity you need. Do you plan to make only basic white bread, or are you interested in a wider variety, such as whole wheat, sourdough, gluten-free, or even jams and cakes? Your preferred bread types will dictate the necessary programs and functions. Lastly, establish a budget. Bread makers range widely in price, so knowing your financial limits will help narrow down options efficiently.
Important Features to Consider
Several key features contribute to a bread maker’s performance and user experience. Capacity and machine size are crucial; smaller machines might be suitable for individuals or couples, while larger ones are better for families. Look for a bread maker with a sufficient number of bread programs to cover your desired recipes. Essential functions like a delay timer allow you to add ingredients in the evening and wake up to fresh bread in the morning, while a keep warm function ensures your bread stays toasty until you’re ready to serve. The material and durability of the machine, especially the kneading paddle and bread pan, are important for longevity. Non-stick coatings are common, but ceramic or stainless steel options may offer increased durability and easier release. Finally, consider how easy the machine is to clean and maintain. Removable, dishwasher-safe parts can save a lot of time and effort.
Reputable Bread Maker Brands
The market is home to several highly-regarded bread maker brands, each with its own strengths. Panasonic is often praised for its consistency and reliable performance, particularly for basic bread types. Zojirushi is known for its high-quality construction, excellent temperature control, and a wider range of specialty programs, making it a favorite among more experienced bakers. Cuisinart offers a good balance of features and affordability, often recommended for beginners. Other notable brands include Oster and Hamilton Beach, which provide budget-friendly options with decent functionality. Comparing the pros and cons of these brands, such as price points, program variety, build quality, and customer support, will help you make an informed decision tailored to your priorities.
Comparison of Popular Bread Maker Models (Simulated)
| Feature | Basic Model (e.g., Cuisinart CBK-110) | Mid-Range Model (e.g., Zojirushi BB-SSC10) | Premium Model (e.g., Breville BBM800XL) |
|---|---|---|---|
| Loaf Size | 1, 1.5, 2 lb | 1 lb (compact) | 1, 1.5, 2, 2.5 lb |
| Programs | 12 (Basic, Whole Wheat, Dough, Jam) | 10 (Basic, Gluten-Free, Sourdough Starter) | 13 (Yeast-Free, Pasta Dough, Bake Only) |
| Delay Timer | Up to 13 hours | Up to 13 hours | Up to 13 hours |
| Auto Dispenser | No | No | Yes (Fruit/Nut) |
| Crust Settings | Light, Medium, Dark | Light, Medium, Dark | Light, Medium, Dark |
| Kneading Paddles | 1 | 1 | 2 |
| Price Range | Low ($80-$120) | Mid ($250-$350) | High ($300-$450) |
| Key Advantage | Affordable, User-Friendly | Excellent Bake Quality, Compact | Versatile, Professional Results |
This table illustrates a general comparison, highlighting how features and price points scale across different bread maker categories. Basic models are excellent for simplicity and cost-effectiveness, while mid-range options often focus on specific bake quality or niche programs. Premium models typically offer the most versatility and advanced features, catering to a wide range of baking needs.
Detailed Guide to Using Your Bread Maker
Mastering your bread maker is straightforward with a few key steps and tips. Consistent results come from careful preparation and understanding your machine.
Before you begin, ensure your bread maker is clean and dry. Gather all your ingredients, measure them accurately, and bring cold ingredients like milk or water to room temperature unless specified otherwise in the recipe. Accuracy in measuring, especially for flour and liquid, is paramount for successful bread.
Choosing and measuring ingredients correctly is the foundation of great bread maker bread. Always use fresh ingredients; expired yeast, for instance, can lead to a flat loaf. Most recipes require liquid first, followed by dry ingredients, with yeast placed last, typically in a small well on top of the flour to prevent premature activation. Use proper measuring cups and spoons, leveling off dry ingredients with a straight edge.
Setting the program and timer is the next crucial step. Consult your bread maker’s manual for specific program names (e.g., “Basic,” “Whole Wheat,” “Dough”). Select the appropriate program based on your recipe, and choose your preferred crust setting (light, medium, or dark). If using the delay timer, ensure all ingredients are added correctly and the delay time is set to your desired finish time.
Here are some tips for delicious and successful bread:
- Ingredient Order: Always follow the recommended order (liquid, dry, yeast last) for optimal mixing and proofing.
- Temperature: Use lukewarm water (around 105-115°F or 40-46°C) for activating yeast, unless specified otherwise.
- Don’t Open Lid: Avoid opening the lid during the kneading and baking cycles as it can affect temperature and humidity, potentially deflating the dough.
- Adjustments: If your dough looks too dry, add a teaspoon of water at a time; if too wet, add a teaspoon of flour. Make these adjustments only during the kneading cycle.
After baking, allow the bread to cool on a wire rack for at least 30 minutes before slicing. This allows the internal structure to set and prevents a gummy texture. To clean your machine, remove the bread pan and kneading paddle. Most pans are non-stick and can be easily washed with warm, soapy water. Avoid abrasive cleaners or sponges that can damage the non-stick coating. Wipe down the interior of the machine with a damp cloth, ensuring no crumbs are left behind.
Delicious Bread Maker Bread Recipes
Your bread maker is a versatile tool for creating a wide array of delicious breads. Experimenting with different recipes will quickly make it a favorite kitchen appliance.
For a classic, comforting loaf, try this Basic White Bread recipe:
- 1 cup warm water
- 2 tbsp olive oil
- 2 tbsp sugar
- 1 tsp salt
- 3 cups bread flour
- 2 tsp active dry yeast
- Add ingredients to your bread maker in the order recommended by your machine (typically liquid first, then dry, yeast last). Select the “Basic” or “White Bread” program and crust setting.
For a healthier option, Whole Wheat Bread is a staple:
- 1 ¼ cups warm water
- 2 tbsp molasses or honey
- 2 tbsp vegetable oil
- 1 ½ tsp salt
- 2 ½ cups whole wheat flour
- ½ cup bread flour
- 2 tsp active dry yeast
- Combine ingredients in your bread maker. Choose the “Whole Wheat” program and desired crust setting.
Satisfy your sweet tooth with a delightful Sweet Bread recipe, like a simple brioche or challah-style loaf:
- 1 cup warm milk
- ¼ cup melted butter
- 2 large eggs
- ¼ cup sugar
- 1 tsp salt
- 3 ½ cups bread flour
- 2 ¼ tsp active dry yeast
- Follow your bread maker’s specific instructions for sweet dough or brioche programs. This often involves an enriched dough cycle that allows for longer proofing.
Don’t stop there! Your bread maker can handle a variety of specialty breads. Try a hearty Sandwich Bread recipe using a mix of white and whole wheat flour for a soft texture, or even venture into a dense, flavorful Rye Bread. Some machines can even prepare dough for Baguettes or Pizza, which you then manually shape and bake in a conventional oven. The possibilities are truly endless, limited only by your imagination and the features of your machine.
Troubleshooting Common Bread Maker Issues
Even with the best bread makers, occasional issues can arise. Understanding how to troubleshoot common problems will save you time and ensure consistent success.
If your bread does not rise, several factors could be at play. The most common culprit is expired or inactive yeast. Always check the expiration date and ensure your water isn’t too hot (which can kill yeast) or too cold (which won’t activate it). Too much salt can also inhibit yeast activity. Ensure you are using the correct amount. Incorrect flour measurements or extremely humid conditions can also affect the rise.
When bread is burned or too dark, it usually points to an incorrect crust setting or prolonged baking. Double-check that you’ve selected the desired crust setting (light, medium, dark). If your bread is consistently too dark even on the light setting, your bread maker might be running a bit hot. Some advanced models allow temperature calibration, but for most, adjusting the recipe slightly or removing the bread a few minutes early might be necessary.
Conversely, if your bread is too dry or dense, it often indicates an imbalance in liquid or flour. Too much flour or too little liquid will result in a dry, crumbly loaf. Conversely, using too little liquid can make the dough too stiff, leading to a dense texture. Ensure accurate measurements and consider adding a tablespoon of extra water if the dough appears too stiff during the kneading cycle. High-altitude baking can also affect hydration, requiring slight adjustments.
If your machine is not working at all, first check the power cord connection and ensure the outlet is functional. Examine the bread pan and kneading paddle for proper installation; some machines have safety features that prevent operation if parts aren’t correctly seated. Consult your manual for specific error codes or troubleshooting steps related to electrical or mechanical issues.
Where to Buy a Bread Maker
Finding a bread maker is easier than ever, with numerous options available both in-store and online.
Reputable electronics stores and home appliance retailers are excellent places to start. Stores like Best Buy, Target, Walmart, and specialty kitchen stores often carry a range of bread makers, allowing you to see models in person and compare features directly. Sales associates can also provide advice and answer questions.
Online marketplaces offer the widest selection and often competitive pricing. Websites like Amazon, eBay, and the official brand websites (e.g., Panasonic, Zojirushi, Cuisinart) provide extensive product details, user reviews, and convenient home delivery. Be sure to check seller ratings and return policies when purchasing online.
Additionally, some hypermarkets and supermarkets with larger home goods sections might carry basic bread maker models. While the selection might be more limited compared to dedicated electronics stores or online retailers, these can be convenient for quick purchases, especially if you’re already doing your grocery shopping.
Comprehensive Bread Maker Buying Guide
Making an informed decision when purchasing a bread maker involves considering several critical factors to ensure you get the best value and functionality for your needs.
First, revisit the factors to consider: your household size, frequency of use, types of bread you want to bake, and any dietary restrictions. These core needs will guide your selection process and prevent overspending on unnecessary features or settling for a machine that doesn’t meet your demands.
Next, establish a budget. Bread makers can range from under $100 for basic models to over $400 for high-end, feature-rich machines. Determine how much you are willing to spend and then look for the best features within that price range. Remember that a higher price often correlates with better build quality, more programs, and advanced functionalities like automatic dispensers.
Always compare prices and quality across different retailers and brands. A quick search online can reveal significant price differences for the same model. Don’t be afraid to read detailed user reviews on multiple platforms. Real-world experiences from other buyers can offer invaluable insights into a machine’s performance, durability, ease of use, and common drawbacks that product descriptions might not highlight. Look for trends in reviews—if many users report the same issue, it’s a red flag.
Finally, pay close attention to the warranty and return policy. A good warranty provides peace of mind, protecting your investment against manufacturing defects. Understand the store’s return or exchange policy in case the bread maker doesn’t meet your expectations or arrives damaged. A strong customer support system is also a plus, especially if you’re new to bread making.
“A good bread maker isn’t just about making bread; it’s about making healthy eating convenient and enjoyable for the whole family.” – Chef Alice Chen, Culinary Instructor
Conclusion
Embracing the world of bread maker bread means unlocking the joy of fresh, homemade loaves with remarkable ease and consistency. From mastering basic white bread to experimenting with gourmet sweet breads, your bread maker is a powerful ally in the kitchen, offering unparalleled convenience, control over ingredients, and the satisfaction of wholesome baking. By considering your needs, understanding key features, and following simple guidelines, you can select the ideal machine and transform your baking routine. The journey to perfect bread maker bread is an incredibly rewarding one, enriching your home with irresistible aromas and delicious flavors. What culinary creation will you embark on first with your new bread maker?
Frequently Asked Questions
What kind of flour is best for bread maker bread?
Bread flour is generally recommended for bread makers as its higher protein content develops more gluten, resulting in a chewier texture and better rise. All-purpose flour can work for some recipes, but the results may be less consistent.
How do I prevent my bread maker bread from having a large hole from the paddle?
To minimize the hole, remove the kneading paddle from the dough before the final rise and bake cycle. This usually happens after the last kneading cycle has finished. You can often pause the machine, remove the paddle, reshape the dough slightly, and then resume the cycle.
Can I make gluten-free bread in a bread maker?
Yes, many modern bread makers have a specific “Gluten-Free” program. This program typically features a single, shorter kneading cycle and a longer rise time, which is ideal for gluten-free flours that don’t develop gluten like traditional wheat flours.
Why is my bread maker bread often too dense or heavy?
Density can be caused by too much flour, too little liquid, insufficient yeast activity (due to old yeast or incorrect water temperature), or improper ingredient balance. Always measure precisely and ensure your yeast is fresh and active.
How long does bread maker bread stay fresh?
Homemade bread generally stays fresh for 2-3 days at room temperature when stored in an airtight container or bread box. To extend freshness, you can slice and freeze portions for up to 3 months, thawing as needed.
