Imagine waking up to the irresistible aroma of freshly baked bread, warm and ready to be slathered with butter. For many, this has been a dream reserved for professional bakers or those with endless free time. The good news? With a bread maker, this delightful experience is now within everyone’s reach. These ingenious kitchen appliances simplify the complex process of bread baking, taking care of the mixing, kneading, proofing, and baking all in one convenient unit. This comprehensive guide will help you navigate the world of bread makers, ensuring you choose the perfect model to transform your kitchen into a personal bakery.
Bread Makers: An Overview
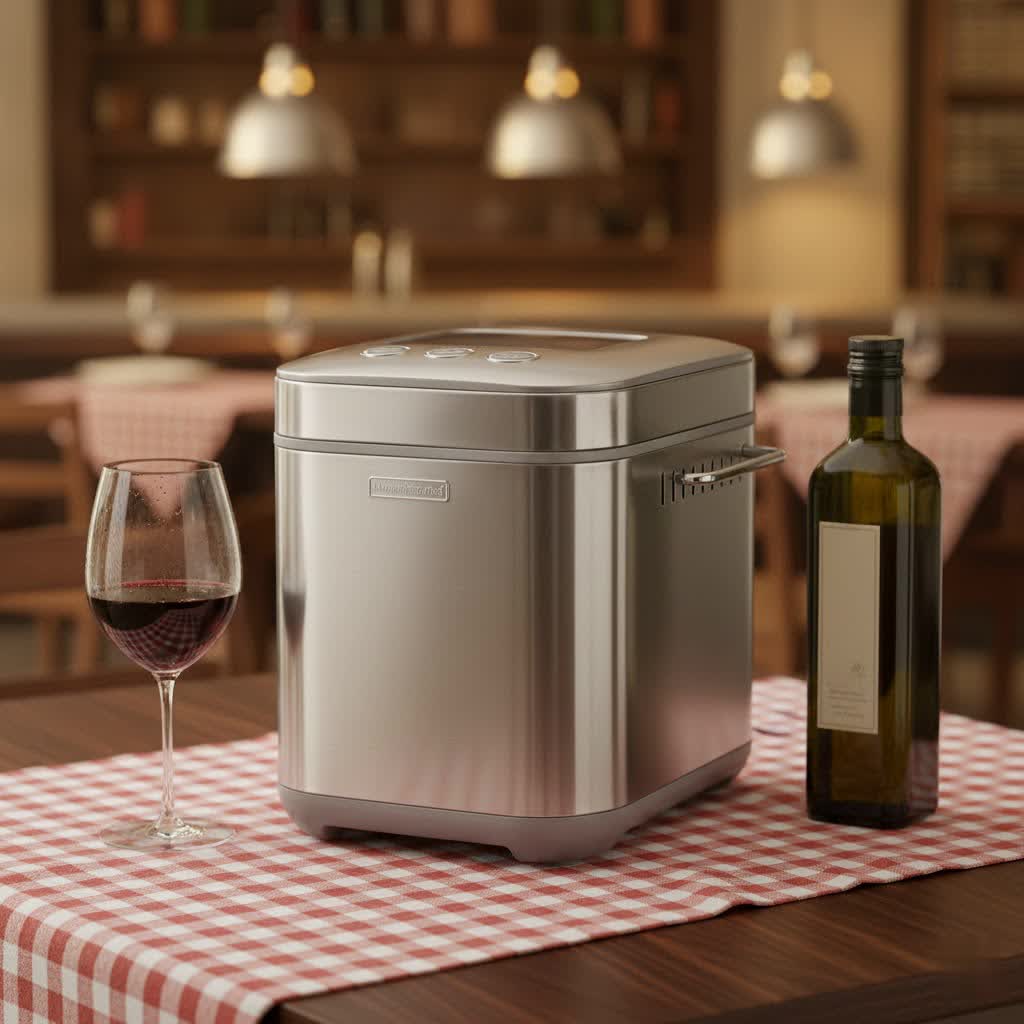
A bread maker, often referred to as a bread machine, is a self-contained countertop appliance designed to automate the process of making various types of bread. It combines the functions of a mixer, kneader, and oven into a single unit, eliminating the need for extensive manual labor. You simply add your ingredients, select a program, and the machine handles the rest, delivering a freshly baked loaf in just a few hours.
The history of bread makers dates back to the late 1980s when they first gained popularity as a convenient way to enjoy homemade bread without the traditional effort. Over the decades, technology has advanced significantly, offering more sophisticated programs, better performance, and a wider array of features.
Today, the market offers several types of bread makers, primarily distinguished by their loaf shape and size. Most bread makers produce either a vertical loaf, which is taller and often fits smaller kitchens, or a horizontal loaf, which more closely resembles a traditional store-bought bread. Some advanced models feature dual kneading paddles to ensure more thorough mixing, particularly beneficial for larger, horizontal loaves, while others boast collapsible paddles to minimize the common hole left at the bottom of the bread.
Why You Should Use a Bread Maker
Embracing a bread maker can revolutionize your kitchen routine and bring numerous benefits to your table. From unparalleled convenience to the sheer joy of fresh, wholesome bread, these appliances offer compelling advantages.
One of the most significant perks is convenience and time-saving. Bread makers are essentially “set-it-and-forget-it” devices. You load the ingredients, press a button, and return later to a perfectly baked loaf. Many models come with a delay timer, allowing you to prepare ingredients the night before and wake up to a warm, delicious breakfast loaf, or have fresh bread ready when you get home from work. This automation bypasses the lengthy and often messy manual kneading and proofing steps.
Bread makers also offer exceptional customization and healthier options. When you bake at home, you have complete control over the ingredients. This means you can avoid the preservatives, artificial additives, and excess sugars often found in commercial breads. You can experiment with different flours, add seeds, nuts, or dried fruits, and tailor recipes to specific dietary needs, such as gluten-free or whole wheat. This ensures not only better hygiene and food safety but also a more nutritious product.
Ultimately, the ability to create fresh, warm, and delicious bread at home is a primary motivator. There’s nothing quite like the taste and aroma of a warm, homemade loaf. In the long run, baking your own bread can also prove to be more cost-effective than consistently purchasing artisan or even standard loaves from the grocery store, especially when buying ingredients in bulk.
Guide to Choosing the Right Bread Maker
Selecting the ideal bread maker involves understanding your personal baking habits and prioritizing features that align with your lifestyle. A careful assessment ensures you invest in an appliance that truly meets your needs.
Determine Your Needs
Before diving into specific models, consider what you expect from your bread maker. This will narrow down your options significantly.
- Family Size and Usage: How many people are you baking for? Bread makers typically offer loaf sizes ranging from 1 pound to 2.5 pounds. A 1-pound machine might be suitable for individuals or couples, while a 2-pound or 2.5-pound model is better for larger families or those who bake frequently. If you’re using it mainly for dough, pan size might be less critical than kneading efficiency.
- Preferred Bread Types: Are you a fan of classic white bread, hearty whole wheat, or do you have specific dietary requirements like gluten-free? Some machines excel at certain types of bread or offer specialized programs for them. Many also feature settings for sweet breads, dough-only cycles for pizza or pasta, and even jam.
- Budget: Bread makers vary widely in price. Entry-level models offer basic functionality at an affordable cost, while premium machines boast advanced features, superior build quality, and more specialized programs. Determine how much you’re willing to spend to strike a balance between features and cost.
|
Our Picks for the Best Bread Maker in 2026
As an Amazon Associate I earn from qualifying purchases.
|
||
| Num | Product | Action |
|---|---|---|
| 1 | Neretva Bread Maker, 20-in-1 2LB Bread Machine Dual Heater & Nonstick Ceramic Pan Bread Makers Machine All Metal Compact for Gluten Free/Dough Maker/Meat Floss/Jam/Yogurt/Breadmaker Recipe-Light Green |

|
| 2 | KBS Pro 710W 2LB Bread Maker, Stainless Steel 17-in-1 Smart Bread Machine with Healthy Ceramic Pan, Automatic Nut Dispenser, Tempered Glass Touch Panel, 3 Crust Colors, 15H Timer& Keep-Warm, Recipes |
|
| 3 | Elite Gourmet Programmable Bread Maker, 2 lb Loaf, 3 Sizes, 19 Presets incl. Gluten-Free, Dough & Jam, Delay Timer, Black |
|
| 4 | 2LB Bread Maker Machine, OSIPOTO 17 in 1 Automatic Stainless Steel Bread Machine, Non-stick, Beginner-Friendly Controls, 15 Hour Timer, Easy to Clean Low Noise, High Success Rate for Homemade Bread |
|
| 5 | Cuisinart Bread Maker Machine, Stainless Steel Convection Bread Machine with 16 Menu Options, 3 Loaf Sizes Up to 2 Lb., 3 Crust Colors, Includes Measuring Cup, Spoon & Kneading Hook, CBK-210 |
|
| 6 | MERIOR 25-IN-1 Bread Maker with Visible Lid - 2lb Automatic Machine, Auto Nut Dispenser, 13-Hour Delay Timer, One-Touch Control & Recipes – Easy Operation, High Success for Homemade Bread |
|
| 7 | KBS Premium 2LB Convection Bread Maker Dual Heaters, 710W Stainless Steel 17-in-1 Bread Machine Healthy Ceramic Pan, Nut Dispenser,Touch Panel, 3 Loaf Sizes 3 Crust Colors, 15H Timer,Low Noise,Recipes |
|
| 8 | KITCHENARM 29-in-1 SMART Bread Machine with Gluten Free Setting 2LB 1.5LB 1LB Bread Maker Machine with Homemade Cycle - Stainless Steel Breadmaker with Recipes Whole Wheat Bread Making Machine |
|
| 9 | Cuisinart Bread Maker Machine, Stainless Steel Automatic Bread Machine with 12 Menu Options, 3 Loaf Sizes up to 2 Lb., 3 Crust Colors, Removable Nonstick Baking Pan & Kneading Paddle, CBK-110NAS |
|
| 10 | Neretva Bread Maker, 20-IN-1 2LB Bread Machine Dual Heater Bread Maker Machine Automatic with Nonstick Ceramic Pan, 15H Timer & 1H Keep Warm Set, Low Noise, Stainless Steel Breadmaker Recipe-Green |
|
Key Features to Consider
Once you’ve identified your primary needs, evaluate the following features to find a bread maker that offers the best functionality and user experience.
- Capacity and Size: Beyond loaf size, consider the overall footprint of the machine. If kitchen counter space is limited, a compact model might be preferable, even if it bakes smaller loaves.
- Number of Programs: Look for a variety of pre-programmed cycles such as basic, whole wheat, French, quick bread, sweet bread, dough, jam, and especially gluten-free if that’s a requirement. More programs offer greater versatility.
- Delay Timer and Keep Warm Function: A delay start timer is invaluable for fresh morning bread or loaves ready when you return home. A “keep warm” setting ensures your bread stays at an optimal temperature after baking until you’re ready to slice it.
- Materials and Durability: Stainless steel exteriors often indicate better build quality and durability compared to plastic. The bread pan typically has a non-stick coating for easy release and cleaning.
- Ease of Cleaning: Removable, non-stick bread pans and paddles make cleanup a breeze. Some paddles are even collapsible to prevent getting stuck in the finished loaf, reducing the cleanup effort even further.
- Kneading Paddles: Single paddles are common, but dual paddles, often found in larger machines, can provide more thorough kneading for a better texture.
- Automatic Dispensers: For bakers who love adding nuts, seeds, or dried fruits, an automatic dispenser is a convenient feature that releases these ingredients at the perfect time during the mixing cycle.
- Crust Color Settings: Most machines offer light, medium, and dark crust options, allowing you to customize your loaf to your preference.
- Viewing Window: A small window on the lid allows you to monitor the baking process without opening the machine, which can disrupt the delicate rising process.
Reputable Bread Maker Brands
Several brands have established a strong reputation for producing reliable and high-performing bread makers.
- Zojirushi: Often considered a premium brand, Zojirushi bread makers like the Home Bakery Virtuoso Plus are praised for their exceptional consistency, traditional horizontal loaf shape, dual kneading paddles, and excellent proofing capabilities. While typically more expensive, they deliver consistently high-quality results. The Zojirushi Home Bakery Mini is a compact option for smaller households.
- Breville: The Breville Custom Loaf Bread Maker stands out for its extensive customization options, including multiple loaf sizes and crust settings, and often features an automatic fruit and nut dispenser and collapsible paddles. It’s ideal for those who love to experiment.
- Cuisinart: Cuisinart offers reliable bread makers, such as the Compact Automatic Bread Maker, which are often noted for good value and a convection fan for even baking and browning. They are a solid choice for quality basic bread.
- Hamilton Beach: Known for budget-friendly and user-friendly appliances, Hamilton Beach bread makers are a great entry point for beginners, often providing straightforward instructions and decent performance for basic loaves.
- Amazon Basics: For those on a tight budget, Amazon Basics offers a cost-effective option for basic bread making, though it may lack some advanced features.
- Panasonic: While less frequently mentioned in recent top lists, Panasonic has a history of producing durable bread makers with good performance, especially for their quiet operation and reliability.
Detailed Guide to Using Your Bread Maker
Mastering your bread maker is straightforward, but a few key practices will ensure consistently perfect loaves. Following these steps will help you get the most out of your appliance.
Before You Start: Always read your bread maker’s instruction manual. Each model can have slight variations in operation and ingredient order.
Ingredient Preparation:
- Measure Accurately: Precision is crucial in bread making. Use proper measuring cups and spoons, or ideally, a kitchen scale for exact measurements, especially for flour and liquid.
- Order of Ingredients: Most bread makers require liquids first, followed by dry ingredients, with yeast added last, placed separately from salt and sugar to prevent premature activation.
- Ingredient Quality: Use fresh ingredients, especially yeast. Old yeast is a common culprit for bread that doesn’t rise. Ensure your flour is fresh and stored correctly. Bread flour generally yields better results than all-purpose flour due to its higher protein content, which contributes to gluten development.
- Temperature: Ensure liquids are at room temperature unless the recipe specifies otherwise. Cold liquids can inhibit yeast activity.
Setting Up and Baking:
- Place Pan: Insert the bread pan securely into the machine, ensuring the kneading paddle(s) are correctly attached.
- Add Ingredients: Carefully add ingredients in the order specified by your recipe or manual.
- Select Program: Choose the appropriate program (e.g., basic, whole wheat, gluten-free).
- Crust Setting & Loaf Size: Select your desired crust color (light, medium, dark) and loaf size.
- Delay Start (Optional): If using, set the delay timer.
- Start: Press the start button. Avoid opening the lid during kneading and proofing cycles as this can affect the rise. You can typically check the dough’s consistency during the initial kneading stage.
After Baking:
- Remove Loaf: Once the cycle finishes, immediately remove the bread pan from the machine using oven mitts.
- Cool: Invert the pan to release the loaf onto a wire rack. Remove the kneading paddle if it’s stuck in the bread (a small hole is common). Allow the bread to cool completely for at least an hour before slicing. This allows the internal structure to set and prevents a gummy texture.
Cleaning and Maintenance:
- Wash Pan and Paddle: After each use, wash the non-stick bread pan and kneading paddle with warm, soapy water. Avoid abrasive scrubbers that can damage the non-stick coating.
- Clean Exterior: Wipe down the exterior of the machine with a damp cloth.
- Storage: Store the bread maker in a cool, dry place.
Delicious Bread Maker Recipes
A bread maker opens up a world of culinary possibilities beyond just basic white bread. Here are some staple recipes and ideas to get you started:
- Basic White Bread: This is the foundation for any bread maker enthusiast. Simple ingredients like flour, water, yeast, sugar, salt, and a little oil combine to create a soft, versatile loaf perfect for sandwiches or toast. Many bread makers come with an excellent basic white bread recipe in their manual.
- Whole Wheat Bread: For a healthier, heartier option, whole wheat bread is a fantastic choice. Using whole wheat flour (sometimes combined with bread flour for a lighter texture) and often a touch of honey or molasses, this bread is rich in fiber and flavor.
- Sweet Breads: Expand your repertoire with delicious sweet loaves. Recipes like cinnamon swirl bread, brioche, or challah dough can be easily made using the “sweet bread” or “dough” cycle, offering a delightful treat for breakfast or dessert.
- Specialty Doughs: Your bread maker isn’t just for baking loaves. The “dough” cycle is perfect for preparing pizza dough, pasta dough, or even dinner roll dough, which you can then shape and bake in a conventional oven. Some machines also have a “jam” program, allowing you to make homemade preserves directly in the bread maker pan.
- Gluten-Free Bread: Many modern bread makers include a dedicated gluten-free cycle. These programs are optimized for the unique properties of gluten-free flours, ensuring a better rise and texture than standard cycles. Always use recipes specifically designed for gluten-free bread in a bread maker.
Troubleshooting Common Bread Maker Issues
Even with the best bread maker, you might occasionally encounter minor issues. Knowing how to troubleshoot them can save your loaf and your sanity.
- Bread Not Rising: This is a common issue. Check your yeast’s expiration date; old yeast is often the culprit. Ensure your water temperature is correct – too hot can kill the yeast, too cold can inhibit it. Double-check your measurements, as too much salt or sugar can also hinder yeast activity. Finally, make sure the kneading paddle is correctly installed.
- Bread is Too Dense/Heavy: This can result from insufficient liquid, too much flour, or a lack of proper gluten development. Ensure accurate measurements and use bread flour when appropriate. Sometimes, the dough needs a little extra liquid if the environment is dry.
- Bread Collapses in the Middle: This often indicates too much liquid, too much yeast, or excessive humidity. It can also happen if the bread maker overheats during the proofing cycle. Try slightly reducing the liquid or yeast in your recipe.
- Burnt or Uneven Crust: Adjust your crust setting (light, medium, dark). If only one side is burning, ensure the machine is not too close to a heat source or wall, which can cause uneven heating.
- Kneading Paddle Stuck in Loaf: This is very common. Most bread makers leave a small hole where the paddle was. Allow the bread to cool slightly, then carefully remove the paddle. Some advanced models feature collapsible paddles to minimize this.
- Machine Not Working: Check the power connection and ensure the pan is correctly seated. If the machine simply stops mid-cycle, consult your manual for error codes.
Where to Buy a Bread Maker
Finding your perfect bread maker is easier than ever with a variety of retailers stocking these popular appliances.
- Online Retailers: Websites like Amazon, Walmart, and Target offer a vast selection of bread makers from various brands, often with competitive pricing and user reviews to guide your decision. Specialty kitchenware sites like Williams Sonoma or Sur La Table also carry higher-end models.
- Electronics and Appliance Stores: Major electronics retailers and appliance stores, both online and brick-and-mortar, typically have a dedicated section for small kitchen appliances, including bread makers. Here, you might be able to see models in person.
- Department Stores: Many large department stores carry a range of kitchen gadgets and often feature bread makers, especially during sale seasons.
Bread Maker Buying Guide
To summarize, making an informed decision when buying a bread maker involves a holistic approach, considering both practicalities and personal preferences.
- Set Your Budget: Determine your financial comfort zone. While premium models offer enhanced features and durability, excellent entry-level and mid-range options are available.
- Assess Your Needs: Think about loaf size, types of bread you’ll bake, and frequency of use. Do you need specific programs like gluten-free or jam settings?
- Read Reviews: Customer reviews and expert comparisons provide invaluable insights into a machine’s performance, ease of use, and common quirks. Look for consistent positive feedback regarding loaf quality and reliability.
- Check Warranty and Return Policy: A good warranty offers peace of mind. Familiarize yourself with the retailer’s return policy in case the machine doesn’t meet your expectations.
- Prioritize Key Features: Decide which features are non-negotiable for you—whether it’s dual paddles, an automatic dispenser, or a compact design. Don’t pay for features you won’t use.
- Consider Long-Term Value: While an initial investment might seem high for a premium model, its durability, versatility, and consistent performance could offer better long-term value.
Frequently Asked Questions
Can I make gluten-free bread in a bread maker?
Yes, many modern bread makers include a dedicated gluten-free setting. These cycles are specifically programmed to accommodate the unique characteristics of gluten-free flours, which require different mixing and rising times, often without a second knead, to achieve the best texture. Always use recipes tailored for gluten-free bread in a bread maker for optimal results.
Do all bread makers leave a hole in the loaf?
Most bread makers do leave a small hole at the bottom of the loaf where the kneading paddle was attached. While this is a common characteristic, some advanced models feature collapsible paddles designed to fold down before baking, thereby minimizing the size of the hole. You can also usually remove the paddle after the final knead, just before the baking cycle, for a cleaner bottom.
How long does it take to bake bread in a bread maker?
The total time to bake a loaf in a bread maker typically ranges from 3 to 4 hours for a standard basic white bread program. Faster cycles, often called “express bake,” can produce a loaf in about 1 to 2 hours, though these may result in a slightly denser texture. Specialized programs like whole wheat or dough-only cycles will have different durations.
Is it cheaper to make bread at home with a bread maker?
In most cases, yes, making bread at home with a bread maker is more cost-effective than regularly buying store-bought bread. The cost of ingredients (flour, yeast, salt, sugar, oil) is generally less than the price of a commercial loaf, especially for specialty or artisan breads. Over time, the savings can easily offset the initial cost of the bread maker itself.
What’s the difference between single and dual paddles?
Single paddles are common in most bread makers, especially those with vertical pans. Dual paddles, often found in larger bread makers with horizontal pans, provide more thorough and even kneading, which is particularly beneficial for bigger loaves and denser doughs. Dual paddles can help ensure all ingredients are well incorporated and contribute to a more consistent bread texture.