The aroma of freshly baked bread wafting through your home is an unparalleled pleasure, and a bread maker makes this dream a daily reality. Among the myriad options available, the Toastmaster bread maker has carved a niche for itself as a reliable, user-friendly, and often budget-friendly choice, particularly favored by those taking their first steps into the world of automatic bread baking. This comprehensive guide will delve into everything you need to know about Toastmaster bread makers, from understanding their features to mastering recipes and troubleshooting common issues, ensuring your journey to homemade bread is a delicious success.
Bread Makers: An Overview
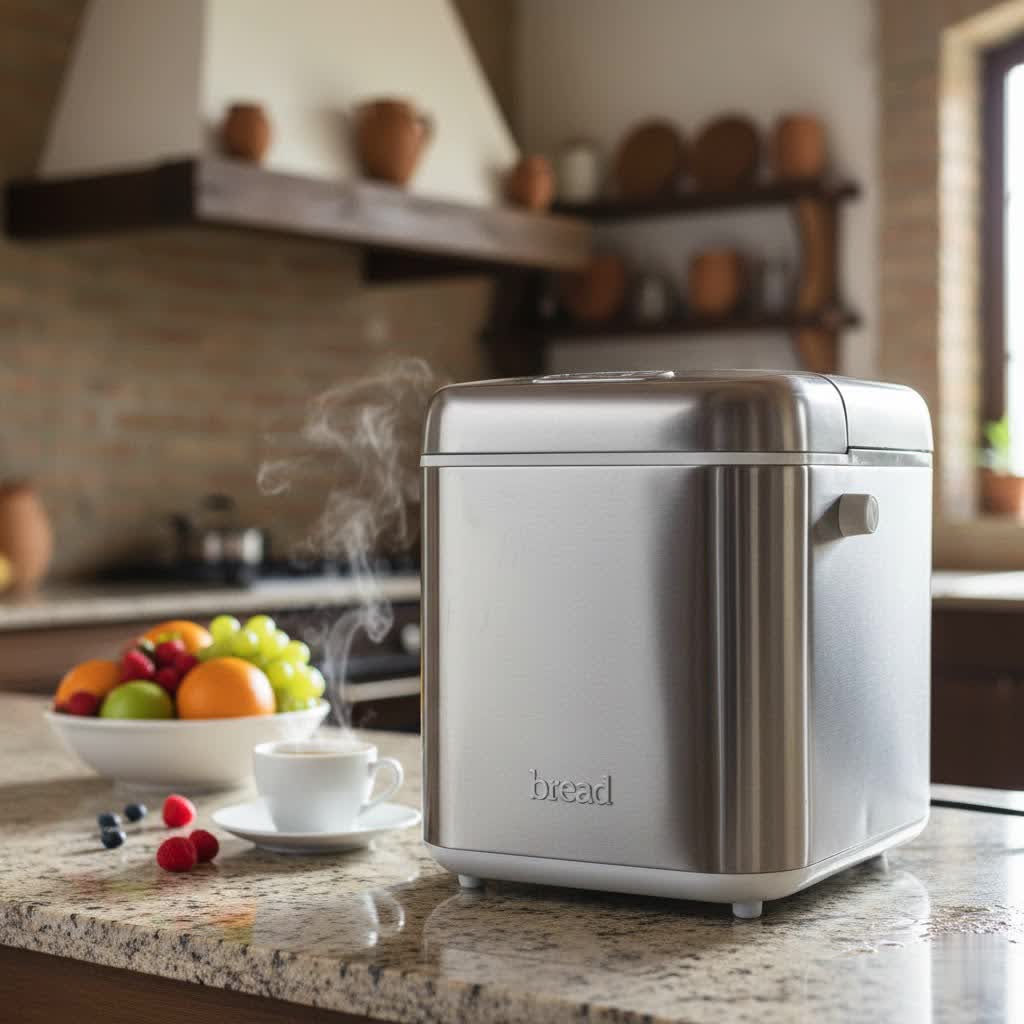
A bread maker is a kitchen appliance designed to automate the process of baking bread. From mixing ingredients to kneading, rising, and baking, these machines handle every step, significantly simplifying what can often be a time-consuming and intricate task. Originally introduced in the 1980s, bread makers have evolved to offer a wide array of programs and features, making homemade bread accessible to everyone.
Historically, early bread makers were somewhat bulky and offered limited program options. Over decades, advancements in technology have led to more compact designs, intuitive controls, and specialized settings for various bread types, including gluten-free and quick breads.
On the market today, bread makers generally come in vertical or horizontal loaf configurations, using one or two kneading paddles. Many Toastmaster models, like the popular 1148X, typically feature a vertical pan design with a single kneading blade. While this design is compact, it can sometimes lead to uneven mixing in corners, a common characteristic even in more expensive single-paddle machines.
Why You Should Use a Bread Maker
Embracing a bread maker in your kitchen offers a multitude of benefits that extend beyond just convenience.
Firstly, bread makers offer unrivaled convenience and time savings. Imagine waking up to the smell of warm, fresh bread without having to set an alarm for early morning kneading. With programmable delay timers, you can add ingredients the night before and have a hot loaf ready exactly when you want it. This convenience is a game-changer for busy individuals and families.
Secondly, bread makers allow for easy customization of recipes and ingredients. Unlike store-bought bread, you have complete control over what goes into your loaf. You can experiment with different flours, add seeds, nuts, or dried fruits, and adjust sugar and salt levels to suit your dietary preferences or health needs. This level of customization is particularly valuable for those with allergies or specific dietary requirements.
Moreover, baking at home with a bread maker ensures food safety and hygiene. You know precisely what ingredients are used, avoiding unwanted preservatives, artificial flavors, or additives often found in commercial breads. The process occurs in your clean kitchen environment, offering peace of mind about the purity of your food.
Finally, nothing beats the taste and texture of freshly baked bread made at home. The rich aroma, the warm, soft interior, and the perfectly crisp crust are sensations that simply cannot be replicated by pre-packaged loaves. A bread maker consistently delivers this fresh-baked quality, transforming ordinary meals into extraordinary culinary experiences.
Choosing the Right Bread Maker
Selecting the ideal bread maker is essential for a satisfying baking experience. It involves considering your personal needs, desired features, and understanding the market’s reputable brands.
Determine Your Usage Needs
|
Our Picks for the Best Bread Maker in 2026
As an Amazon Associate I earn from qualifying purchases.
|
||
| Num | Product | Action |
|---|---|---|
| 1 | Cuisinart Bread Maker Machine, Stainless Steel Automatic Bread Machine with 12 Menu Options, 3 Loaf Sizes up to 2 Lb., 3 Crust Colors, Removable Nonstick Baking Pan & Kneading Paddle, CBK-110NAS |

|
| 2 | Neretva Bread Maker, 20-in-1 2LB Bread Machine Dual Heater & Nonstick Ceramic Pan Bread Makers Machine All Metal Compact for Gluten Free/Dough Maker/Meat Floss/Jam/Yogurt/Breadmaker Recipe-Light Green |
|
| 3 | KITCHENARM 29-in-1 SMART Bread Machine with Gluten Free Setting 2LB 1.5LB 1LB Bread Maker Machine with Homemade Cycle - Stainless Steel Breadmaker with Recipes Whole Wheat Bread Making Machine |
|
| 4 | 2LB Bread Maker Machine, OSIPOTO 17 in 1 Automatic Stainless Steel Bread Machine, Non-stick, Beginner-Friendly Controls, 15 Hour Timer, Easy to Clean Low Noise, High Success Rate for Homemade Bread |
|
| 5 | Elite Gourmet Programmable Bread Maker, 2 lb Loaf, 3 Sizes, 19 Presets incl. Gluten-Free, Dough & Jam, Delay Timer, Black |
|
| 6 | Neretva Bread Maker, 20-IN-1 2LB Bread Machine Dual Heater Bread Maker Machine Automatic with Nonstick Ceramic Pan, 15H Timer & 1H Keep Warm Set, Low Noise, Stainless Steel Breadmaker Recipe-Green |
|
| 7 | Cuisinart Bread Maker Machine, Stainless Steel Convection Bread Machine with 16 Menu Options, 3 Loaf Sizes Up to 2 Lb., 3 Crust Colors, Includes Measuring Cup, Spoon & Kneading Hook, CBK-210 |
|
| 8 | KBS Pro 710W 2LB Bread Maker, Stainless Steel 17-in-1 Smart Bread Machine with Healthy Ceramic Pan, Automatic Nut Dispenser, Tempered Glass Touch Panel, 3 Crust Colors, 15H Timer& Keep-Warm, Recipes |
|
| 9 | MERIOR 25-IN-1 Bread Maker with Visible Lid - 2lb Automatic Machine, Auto Nut Dispenser, 13-Hour Delay Timer, One-Touch Control & Recipes – Easy Operation, High Success for Homemade Bread |
|
| 10 | KBS Premium 2LB Convection Bread Maker Dual Heaters, 710W Stainless Steel 17-in-1 Bread Machine Healthy Ceramic Pan, Nut Dispenser,Touch Panel, 3 Loaf Sizes 3 Crust Colors, 15H Timer,Low Noise,Recipes |
|
Before diving into models, consider your baking habits. Are you baking for a small family or a larger household? Toastmaster bread makers typically offer loaf capacities ranging from 1.5 to 2 pounds, which is suitable for most families. What types of bread do you enjoy? If you’re primarily looking for basic white, whole wheat, or dough cycles, a simpler Toastmaster model might be perfect. If you crave specialized breads like gluten-free, some Toastmaster models may lack dedicated settings, though general recipes can often be adapted. Lastly, what’s your budget? Toastmaster machines are known for their affordability, making them an excellent entry-level option without a significant financial commitment.
Key Features to Consider
When evaluating bread makers, several features significantly impact usability and versatility:
- Capacity and Size: Toastmaster models generally handle 1.5 to 2-pound loaves. Consider if this meets your family’s consumption. Their compact design (e.g., 13″h x 13″w x 11.75″d for the TBR15) makes them suitable for smaller kitchens.
- Number of Programs: Most Toastmaster machines, like the TBR15 and 1148X, offer 8 to 12 pre-programmed cycles, including basic, whole wheat, French, sweet, fast bake, quick bread, and dough. Some unique models like the Toastmaster Breadmaker’s Hearth even include settings for cake and pizza dough, and even mixing.
- Delay Timer and Keep Warm Function: A 13-hour delay timer is a standard feature in many Toastmaster models, allowing you to prepare ingredients hours in advance. The keep warm function, often lasting up to 3 hours, ensures your bread stays fresh and warm until you’re ready to serve.
- Material and Durability: Toastmaster bread makers are praised for their robust construction and longevity. Many users report these machines lasting for many years, even decades, making them a durable investment. The bread pans typically feature a non-stick coating for easy removal and cleaning.
- Ease of Cleaning and Maintenance: Look for non-stick bread pans and easily wipeable exteriors. Most Toastmaster models are designed for straightforward cleaning.
Reputable Bread Maker Brands
While brands like Zojirushi and Panasonic are often lauded for their advanced features and consistent performance, Toastmaster stands out as a strong contender in the entry-level and budget-friendly segment. It’s an excellent choice for new bakers who want to experiment with homemade bread without a large upfront investment. While it may not offer all the “bells and whistles” of premium brands, Toastmaster delivers reliable basic functionalities and surprising durability for its price point. Other popular brands include Oster, Sunbeam, and Cuisinart, each offering different feature sets and price ranges. For many, a Toastmaster machine provides the perfect balance of simplicity, performance, and value.
Popular Toastmaster Bread Maker Models Compared
Toastmaster has produced several popular bread maker models over the years, each with its own characteristics. While specific models may be harder to find new, understanding their features can guide your search for a reliable unit, perhaps even a well-maintained secondhand one.
| Model | Loaf Sizes | Cycles | Notable Features | Pros | Cons |
|---|---|---|---|---|---|
| Toastmaster 1148X | 1, 1.5, 2 lb | 8 (Basic, Whole Wheat, Sweet, Fast Bake, French, Dough, etc.) | Fast Bake (under 1 hour), 13-hour delay, 3-hour warm setting, large viewing window, two kneading cycles | Easy to use, durable, good manual, dual kneading for lighter loaves | Fast bake can yield denser bread, sometimes struggles to mix corners evenly |
| Toastmaster TBR15 | 1.5 lb | 8 (Basic, Whole Wheat, French, Sweet, Fast Bake, Quick Bread, Dough, Bake) | 80-minute quick bake, compact size (13″h x 13″w x 11.75″d), large viewing window | Affordable, simple, good for beginners, detailed instruction book | Single loaf size, can have floury corners if not manually intervened, quick bake is longer than some competitors, no jam cycle |
| Toastmaster TBR20 | 1.5, 2 lb | 8 (similar to TBR15) | Slightly larger capacity than TBR15, similar core features | Good value, reliable performance | Similar limitations to TBR15 regarding mixing and specialized cycles |
| Toastmaster 1195 (Bread & Butter Maker) | 1.5, 2 lb | 10 programs | Unique “butter maker” function, programmable | Versatile (bread & butter), programmable, often praised by users for longevity | Older model, may be hard to find parts or manuals |
| Toastmaster 1143S (Breadmaker’s Hearth) | 1.5, 2 lb | 8 (Basic, Whole Wheat, French, Sweet, Cake, Dough, Pizza Dough, Mixing) | Multifunction: bread maker, oven, broiler, toaster in one compact unit, horizontal loaf pan | Space-saving, highly versatile (multiple appliances in one), unique design | Toaster function may dry out bread, pan visibility issue when in use, bread can stick to top if it rises too high, an older unique model |
The Toastmaster 1148X is often lauded for its simplicity and the inclusion of two kneading cycles, which helps develop gluten for lighter, higher-rising loaves. Its “Fast Bake” option is a highlight, capable of producing a loaf in under an hour, though typically resulting in a denser texture. Models like the TBR15 and TBR20 represent earlier, more basic designs, offering essential cycles for everyday baking. The unique Bread & Butter Maker (like the 1195) and the Breadmaker’s Hearth (1143S) showcase Toastmaster’s innovation in offering multi-purpose kitchen solutions, catering to specific user needs like making fresh butter alongside bread or combining several cooking functions into one unit.
Detailed Guide to Using Your Bread Maker
Using a Toastmaster bread maker is straightforward, but following a few key steps and tips will ensure consistently excellent results.
Preparation Before Baking
- Clean the Bread Pan and Kneading Blade: Ensure the bread pan and kneading blade are clean and free of any debris from previous bakes. The non-stick coating works best when clean. Attach the kneading blade onto the mounting shaft inside the pan, aligning any flat sides and pushing it down firmly.
- Measure Ingredients Accurately: This is perhaps the most crucial step. Bread making is a science; small variations in ingredient amounts can significantly impact the final product. Use proper measuring cups and spoons, and level off dry ingredients.
- Ensure Ingredients are Room Temperature: Most recipes call for room temperature ingredients, especially liquids and eggs, to promote optimal yeast activation and dough rising.
How to Choose and Measure Ingredients
- Order of Ingredients: Typically, liquids go in first, followed by dry ingredients, with yeast placed last in a small well made in the center of the flour, preventing it from touching the liquid or salt prematurely. This order helps prevent early activation of the yeast.
- Yeast: Always use fresh bread machine yeast or active dry yeast. Check expiration dates. For fast bake cycles, quick or rapid-rise yeast is usually required, often in slightly larger quantities.
- Flour: Bread flour is recommended for most yeast breads due to its higher protein content, which develops gluten better. Whole wheat flour will produce denser loaves, so some recipes suggest adding vital wheat gluten to improve rise and texture.
- Liquids: Water, milk, or other liquids should be at the temperature specified in the recipe (often around 80°F/27°C).
Setting the Program and Delay Timer
- Place Bread Pan in Machine: Securely place the prepared bread pan with ingredients into the bread maker, ensuring it snaps into place. Close the lid.
- Select Program: Use the control panel to select the desired program (e.g., Basic, Whole Wheat, French). Refer to your specific Toastmaster model’s manual for program options and corresponding timing.
- Choose Crust Color: Select your preferred crust color (light, medium, or dark) if your machine offers this option.
- Set Delay Timer (Optional): If you want bread later, use the delay timer function. Calculate the number of hours until you want the bread finished and set the timer accordingly. Remember to avoid perishable ingredients like milk, butter, or eggs when using a long delay.
- Press Start: Once all settings are chosen, press the START button. The machine will begin its cycle.
Tips for Perfect Bread
- Monitor the Dough: During the first mixing cycle, check the dough consistency. It should form a soft, pliable ball. If it’s too sticky, add a teaspoon of flour at a time. If too dry, add a teaspoon of water. This is especially helpful if your machine tends to leave floury corners.
- Add-Ins: If your recipe includes nuts, seeds, or fruits, many Toastmaster models will beep at the appropriate time to add them during the kneading cycle.
- Cooling: Once baking is complete, remove the bread pan immediately (using oven mitts) and turn the bread out onto a wire rack to cool completely before slicing. This prevents a soggy bottom and allows the internal structure to set.
- Storage: Store cooled bread in an airtight container or bread bag at room temperature for a few days, or freeze for longer storage.
Cleaning and Maintenance
- Unplug and Cool: Always unplug the machine and allow it to cool completely before cleaning.
- Wipe Down Exterior: Use a damp cloth to wipe the exterior of the machine. Do not immerse the unit in water.
- Clean Bread Pan and Blade: Wash the bread pan and kneading blade with warm, soapy water. Avoid abrasive cleaners or metal scouring pads to protect the non-stick coating. Ensure they are thoroughly dry before storage.
- Clear Interior: Remove any crumbs or spilled flour from the heating element area with a damp cloth or a small vacuum.
Delicious Bread Recipes for Your Bread Maker
Your Toastmaster bread maker opens up a world of baking possibilities. Here are some fundamental recipes to get you started, along with ideas for more specialized loaves.
Basic White Bread Recipe (1.5 lb loaf)
This is a perfect starting point for any new bread maker owner.
- 1 cup warm water (around 80°F/27°C)
- 2 tbsp granulated sugar
- 1 tsp salt
- 1.5 tbsp unsalted butter, softened or 1.5 tbsp olive oil
- 3 cups bread flour
- 2.25 tsp active dry yeast or bread machine yeast
Instructions:
- Add water, sugar, salt, and butter/oil to the bread pan.
- Add bread flour, creating a small well in the center.
- Add yeast into the well.
- Place the pan in the bread maker, select the “Basic” program, and choose your desired crust color.
- Press start.
Hearty Whole Wheat Bread Recipe (2 lb loaf)
For a healthier, fiber-rich option, this whole wheat recipe is satisfying and delicious.
- 1.5 cups warm milk (or water)
- 3 tbsp honey or molasses
- 2 tbsp unsalted butter, softened
- 1.5 tsp salt
- 3 cups whole wheat flour
- 1 cup bread flour (optional, for a lighter texture)
- 1.5 tbsp vital wheat gluten (optional, improves rise with whole wheat)
- 2.5 tsp active dry yeast or bread machine yeast
Instructions:
- Add warm milk, honey/molasses, butter, and salt to the bread pan.
- Add whole wheat flour, bread flour (if using), and vital wheat gluten (if using). Create a well.
- Add yeast to the well.
- Select the “Whole Wheat” program and desired crust color.
- Press start.
Sweet Bread (Brioche or Challah-style)
Many Toastmaster machines include a “Sweet” program, ideal for enriched doughs.
- 1 cup warm milk
- 2 large eggs, lightly beaten
- 1/4 cup unsalted butter, melted and cooled slightly
- 1/4 cup granulated sugar
- 1 tsp salt
- 3.5 cups bread flour
- 2.25 tsp active dry yeast or bread machine yeast
Instructions:
- Add warm milk, beaten eggs, cooled butter, sugar, and salt to the bread pan.
- Add bread flour, making a well.
- Add yeast to the well.
- Select the “Sweet” program and desired crust color.
- Press start. If your machine has an “add-in” signal, you can add dried fruits or chocolate chips when it beeps.
Adapting Recipes and Special Breads
- Dough Cycle: Use the “Dough” cycle to prepare dough for pizzas, dinner rolls, cinnamon buns, or bagels. Once the cycle finishes, remove the dough, shape it, and bake it in a conventional oven.
- Quick Bread Cycle: This cycle is for recipes that use baking powder or baking soda as leavening agents, not yeast. Think banana bread or zucchini bread.
- Gluten-Free (GF) Baking: While many older Toastmaster models don’t have a dedicated GF setting, you can often adapt GF recipes using the “Basic” or “Whole Wheat” cycle, as GF flours don’t require kneading to develop gluten. Ensure your recipe uses a suitable gluten-free flour blend and xanthan gum if necessary. Always follow the specific instructions for layering GF ingredients.
Troubleshooting Common Bread Maker Issues
Even with the most reliable Toastmaster machine, you might encounter issues. Here’s how to address them:
Bread Not Rising
- Check Yeast: Ensure your yeast is fresh and active. Test it by dissolving a teaspoon in warm water with a pinch of sugar; it should foam within 5-10 minutes.
- Water Temperature: Water that’s too hot will kill the yeast; too cold, and it won’t activate. Aim for around 80-100°F (27-38°C).
- Ingredient Order: Make sure yeast is added last and doesn’t directly contact salt or liquids until mixing begins.
- Flour Type/Amount: Using insufficient bread flour or too much dense whole wheat flour can inhibit rise.
- Machine Power: Ensure the bread maker is on a dedicated circuit to avoid power fluctuations affecting the rise cycle. If power is lost during a cycle (before baking), some Toastmaster models (e.g., 1148X) allow restarting the program, or you can bake the dough in a conventional oven.
Bread Burnt or Too Dark
- Crust Setting: Double-check that you haven’t selected the “Dark” crust setting inadvertently.
- Sugar Content: Too much sugar in the recipe can lead to darker crusts.
- Heating Element: Ensure the heating element is clean and free of debris that could cause uneven heating.
Bread Dry or Crumbly
- Liquid Content: The dough might be too dry. Try adding a tablespoon or two more liquid in future batches.
- Flour Quality: Flour can vary in moisture content. Adjust liquid slightly if needed.
- Altitude: High altitude can affect baking. You might need to adjust liquid or flour slightly.
Machine Not Operating
- Power Connection: Ensure the machine is properly plugged into a working outlet.
- Circuit Breaker: Check if the circuit breaker has tripped.
- Overload: Bread makers should ideally be on a separate electrical circuit. An overloaded circuit can prevent proper operation.
- Damaged Cord/Plug: If the cord or plug is damaged, do not use the appliance. Contact customer service.
For specific technical issues or parts replacement, consult your Toastmaster manual or their customer service (e.g., 1-800-947-3744 for some models).
Where to Buy a Bread Maker
Finding a Toastmaster bread maker today can involve a mix of new and secondhand markets, reflecting the brand’s long history and durability.
- Online Retailers: While new Toastmaster bread makers might be less common on major online platforms compared to other brands, you can still find them, or similar budget-friendly alternatives. Always check product descriptions and reviews carefully.
- Electronics and Department Stores: Some larger retail chains occasionally carry Toastmaster appliances, especially during promotional periods.
- Secondhand Marketplaces: Due to their reputation for lasting many years, Toastmaster bread makers are frequently available on platforms like eBay, Facebook Marketplace, and at thrift stores or garage sales. This can be an excellent way to acquire a functional machine at a very low cost. When buying secondhand, always inspect the bread pan for wear on the non-stick coating and ensure the kneading blade and paddle shaft are intact.
- Specialty Appliance Stores: Less common for Toastmaster, but these stores might offer a broader range of brands and expert advice.
Bread Maker Buying Guide
When making your final decision on a bread maker, whether it’s a Toastmaster or another brand, a structured approach helps ensure you make the best choice.
- Budget Alignment: Toastmaster bread makers are generally at the lower end of the price spectrum, offering great value. If your budget is tight but you still want reliable performance, a Toastmaster is a strong contender.
- Compare Features to Needs: Refer back to your determined usage needs. Does the machine offer the loaf size, programs, and convenience features (like delay timer) that are important to you? For basic baking, Toastmaster excels.
- Read User Reviews: Customer reviews provide invaluable real-world insights into a machine’s performance, durability, and any common quirks. Pay attention to feedback on bread quality, ease of use, and longevity. Many Toastmaster owners praise their machines for lasting a long time.
- Warranty and Customer Support: Always check the warranty period and the availability of customer support and replacement parts. While older Toastmaster models might have limited parts availability, the brand generally has a service contact for queries.
“A bread maker, especially a simple and robust one like many Toastmaster models, empowers home bakers to enjoy fresh, wholesome bread without the intimidation of traditional baking. It’s an investment in both taste and convenience.” – Reviewrdous Admin, Bread Machine Expert with 10+ Years Experience
Conclusion
The Toastmaster bread maker, with its legacy of simplicity and durability, remains a fantastic option for anyone looking to effortlessly enjoy homemade bread. Whether you’re a novice baker or simply seeking a convenient way to integrate fresh loaves into your daily routine, a Toastmaster machine provides essential functionality, dependable performance, and excellent value. From perfectly risen white bread to hearty whole wheat and specialized doughs, this appliance handles the heavy lifting, leaving you with the joy of warm, fragrant results.
Are you ready to transform your kitchen into a personal bakery with a Toastmaster bread maker?
Frequently Asked Questions
What are the main advantages of a Toastmaster bread maker?
Toastmaster bread makers are primarily known for their affordability, ease of use, and surprising durability. They are an excellent entry-level option for new bakers, offering essential programs and reliable performance without a significant investment. Many users report these machines lasting for many years.
Can Toastmaster bread makers make gluten-free bread?
While many older Toastmaster models may not have a dedicated gluten-free setting, you can often adapt gluten-free recipes using the “Basic” or “Whole Wheat” cycles. It’s crucial to follow specific gluten-free recipes that account for the properties of gluten-free flours and the yeast-free nature of some quick bread recipes.
What loaf sizes do Toastmaster bread makers typically offer?
Most Toastmaster bread makers are designed to produce 1.5-pound or 2-pound loaves. Some specific models may also offer a 1-pound option, providing versatility for different household needs and bread consumption levels.
How do I clean my Toastmaster bread maker?
To clean your Toastmaster bread maker, first, unplug it and allow it to cool completely. Wipe the exterior with a damp cloth. Wash the non-stick bread pan and kneading blade with warm, soapy water, avoiding abrasive cleaners. Ensure all parts are thoroughly dry before reassembly or storage.
What should I do if my bread doesn’t rise in my Toastmaster machine?
If your bread doesn’t rise, first check your yeast’s freshness and the water temperature. Ensure the yeast hasn’t come into premature contact with salt or liquid. Also, verify that your flour is fresh and correctly measured, and that the machine is on a stable power supply.
