Are you dreaming of waking up to the irresistible aroma of freshly baked bread without the hassle of kneading and waiting? A homemade bread maker transforms this dream into a daily reality, offering a convenient, cost-effective, and deeply satisfying way to enjoy warm, delicious loaves right from your kitchen. This comprehensive guide will walk you through everything you need to know, from understanding the various features of these remarkable appliances to mastering delicious recipes and troubleshooting common issues, ensuring you select the perfect homemade bread maker for your needs and become a home baking pro.
Bread Makers: An Overview
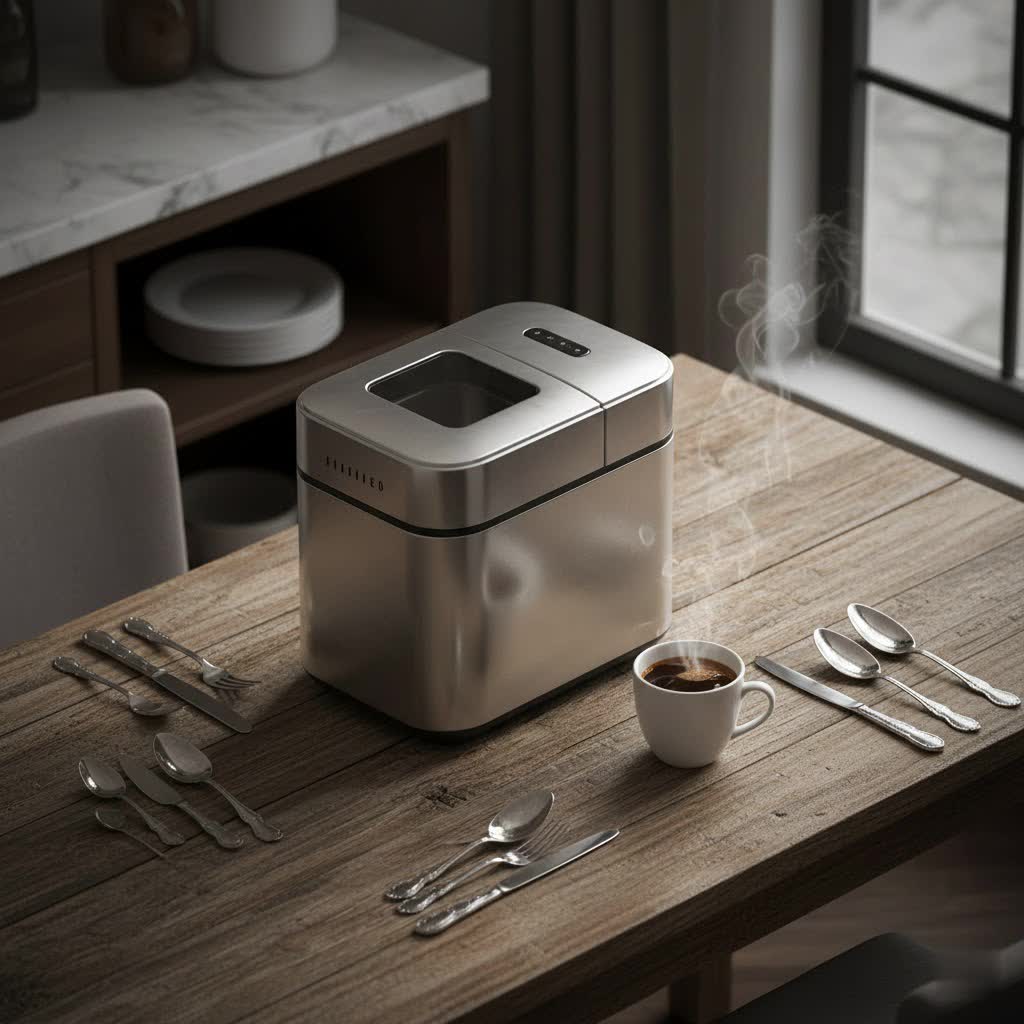
A homemade bread maker is a countertop appliance that automates the entire bread-making process, from mixing and kneading to rising and baking. It combines ingredients, develops the dough, allows it to proof in a temperature-controlled environment, and then bakes it into a perfect loaf, all with minimal intervention from you. While the earliest models were somewhat basic, modern bread makers have evolved significantly, offering a wide array of programs and features.
The history of bread makers traces back to the 1980s, when Japanese company Matsushita Electric (now Panasonic) introduced the first automatic bread-making machine. Initially a novelty, these machines quickly gained popularity as consumers discovered the immense convenience and joy of fresh, homemade bread. Today, the market boasts a diverse range of models, from compact units ideal for small kitchens to professional-grade machines with advanced customization options, catering to every baker’s preference.
Common types of homemade bread makers vary by capacity, typically ranging from 1-pound loaves perfect for individuals or couples, to larger 2-pound machines suitable for families. Beyond size, they differ in the number of pre-programmed cycles, the shape of the bread pan (vertical vs. horizontal), and additional features like automatic ingredient dispensers or dual kneading paddles.
Why You Should Use a Homemade Bread Maker
Embracing a homemade bread maker in your kitchen brings a multitude of benefits, making it an invaluable appliance for both seasoned bakers and complete novices. The sheer convenience and time-saving aspects alone are often enough to convince many to invest in one. Simply adding ingredients and pressing a button liberates you from the labor-intensive process of traditional bread-making.
One of the most compelling reasons to own a bread maker is the unparalleled ability to customize your recipes and ingredients. You have complete control over what goes into your bread, allowing you to choose organic flours, reduce sugar or salt, or add nutritious seeds and grains. This level of personalization is crucial for those with dietary restrictions, such as gluten sensitivity, or anyone simply aiming for a healthier lifestyle.
Furthermore, making bread at home ensures superior food safety and hygiene. You know exactly how your bread is prepared, free from commercial additives, preservatives, or unknown processing methods. This peace of mind is invaluable for families and health-conscious individuals. Ultimately, the greatest reward is the ability to enjoy warm, aromatic, and incredibly fresh bread anytime you desire, a luxury that store-bought loaves simply cannot match.
Guide to Choosing the Right Homemade Bread Maker
Selecting the ideal homemade bread maker can seem daunting with the array of options available. However, by considering your personal needs and understanding key features, you can make an informed decision that will bring years of baking pleasure. The right machine will seamlessly integrate into your lifestyle and culinary habits.
Determine Your Needs
|
Our Picks for the Best Bread Maker in 2026
As an Amazon Associate I earn from qualifying purchases.
|
||
| Num | Product | Action |
|---|---|---|
| 1 | MERIOR 25-IN-1 Bread Maker with Visible Lid - 2lb Automatic Machine, Auto Nut Dispenser, 13-Hour Delay Timer, One-Touch Control & Recipes – Easy Operation, High Success for Homemade Bread |

|
| 2 | Cuisinart Bread Maker Machine, Stainless Steel Convection Bread Machine with 16 Menu Options, 3 Loaf Sizes Up to 2 Lb., 3 Crust Colors, Includes Measuring Cup, Spoon & Kneading Hook, CBK-210 |
|
| 3 | 2LB Bread Maker Machine, OSIPOTO 17 in 1 Automatic Stainless Steel Bread Machine, Non-stick, Beginner-Friendly Controls, 15 Hour Timer, Easy to Clean Low Noise, High Success Rate for Homemade Bread |
|
| 4 | KBS Pro 710W 2LB Bread Maker, Stainless Steel 17-in-1 Smart Bread Machine with Healthy Ceramic Pan, Automatic Nut Dispenser, Tempered Glass Touch Panel, 3 Crust Colors, 15H Timer& Keep-Warm, Recipes |
|
| 5 | KITCHENARM 29-in-1 SMART Bread Machine with Gluten Free Setting 2LB 1.5LB 1LB Bread Maker Machine with Homemade Cycle - Stainless Steel Breadmaker with Recipes Whole Wheat Bread Making Machine |
|
| 6 | KBS Premium 2LB Convection Bread Maker Dual Heaters, 710W Stainless Steel 17-in-1 Bread Machine Healthy Ceramic Pan, Nut Dispenser,Touch Panel, 3 Loaf Sizes 3 Crust Colors, 15H Timer,Low Noise,Recipes |
|
| 7 | Neretva Bread Maker, 20-IN-1 2LB Bread Machine Dual Heater Bread Maker Machine Automatic with Nonstick Ceramic Pan, 15H Timer & 1H Keep Warm Set, Low Noise, Stainless Steel Breadmaker Recipe-Green |
|
| 8 | Cuisinart Bread Maker Machine, Stainless Steel Automatic Bread Machine with 12 Menu Options, 3 Loaf Sizes up to 2 Lb., 3 Crust Colors, Removable Nonstick Baking Pan & Kneading Paddle, CBK-110NAS |
|
| 9 | Neretva Bread Maker, 20-in-1 2LB Bread Machine Dual Heater & Nonstick Ceramic Pan Bread Makers Machine All Metal Compact for Gluten Free/Dough Maker/Meat Floss/Jam/Yogurt/Breadmaker Recipe-Light Green |
|
| 10 | Elite Gourmet Programmable Bread Maker, 2 lb Loaf, 3 Sizes, 19 Presets incl. Gluten-Free, Dough & Jam, Delay Timer, Black |
|
Before diving into specifications, consider how you intend to use your bread maker. Are you baking for a small family or regularly hosting gatherings? This will help determine the necessary loaf capacity. Do you have a passion for a specific type of bread, such as whole wheat, sourdough, or gluten-free, or do you prefer simple white loaves? Lastly, establish a realistic budget, as prices can vary significantly between basic and premium models.
Important Features to Consider
When evaluating different machines, several features stand out as particularly important. Dung tích và kích thước máy (Capacity and machine size) dictate the loaf size and how much counter space the appliance will occupy. Số lượng chương trình làm bánh (Number of baking programs) offers versatility, including settings for basic, whole wheat, French, sweet, and gluten-free breads, as well as dough-only cycles for pizza or pasta.
A chức năng hẹn giờ và giữ ấm (delay timer and keep-warm function) allows you to add ingredients in the evening and wake up to a fresh loaf, or ensures your bread stays warm until serving. Chất liệu và độ bền của máy (Material and durability) often correlate with price, with stainless steel models typically offering greater longevity than plastic ones. Finally, consider how dễ dàng vệ sinh và bảo trì (easy to clean and maintain) the bread pan and kneading paddles are, as this impacts daily convenience.
Reputable Homemade Bread Maker Brands
Several brands consistently rank high in performance and user satisfaction for homemade bread makers.
- Panasonic: Often lauded for consistently excellent results, producing well-risen loaves with an airy texture. Models like the SD-B2510 are frequently cited as top performers for overall quality, even their more affordable options.
- Zojirushi: Known for premium quality and features like dual kneading paddles and traditional rectangular loaf pans, which result in evenly mixed and perfectly shaped bread. The Virtuoso Plus is a favorite among enthusiasts.
- Breville: Offers highly customizable machines with intuitive LCD screens, appealing to those who enjoy experimenting with recipes and settings.
- Cuisinart: Provides compact and budget-friendly options that still deliver good results for basic breads, making them ideal for beginners or those with limited space.
- Hamilton Beach: A popular choice for entry-level models, offering straightforward operation and reliable performance at an accessible price point.
Each brand has its strengths, from Panasonic’s consistent baking to Zojirushi’s advanced features, allowing you to find a machine that aligns with your specific priorities and budget.
Comparison Table of Popular Homemade Bread Maker Models
Choosing a bread maker often comes down to balancing features, performance, and price. This table highlights some popular models and their key attributes to help you compare.
| Model | Loaf Capacity | Key Features | Price Range (Approx.) | Pros | Cons |
|---|---|---|---|---|---|
| Panasonic SD-B2510 | 1.5-2 lb | 21 programs, delay timer | $100-$150 | Excellent rise & texture, consistent results | No ingredient dispenser, long bake times |
| Zojirushi Virtuoso Plus | 2 lb | Dual paddles, top & bottom heaters, custom prog. | $300-$450 | Superior kneading, traditional loaf shape, versatile | High price, large footprint |
| Breville Custom Loaf | 1-2.5 lb | Auto ingredient dispenser, collapsible paddle | $250-$400 | Highly customizable, intuitive controls, diverse loaf sizes | Can be loud, some inconsistent browning |
| Cuisinart Compact Auto | 1-2 lb | 12 programs, 3 crust settings | $100-$150 | Compact, budget-friendly, good for basic bread | Fewer advanced features, less powerful motor |
| Hamilton Beach | 1.5-2 lb | 12 programs, gluten-free setting | $80-$120 | Affordable, easy to use, decent for beginners | Less durable, can be noisy during kneading |
This comparison offers a snapshot of what to expect from leading models, assisting you in identifying a machine that best fits your baking ambitions and budget.
Detailed Guide to Using Your Homemade Bread Maker
Operating a homemade bread maker is remarkably straightforward, but following a few key steps and tips can guarantee consistently perfect results. Think of your bread maker as a smart assistant – it performs the hard work, but still needs clear instructions.
Begin by preparing your machine. Ensure the bread pan is clean and the kneading paddle(s) are securely attached at the bottom. Some recipes recommend lightly greasing the pan, though many modern non-stick pans don’t require it. Always consult your machine’s manual for specific instructions, as minor differences can impact your outcome.
Ingredient selection and precise measurement are paramount. Use fresh ingredients, especially yeast, and check expiration dates. For most bread makers, the order of adding ingredients is crucial: typically, liquids first (water, milk, oil), followed by dry ingredients (flour, sugar, salt), with the yeast placed last, often in a small well on top of the flour, to prevent premature activation from interacting with liquids or salt. Accurate measurement, especially for flour, is vital; spooning flour into a measuring cup and leveling it off, rather than scooping directly, prevents over-packing and dense bread. The ideal water temperature for yeast activation is usually between 105-110°F (40-43°C) – too cold and yeast won’t activate, too hot and it will die.
Once ingredients are loaded, setting the program is simple. Select the cycle appropriate for your recipe (e.g., “Basic White,” “Whole Wheat,” “Gluten-Free,” or “Dough”). Choose your desired crust color (light, medium, dark) and loaf size (1 lb, 1.5 lb, 2 lb). Many machines also offer a delay timer, allowing you to program baking to finish hours later. Press start, and let your machine do the rest!
For tips to make delicious and successful bread, avoid opening the lid during the kneading and rising cycles, as this can affect temperature and humidity. Monitor the dough during the first few minutes of kneading; it should form a smooth, elastic ball. If it’s too dry, add a teaspoon of water at a time; if too wet, add a teaspoon of flour. Once baked, carefully remove the hot bread pan, then invert the loaf onto a wire rack to cool completely for at least 20-30 minutes before slicing. This prevents a gummy texture and allows steam to escape.
Cleaning and maintenance involve washing the bread pan and kneading paddle(s) with warm, soapy water after each use. Avoid abrasive scrubbers that could damage the non-stick coating. Wipe down the interior and exterior of the machine with a damp cloth. Regular cleaning ensures longevity and optimal performance.
Delicious Homemade Bread Maker Recipes
The versatility of a homemade bread maker extends far beyond basic white bread. With your machine, you can effortlessly create a wide range of delectable loaves to suit any taste or occasion.
Basic White Bread Recipe
This fundamental recipe is a perfect starting point for any beginner.
- 1 cup warm water (105-110°F / 40-43°C)
- 2 tbsp vegetable oil or melted butter
- 3 cups bread flour (or all-purpose flour for a slightly denser loaf)
- 2 tbsp granulated sugar
- 1 tsp salt
- 2 tsp active dry or bread machine yeast
Add ingredients to your bread machine pan in the order specified by your manual (typically liquids, then dry, then yeast). Select the “Basic” or “White Bread” cycle, chosen loaf size, and crust preference. Press start and enjoy the aroma!
Whole Wheat Bread Recipe
For a healthier, heartier option, whole wheat bread is a fantastic choice.
- 1 ¼ cups warm water
- 2 tbsp honey or molasses
- 2 tbsp vegetable oil
- 3 cups whole wheat flour
- 1 tsp salt
- 2 tsp active dry or bread machine yeast
Follow your machine’s instructions for adding ingredients. Select the “Whole Wheat” cycle, and choose your desired crust color and loaf size. Whole wheat loaves tend to be denser, so do not be alarmed if the rise isn’t as dramatic as white bread.
Sweet Bread (Cinnamon Raisin)
Indulge your sweet tooth with a delightful cinnamon raisin bread, perfect for breakfast or a snack.
- 1 cup warm milk
- ¼ cup melted butter
- 1 egg, beaten
- 3 cups bread flour
- ¼ cup granulated sugar
- 1 tsp salt
- 1 ½ tsp ground cinnamon
- 2 tsp active dry or bread machine yeast
- ½ cup raisins (add at the “mix-in” beep if your machine has a dispenser, or manually add during the last kneading cycle)
Layer ingredients according to your machine’s manual. Use the “Sweet Bread” or “Basic” cycle. Enjoy toasted with butter!
Gluten-Free Bread
For those with dietary needs, many bread makers offer a dedicated gluten-free cycle.
- 1 ¼ cups warm water
- 2 tbsp vegetable oil
- 2 large eggs, lightly beaten
- 1 ½ tsp apple cider vinegar
- 2 ¾ cups gluten-free bread flour blend (ensure it contains xanthan gum or add 1 tsp separately)
- 2 tbsp granulated sugar
- 1 tsp salt
- 2 ¼ tsp active dry or bread machine yeast
Place liquid ingredients first, then dry, and yeast last. Select the “Gluten-Free” cycle on your machine. The dough for gluten-free bread is typically stickier and more batter-like, so do not expect a traditional dough consistency.
Troubleshooting Common Homemade Bread Maker Issues
Even with the best homemade bread maker, occasional issues can arise. Understanding how to troubleshoot common problems will save you frustration and lead to more successful baking experiences.
If your bread is not rising or collapses, the most frequent culprit is often the yeast. Ensure your yeast is fresh and active; expired yeast won’t work. Also, check that the water temperature is correct – water that is too hot will kill the yeast, while water that is too cold will inhibit its activation. Ensure yeast doesn’t directly contact salt or liquids until the mixing cycle begins, as both can hinder its action.
A dense or heavy loaf is another common complaint. This can often be attributed to improper flour measurement; packed flour means too much flour, leading to a dry, heavy dough. Always fluff flour before spooning it into a measuring cup and leveling. Using the wrong type of flour, such as all-purpose instead of bread flour for certain recipes, can also result in a denser texture due to lower gluten content.
If your bread is burned on top or unevenly browned, check your crust setting (light, medium, dark) to ensure it’s not set too high. Some machines, particularly those without a top heating element, might struggle with even browning. Experimenting with different crust settings can help. If your machine is older, the heating element might be losing efficiency.
Should your homemade bread maker not activate or function correctly, first ensure it’s properly plugged in and the bread pan is securely seated. Check the lid to ensure it’s closed completely. If the problem persists, consult your machine’s manual for specific error codes or troubleshooting steps, or contact the manufacturer’s customer support.
“A common mistake beginners make is overlooking the precise temperature of their water and the freshness of their yeast. These two factors are critical for a perfect rise, regardless of your recipe or machine.” – Chef Anya Petrova, Master Baker and Appliance Reviewer
Where to Buy a Homemade Bread Maker
Acquiring your own homemade bread maker is easier than ever, with numerous reputable retailers offering a wide selection of models. Whether you prefer the tactile experience of shopping in person or the convenience of online browsing, you’ll find plenty of options.
Các cửa hàng điện máy uy tín (Reputable electronics stores) such as Best Buy, Walmart, or Target often stock a range of bread makers, allowing you to see models in person and compare sizes and features. Sales associates can also provide assistance, though their expertise might vary.
Các trang web bán hàng trực tuyến (Online retail websites) like Amazon, King Arthur Baking, or the official websites of brands like Panasonic, Zojirushi, and Breville, offer the broadest selection and competitive pricing. Online platforms also provide the advantage of extensive customer reviews, which can be invaluable in making your choice.
Occasionally, you might find deals at các chợ và siêu thị (local markets and supermarkets), especially during holiday sales or promotional events. However, their selection is typically more limited. For the latest models and best deals, online retailers often provide the most comprehensive shopping experience.
Homemade Bread Maker Buying Guide
When investing in a homemade bread maker, several factors should guide your decision to ensure you select a machine that perfectly matches your baking aspirations. Consider these elements carefully to maximize your satisfaction.
First, các yếu tố cần xem xét khi mua máy làm bánh mì (factors to consider when buying a bread maker) include the range of programs (basic, whole wheat, gluten-free, dough, rapid bake), loaf capacity, and whether it has advanced features like an automatic ingredient dispenser or custom cycle programming. Think about how frequently you’ll bake and the types of bread you want to make.
Your ngân sách dự kiến (anticipated budget) is a crucial determinant. While entry-level machines are affordable and effective for basic needs, higher-priced models often come with superior build quality, more features, and greater durability. Determine how much you’re willing to spend to narrow down your choices.
So sánh giá cả và chất lượng (Comparing prices and quality) across different brands and models is essential. Don’t simply opt for the cheapest option; a slightly higher investment can lead to better performance and a longer lifespan. Look for sales and discounts, but prioritize value over minimal cost.
Đọc đánh giá của người dùng khác (Reading user reviews) provides real-world insights into a machine’s performance, ease of use, common quirks, and reliability. Pay attention to consistent feedback regarding bread texture, noise levels, and customer service. Sites like Amazon, retailer review sections, and specialized baking forums are excellent resources.
Finally, always check the chính sách bảo hành và đổi trả (warranty and return policy) before purchasing. A good warranty offers peace of mind and protects your investment against manufacturing defects. Understanding the return process is also important in case the machine doesn’t meet your expectations.
Conclusion
A homemade bread maker is more than just an appliance; it’s a gateway to a world of fresh, aromatic, and customizable bread, transforming your kitchen into a personal bakery. By understanding the diverse features available, selecting a reputable brand, and following simple usage guidelines, you can effortlessly create delicious loaves that are perfectly tailored to your taste and dietary needs. Whether you crave a simple white loaf, a hearty whole wheat, or a specialized gluten-free option, your bread maker stands ready to deliver.
Embrace the joy of effortless home baking and discover the unparalleled satisfaction of serving warm, fresh bread to your family and friends. Which homemade bread maker will you choose to start your baking journey?
Frequently Asked Questions
Can I use regular all-purpose flour in my homemade bread maker?
Yes, you can generally use all-purpose flour, but bread flour is often recommended for taller, chewier loaves as it has a higher protein (gluten) content. If using all-purpose flour, your bread might be slightly denser, and you may need minor adjustments to the liquid amount.
Why is my bread machine bread dense and heavy?
Dense bread is usually due to too much flour (often from improper measuring by packing it), too little liquid, or inactive yeast. Ensure you spoon and level your flour, use warm (not hot) water, and check your yeast’s expiration date.
