Imagine waking up to the irresistible aroma of freshly baked white bread, its crust golden and its interior impossibly soft, all with minimal effort. This isn’t a dream for seasoned bakers; it’s an everyday reality made possible by the humble yet powerful bread maker. Whether you’re a complete novice or looking to refine your homemade white bread skills, this comprehensive guide will equip you with everything you need to bake perfect white loaves right in your kitchen.
Bread Makers: An Overview
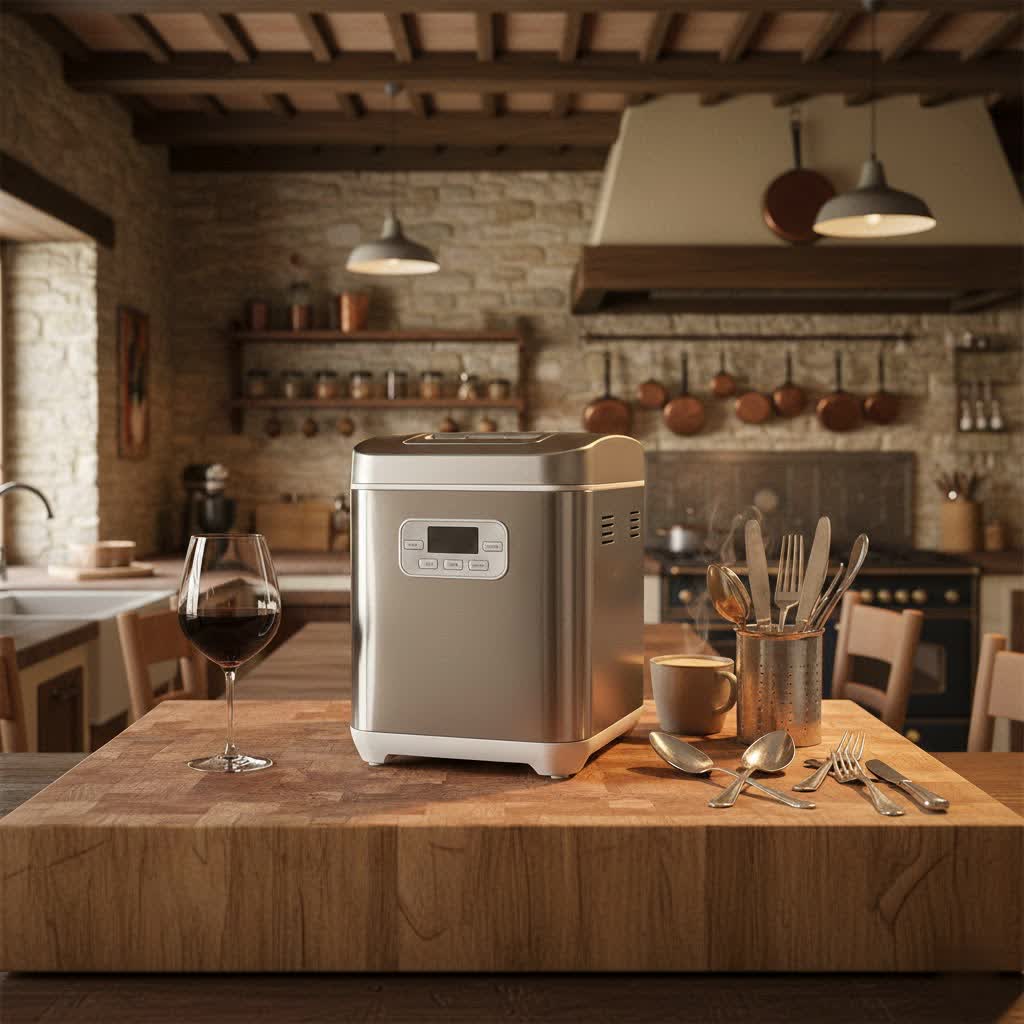
A bread maker is a dedicated kitchen appliance designed to automate the entire bread-making process, from mixing and kneading to proofing and baking. It’s a true “set-it-and-forget-it” device, simplifying what can often seem like a complex culinary art.
The concept of automated bread-making evolved from the desire to bring the convenience of fresh bread into every home without the intensive labor traditionally required. Early bread machines paved the way for today’s sophisticated models, which offer multiple programs and features. Modern bread makers come in various types, typically differing in capacity (producing loaves from 1 to 3 pounds), pan orientation (vertical or horizontal), and the number of kneading paddles (single or dual). Some feature numerous pre-programmed settings for various bread types, doughs, jams, and even cakes, while others focus on core functionalities.
Why You Should Use a Bread Maker for White Bread
Embracing a bread maker for your white bread needs offers a multitude of compelling benefits that elevate your home baking experience.
Firstly, convenience and time-saving are paramount. A bread maker handles all the tedious steps—mixing, kneading, and proofing—allowing you to simply add ingredients and return hours later to a freshly baked loaf. This is especially valuable for busy individuals or those with physical limitations who find traditional kneading challenging. Many models also include a delay timer, letting you prepare ingredients in advance and schedule the baking cycle to finish just in time for breakfast or dinner.
Secondly, a bread maker provides unparalleled control over ingredients, ensuring hygiene and allowing for healthier choices. Unlike store-bought white bread, which can contain numerous additives and preservatives, making your own means you know exactly what goes into each loaf. You can select organic flours, adjust sugar and salt levels, and avoid artificial ingredients, tailoring the bread to your dietary preferences and health goals.
Finally, the consistent and delicious results speak for themselves. Bread makers are engineered to maintain optimal temperatures and execute precise kneading cycles, which are crucial for developing gluten and achieving the perfect rise and texture for white bread. This reliability minimizes baking mishaps, ensuring soft, airy loaves with a perfectly browned crust almost every time. The aroma of warm, homemade white bread filling your kitchen is an added bonus, creating a truly comforting and inviting atmosphere.
Choosing the Right Bread Maker for Perfect White Bread
Selecting the ideal bread maker is key to consistently baking delicious white bread. Consider these factors to find a machine that aligns with your specific baking habits and preferences.
Determine Your Usage Needs
|
Our Picks for the Best Bread Maker in 2026
As an Amazon Associate I earn from qualifying purchases.
|
||
| Num | Product | Action |
|---|---|---|
| 1 | KITCHENARM 29-in-1 SMART Bread Machine with Gluten Free Setting 2LB 1.5LB 1LB Bread Maker Machine with Homemade Cycle - Stainless Steel Breadmaker with Recipes Whole Wheat Bread Making Machine |

|
| 2 | 2LB Bread Maker Machine, OSIPOTO 17 in 1 Automatic Stainless Steel Bread Machine, Non-stick, Beginner-Friendly Controls, 15 Hour Timer, Easy to Clean Low Noise, High Success Rate for Homemade Bread |
|
| 3 | MERIOR 25-IN-1 Bread Maker with Visible Lid - 2lb Automatic Machine, Auto Nut Dispenser, 13-Hour Delay Timer, One-Touch Control & Recipes – Easy Operation, High Success for Homemade Bread |
|
| 4 | KBS Pro 710W 2LB Bread Maker, Stainless Steel 17-in-1 Smart Bread Machine with Healthy Ceramic Pan, Automatic Nut Dispenser, Tempered Glass Touch Panel, 3 Crust Colors, 15H Timer& Keep-Warm, Recipes |
|
| 5 | Cuisinart Bread Maker Machine, Stainless Steel Automatic Bread Machine with 12 Menu Options, 3 Loaf Sizes up to 2 Lb., 3 Crust Colors, Removable Nonstick Baking Pan & Kneading Paddle, CBK-110NAS |
|
| 6 | Neretva Bread Maker, 20-in-1 2LB Bread Machine Dual Heater & Nonstick Ceramic Pan Bread Makers Machine All Metal Compact for Gluten Free/Dough Maker/Meat Floss/Jam/Yogurt/Breadmaker Recipe-Light Green |
|
| 7 | Elite Gourmet Programmable Bread Maker, 2 lb Loaf, 3 Sizes, 19 Presets incl. Gluten-Free, Dough & Jam, Delay Timer, Black |
|
| 8 | Neretva Bread Maker, 20-IN-1 2LB Bread Machine Dual Heater Bread Maker Machine Automatic with Nonstick Ceramic Pan, 15H Timer & 1H Keep Warm Set, Low Noise, Stainless Steel Breadmaker Recipe-Green |
|
| 9 | Cuisinart Bread Maker Machine, Stainless Steel Convection Bread Machine with 16 Menu Options, 3 Loaf Sizes Up to 2 Lb., 3 Crust Colors, Includes Measuring Cup, Spoon & Kneading Hook, CBK-210 |
|
| 10 | KBS Premium 2LB Convection Bread Maker Dual Heaters, 710W Stainless Steel 17-in-1 Bread Machine Healthy Ceramic Pan, Nut Dispenser,Touch Panel, 3 Loaf Sizes 3 Crust Colors, 15H Timer,Low Noise,Recipes |
|
Before diving into features, think about how you’ll primarily use your bread maker. Are you baking for a small family, or do you need larger loaves for entertaining? Most bread makers offer different loaf sizes, typically ranging from 1 to 2.5 pounds. For a standard white sandwich bread, a 1.5 to 2-pound capacity is usually sufficient. Consider how often you plan to bake and the types of white bread you enjoy—a simple soft white loaf or something richer like a milk bread. Your budget also plays a significant role; entry-level models are great for basic white bread, while higher-end machines offer more versatility and advanced features.
Key Features to Consider
Several features can enhance your bread-making experience, especially for white bread:
- Capacity and Loaf Shape: As mentioned, match the capacity to your needs. Some machines, particularly those with dual kneading paddles, produce more traditional rectangular loaf shapes, which are ideal for sandwich bread.
- Number of Programs: Look for a dedicated “White Bread” or “Basic” cycle, which is optimized for white flour. Additional settings for dough, quick bread, or even gluten-free options offer greater versatility if you plan to experiment beyond white bread.
- Delay Timer and Keep Warm Function: A delay timer allows you to program the machine to start baking hours later, ensuring fresh bread exactly when you want it. A “keep warm” function keeps the bread warm for a period after baking, which can be convenient.
- Crust Color Settings: Most machines offer light, medium, and dark crust settings, allowing you to customize your white bread’s exterior to your preference.
- Material and Durability: Stainless steel exteriors often indicate a more robust build, while non-stick bread pans are essential for easy loaf removal and cleaning.
- Ease of Cleaning and Maintenance: A removable, non-stick pan is a must-have for hassle-free cleanup. Dishwasher-safe parts are a bonus.
- Automatic Dispensers: Some advanced models include automatic dispensers for adding fruits, nuts, or seeds at the optimal time during the kneading cycle, though this might be less critical for a plain white bread.
Reputable Bread Maker Brands
Several brands consistently receive high praise for their bread makers, particularly for their ability to produce excellent white bread:
- Zojirushi: Often considered a premium brand, Zojirushi models like the Virtuoso Plus are lauded for their dual paddles, which ensure thorough kneading and a traditional rectangular loaf shape. They are known for consistent, high-quality results.
- Panasonic: Panasonic bread makers are frequently recommended for their reliability, ease of use, and a wide range of pre-programmed settings, including excellent basic white bread cycles.
- Cuisinart: Cuisinart offers compact and reliable options that produce great-tasting loaves, often at a more budget-friendly price point. Their machines are good for basic bread-making.
- Breville: The Breville Custom Loaf bread maker stands out for its extensive customization options and unique features like a collapsible kneading paddle that minimizes the hole in the bottom of the loaf.
- Hamilton Beach: A popular choice for those seeking good value, Hamilton Beach machines offer a decent range of programs and capacities suitable for everyday white bread baking.
“For truly exceptional white bread, the right bread maker combines precise temperature control with robust kneading, creating a perfect environment for gluten development.” – Expert Baker, Anna Chen
Comparing Popular Bread Maker Models
When seeking the perfect bread maker for white bread, certain models consistently rise to the top, each with its unique strengths.
The Zojirushi Home Bakery Virtuoso Plus is often hailed as a top-tier choice for its superior performance, especially in creating perfectly shaped, soft white loaves. Its dual kneading paddles ensure thorough mixing and uniform dough development, resulting in a classic rectangular loaf—ideal for sandwiches. Users praise its consistency in producing pillowy soft white bread with excellent crust browning due to both top and bottom heating elements. While it comes at a higher price, its reliability and quality results often justify the investment for serious home bakers.
For those looking for a balance of performance and value, the Cuisinart Compact Automatic Bread Maker is a strong contender. It might not boast all the advanced features of premium models, but it delivers very good basic white bread with an evenly browned crust. It’s a solid, budget-friendly option for daily bread baking, making it a favorite for many households.
The Breville Custom Loaf Bread Maker offers extensive customization, appealing to bakers who enjoy experimenting. While it might produce a slightly more “rustic” loaf compared to the perfectly uniform Zojirushi, its unique collapsible kneading paddle minimizes the common issue of a large hole at the bottom of the bread. It also features automatic ingredient dispensers, ensuring even distribution of any additions, though for a pure white bread, this is less critical.
Panasonic bread makers, such as the SD-B2510 or SD-YR2550, are known for their intuitive operation and a wide array of programs, including excellent settings for basic white and other doughs. They consistently produce well-risen loaves with good texture and browning, making them a reliable choice for beginners and experienced users alike.
While all these machines can make excellent white bread, consider the loaf shape, specific features like dual paddles or collapsible paddles, and your budget when making your final decision. The Zojirushi generally offers the most traditional loaf shape and consistent texture, while Cuisinart provides great value, and Breville caters to customization enthusiasts.
Step-by-Step Guide to Making White Bread in Your Bread Maker
Baking delicious white bread in your bread maker is a straightforward process once you understand the key steps and tips.
Preparing Your Bread Maker
First, ensure your bread maker pan is clean and the kneading paddle(s) are correctly inserted onto the shaft at the bottom of the pan. This is a crucial step that is sometimes overlooked, but vital for proper mixing.
Accurate Ingredient Measurement
Precision is paramount in bread making. While recipes often list ingredients in cups, weighing your ingredients, especially flour, with a digital kitchen scale provides the most accurate results and helps prevent dense or crumbly loaves. If using measuring cups, spoon the flour lightly into the cup and level it off without compacting it. Ensure all ingredients are at room temperature, particularly liquids and butter, as this helps activate the yeast effectively. Warm water (around 110-120°F or 43-49°C) is ideal for yeast activation.
Adding Ingredients in the Correct Order
The order of ingredients is critical for proper mixing and yeast activation. While specific bread maker models may recommend a slightly different order, a common sequence is:
- Liquids: Water or milk (warmed).
- Fats: Oil or melted butter.
- Sweeteners: Sugar or honey.
- Salt: Place salt away from the yeast to prevent it from inhibiting yeast activity.
- Flour: Carefully add the flour, creating a small mound.
- Yeast: Make a small indentation in the center of the flour mound and add the yeast there, ensuring it doesn’t come into direct contact with the liquid or salt until the mixing cycle begins.
Setting the Program and Starting the Machine
Once all ingredients are in the pan, insert the pan into the bread maker and close the lid. Select the appropriate program—typically “Basic White,” “White Bread,” or “Normal” cycle. Choose your desired loaf size (e.g., 1.5 lb or 2 lb) and crust color (light, medium, or dark). Then, press start and let your machine do the rest.
Tips for a Perfect Loaf
- Monitor Dough Consistency: During the first 10-15 minutes of kneading, occasionally check the dough. It should form a smooth, elastic ball that pulls away cleanly from the sides of the pan. If it’s too sticky, add flour one tablespoon at a time; if too dry, add water one tablespoon at a time until the desired consistency is reached.
- Cool Completely: Once the baking cycle is complete, promptly remove the bread pan using oven mitts. Invert the pan to release the loaf onto a wire cooling rack. Allow the bread to cool completely (at least 1-2 hours) before slicing. Slicing warm bread can lead to a gummy texture.
- Fresh Yeast: Always use fresh yeast and check its expiration date. Expired yeast is a common cause of bread not rising.
Delicious White Bread Recipes for Your Bread Maker
Here are a couple of versatile white bread recipes perfect for your bread maker, offering a soft texture and classic flavor.
Basic White Bread (2 lb loaf)
This recipe yields a soft, versatile white bread, perfect for sandwiches or toast.
Ingredients:
- 1 ¼ cups warm water (110°F / 45°C)
- 2 tablespoons vegetable oil or melted butter
- 2 tablespoons granulated sugar
- 1 ½ teaspoons salt
- 3 ½ cups bread flour (or all-purpose flour for a slightly denser crumb)
- 2 teaspoons active dry yeast or bread machine yeast
Instructions:
- Add ingredients to your bread maker pan in the order recommended by your manufacturer (typically liquids first, then dry ingredients, flour, and yeast last).
- Select the “Basic White” or “White Bread” setting, 2 lb loaf size, and your preferred crust color.
- Press start.
- Once baked, remove the loaf immediately and cool on a wire rack before slicing.
Soft Milk White Bread (1.5 lb loaf)
Using milk instead of water creates a richer flavor and even softer crumb.
Ingredients:
- 1 cup warm milk (whole or 2%, 110°F / 45°C)
- 2 tablespoons unsalted butter, softened or melted
- 1 ½ tablespoons granulated sugar
- 1 teaspoon salt
- 3 cups bread flour
- 1 ½ teaspoons active dry yeast or bread machine yeast
Instructions:
- Follow the same ingredient layering method as the basic white bread recipe.
- Select the “Basic White” or “Sweet Bread” setting, 1.5 lb loaf size, and preferred crust color.
- Press start and allow the machine to complete the cycle.
- Cool completely on a wire rack before enjoying.
Recipe Variations:
- Honey White Bread: Substitute granulated sugar with an equal amount of honey for a subtle sweetness and different aroma.
- Garlic Herb White Bread: Add 1-2 teaspoons of dried herbs (like oregano or Italian seasoning) and 1-2 cloves of minced garlic (added with liquids) for a savory twist.
- Enriched White Bread: For an even richer loaf, add one egg yolk with the liquids. This will contribute to a more tender crumb and a slightly yellow hue.
Remember to always consult your bread maker’s manual for specific ingredient loading instructions and program recommendations, as they can vary by model.
Troubleshooting Common White Bread Issues in a Bread Maker
Even with the best intentions, baking bread can sometimes present challenges. Here’s how to diagnose and fix common problems you might encounter with white bread in your bread maker:
Flat Loaf or No Rise
- Cause: Often related to yeast. It could be expired, too little was used, or the liquid was too hot (killing the yeast) or too cold (inhibiting activation). Too much salt can also kill yeast. Incorrect flour type or insufficient liquid can also cause a flat, dense loaf.
- Solution: Always check yeast expiration dates and use fresh, active yeast. Ensure liquids are between 110-120°F (43-49°C). Measure salt accurately; too much can inhibit yeast. Use bread flour for better gluten development, and ensure your flour-to-liquid ratio is correct. Monitor dough consistency during the initial kneading and adjust with small additions of flour or water if needed.
Collapsed or Sunken Loaf
- Cause: Typically, too much yeast, too much liquid, or too much sugar. This causes the dough to rise too quickly and then collapse under its own weight during baking. High humidity or altitude can also contribute.
- Solution: Reduce yeast by ¼ to ½ teaspoon in your next batch. Slightly decrease the amount of liquid or sugar. In hot, humid weather, use cold water or choose a rapid cycle if your machine has one to prevent over-rising. For high altitudes, specific adjustments to yeast, liquid, and flour may be necessary.
Gummy or Raw Center
- Cause: Usually indicates too much liquid, the bread was not baked long enough, or the kneading paddle was not properly inserted, leading to uneven mixing.
- Solution: Reduce liquid by one tablespoon in your recipe. Ensure the kneading paddle is securely in place before adding ingredients. If your machine allows, try extending the baking time slightly or choosing a darker crust setting, which often bakes longer. Always cool the bread completely on a wire rack before slicing to allow the internal moisture to redistribute.
Heavy, Dense Texture
- Cause: Too much flour, not enough liquid, or insufficient kneading. Low-protein all-purpose flour can also result in a denser loaf compared to bread flour.
- Solution: Accurately measure flour, preferably by weight. Monitor the dough during kneading and add small amounts of water if it appears too stiff. Use bread flour, which has a higher protein content, for a lighter, airier crumb.
Uneven Crust or Browning
- Cause: This can sometimes be a characteristic of the bread maker itself, especially if it lacks a top heating element. Uneven ingredient distribution can also play a role.
- Solution: Ensure ingredients are well-distributed by adding them in the correct order. Choose a darker crust setting. If your machine has a specific troubleshooting guide for uneven crust, consult it.
By carefully observing your dough and loaf, and making small adjustments to your recipe or technique, you can overcome most bread machine issues and consistently bake beautiful white bread.
Where to Buy a Bread Maker
Acquiring a bread maker is a straightforward process, with numerous retail channels offering a wide selection of models to suit every need and budget.
Online Retailers like Amazon, Walmart, and the official websites of brands such as Zojirushi, Panasonic, Breville, and Cuisinart are excellent places to start. These platforms typically offer the broadest range of models, competitive pricing, and the convenience of home delivery. You can easily compare features, read customer reviews, and often find exclusive online deals.
Electronics Stores such as Best Buy often stock popular bread maker brands. Shopping in person allows you to see the machines firsthand, assess their size, build quality, and ask sales associates specific questions.
Department Stores like Macy’s, Kohl’s, or JCPenney, particularly their home goods sections, also carry a selection of bread makers. These stores can be a good option for finding mid-range models and might offer seasonal sales.
Specialty Kitchen Stores may provide a more curated selection and expert advice. While their inventory might be smaller, the staff are often very knowledgeable and can guide you toward a machine that best fits your baking aspirations.
When purchasing, always consider the retailer’s return policy and warranty information to ensure peace of mind with your investment.
Bread Maker Buying Guide
Navigating the options for bread makers can feel overwhelming, but a systematic approach will lead you to the perfect appliance for your home.
Start by assessing your anticipated needs and usage frequency. If you plan to bake daily for a large family, a robust 2-pound or larger machine with durable construction and multiple cycles will be more suitable than a compact model. For occasional baking or smaller households, a 1.5-pound capacity might suffice. Also, consider the types of white bread you envision making; a basic machine is fine for simple loaves, but if you desire artisanal variations or other bread types, more programs are beneficial.
Establish a realistic budget early on. Bread makers range from under $100 to over $300. More expensive models often come with advanced features like dual kneading paddles, automatic ingredient dispensers, a wider array of programs (including gluten-free options), and premium build materials that contribute to durability and consistent results. However, excellent entry-level and mid-range options can still produce fantastic white bread.
Compare specific features relevant to white bread baking. Look for a “Basic White” or “Normal” cycle, which is optimized for white flour. Adjustable crust settings (light, medium, dark) allow for customization. A delay timer is invaluable for fresh bread on demand, and a “keep warm” function is a nice convenience. Consider the pan shape—some machines yield a more traditional rectangular loaf, which is ideal for sandwiches.
Always read user reviews and expert ratings for the models you’re considering. Real-world feedback can provide invaluable insights into a machine’s performance, ease of use, durability, and how well it handles white bread recipes. Pay attention to comments regarding noise levels, ease of cleaning, and consistency of results.
Finally, confirm the warranty and return policy offered by both the manufacturer and the retailer. A good warranty provides protection against defects, and a flexible return policy can be helpful if the machine doesn’t meet your expectations. By meticulously considering these factors, you can confidently choose a bread maker that will reliably deliver delicious homemade white bread for years to come.
Conclusion
Embracing a bread maker simplifies the journey to fresh, homemade white bread, transforming a once time-consuming task into a delightful daily ritual. From defining the appliance’s role to understanding its evolution, recognizing the sheer convenience and health benefits it offers, and guiding you through selection, usage, and troubleshooting, this article aims to empower your baking endeavors. With careful attention to ingredients, proper programming, and a few key tips, you can consistently achieve that perfect, soft white loaf that fills your home with an inviting aroma and satisfies every craving. So, why wait to experience the unparalleled joy of baking your own bread?
Frequently Asked Questions
What is the ideal temperature for water when making white bread in a bread maker?
The ideal temperature for water when making white bread in a bread maker is typically between 110-120°F (43-49°C). This range is crucial for activating the yeast without killing it, ensuring a proper rise and a light, airy texture for your white loaf. Using water that is too cold can result in a flat loaf, while water that is too hot can destroy the yeast.
Can I use all-purpose flour instead of bread flour for white bread in my bread maker?
Yes, you can use all-purpose flour instead of bread flour for white bread in your bread maker, but the results may differ. Bread flour has a higher protein content, which contributes to stronger gluten development, resulting in a chewier texture and a taller, airier loaf. All-purpose flour will still produce a good white bread, but it might be slightly denser and have a softer crumb.
Why did my white bread collapse in the bread maker?
A collapsed white bread loaf in a bread maker is often caused by too much yeast, too much liquid, or too much sugar in the recipe. These factors can cause the dough to rise too quickly and then fall. High humidity or altitude can also contribute to over-rising and subsequent collapse. Adjusting ingredient ratios and potentially using colder liquids in warm weather can help.
How do I prevent a large hole at the bottom of my bread maker white bread?
A large hole at the bottom of your bread maker white bread is typically caused by the kneading paddle. Some advanced bread makers feature collapsible paddles that retract before baking, minimizing this issue. For machines with fixed paddles, removing the paddle after the final kneading cycle (before the last rise and bake) and gently reshaping the dough can help, though this requires manual intervention.
How long does homemade white bread from a bread maker stay fresh?
Homemade white bread from a bread maker generally stays fresh for about 3-4 days when stored properly at room temperature. To maintain freshness, keep the loaf in an airtight container or a bread bag. For longer storage, you can slice the bread and freeze it for up to 2-3 months, thawing slices as needed.
Is it cheaper to make white bread in a bread maker than to buy it?
In many cases, it is cheaper to make white bread in a bread maker than to buy commercially produced loaves, especially when considering the cost of basic ingredients like flour, yeast, water, and salt. While the initial investment in a bread maker can vary, the cost per loaf typically works out to be less than store-bought options over time, particularly for higher-quality bread.
