Imagine waking up to the comforting aroma of freshly baked bread, filling your home with a warmth that store-bought loaves can simply never replicate. For many, the idea of baking bread from scratch seems like a time-consuming endeavor, reserved only for seasoned bakers. However, with a modern homemade bread maker, this delightful experience is within everyone’s reach. This versatile kitchen appliance simplifies the entire bread-making process, allowing you to enjoy nutritious, delicious loaves with minimal effort.
Bread Makers: An Overview
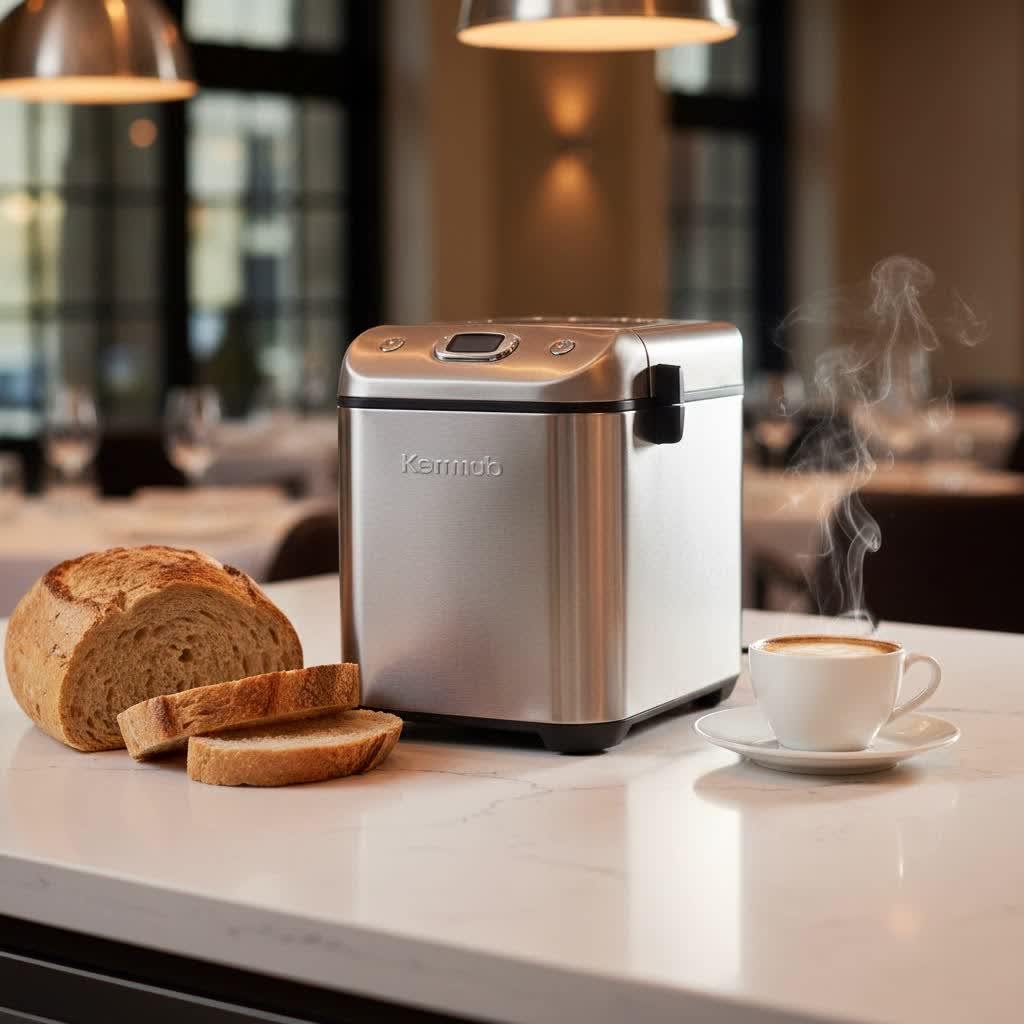
A bread maker is a countertop kitchen appliance designed to automate the process of making bread. From mixing ingredients to kneading, proofing, and baking, it handles every step, transforming raw components into a perfect loaf. Historically, bread making was a labor-intensive art, requiring specialized skills and equipment. The first automatic bread makers emerged in the late 1980s, revolutionizing home baking by making it accessible to busy individuals and families.
Today, the market offers a diverse range of automatic bread machines. You’ll find models that bake vertical loaves, which are often taller and ideal for sandwiches, and horizontal loaves, which more closely resemble traditional bakery bread. Capacities typically range from 1-pound loaves perfect for individuals or small families, to 2-pound or even 2.5-pound machines suitable for larger households or those who bake frequently. Some advanced models even offer dual kneading paddles for more thorough mixing, while others feature unique heating elements for superior crust development.
Why You Should Embrace a Homemade Bread Maker
There are compelling reasons to bring a bread maker into your kitchen. The convenience and time-saving aspects are often at the top of the list, but the benefits extend far beyond that.
First and foremost, a bread maker offers unparalleled convenience and time-saving. Gone are the days of labor-intensive kneading and constant monitoring. You simply add your ingredients, select a program, and the machine handles the rest. Many models come with a delay timer, allowing you to set it up the night before and wake up to a warm, fresh loaf, or come home to one after a long day. This means less time spent in the kitchen and more time enjoying delicious, fresh bread.
Secondly, a homemade bread maker provides complete control over your ingredients. Unlike commercial bread that often contains preservatives, artificial flavors, and excessive sugars, baking your own bread ensures you know exactly what goes into every slice. This is particularly beneficial for those with dietary restrictions, such as gluten intolerance, as many machines offer specific gluten-free bread programs. You can choose organic flours, experiment with different grains, and customize flavor profiles to suit your healthy choices and preferences.
Beyond health and convenience, the unmistakable taste and aroma of fresh bread are unbeatable. There’s nothing quite like the smell of baking bread permeating your home, creating a cozy and inviting atmosphere. The texture and flavor of a homemade loaf, still warm from the machine, far surpass anything you’ll find pre-packaged at the store. Plus, using a bread maker can also reduce food waste by allowing you to bake smaller, more precise loaf sizes.
Your Guide to Choosing the Perfect Bread Maker
Selecting the right bread maker involves considering several factors to ensure it aligns with your lifestyle and baking aspirations.
Assess Your Baking Needs
Before diving into features, take a moment to assess your baking needs.
- Family Size and Usage: Are you baking for a single person, a small family, or a larger household? This will determine the ideal loaf size capacity you need (e.g., 1-pound, 1.5-pound, 2-pound). If you plan to bake frequently or in larger quantities, a larger capacity machine might be more efficient.
- Preferred Bread Types: Do you primarily want to make basic white bread, or are you interested in whole wheat, gluten-free, sourdough, or sweet breads? Ensure the machine has the specific programmable settings for the types of bread you envision baking.
- Budget: Bread makers vary widely in price. Determine your budget-friendly range, keeping in mind that more advanced features and durable construction often come with a higher price tag. A good entry-level machine can be found for under $100, while premium models can exceed $400.
|
Our Picks for the Best Bread Maker in 2026
As an Amazon Associate I earn from qualifying purchases.
|
||
| Num | Product | Action |
|---|---|---|
| 1 | Neretva Bread Maker, 20-in-1 2LB Bread Machine Dual Heater & Nonstick Ceramic Pan Bread Makers Machine All Metal Compact for Gluten Free/Dough Maker/Meat Floss/Jam/Yogurt/Breadmaker Recipe-Light Green |

|
| 2 | KITCHENARM 29-in-1 SMART Bread Machine with Gluten Free Setting 2LB 1.5LB 1LB Bread Maker Machine with Homemade Cycle - Stainless Steel Breadmaker with Recipes Whole Wheat Bread Making Machine |
|
| 3 | 2LB Bread Maker Machine, OSIPOTO 17 in 1 Automatic Stainless Steel Bread Machine, Non-stick, Beginner-Friendly Controls, 15 Hour Timer, Easy to Clean Low Noise, High Success Rate for Homemade Bread |
|
| 4 | KBS Premium 2LB Convection Bread Maker Dual Heaters, 710W Stainless Steel 17-in-1 Bread Machine Healthy Ceramic Pan, Nut Dispenser,Touch Panel, 3 Loaf Sizes 3 Crust Colors, 15H Timer,Low Noise,Recipes |
|
| 5 | Cuisinart Bread Maker Machine, Stainless Steel Automatic Bread Machine with 12 Menu Options, 3 Loaf Sizes up to 2 Lb., 3 Crust Colors, Removable Nonstick Baking Pan & Kneading Paddle, CBK-110NAS |
|
| 6 | Cuisinart Bread Maker Machine, Stainless Steel Convection Bread Machine with 16 Menu Options, 3 Loaf Sizes Up to 2 Lb., 3 Crust Colors, Includes Measuring Cup, Spoon & Kneading Hook, CBK-210 |
|
| 7 | Elite Gourmet Programmable Bread Maker, 2 lb Loaf, 3 Sizes, 19 Presets incl. Gluten-Free, Dough & Jam, Delay Timer, Black |
|
| 8 | MERIOR 25-IN-1 Bread Maker with Visible Lid - 2lb Automatic Machine, Auto Nut Dispenser, 13-Hour Delay Timer, One-Touch Control & Recipes – Easy Operation, High Success for Homemade Bread |
|
| 9 | Neretva Bread Maker, 20-IN-1 2LB Bread Machine Dual Heater Bread Maker Machine Automatic with Nonstick Ceramic Pan, 15H Timer & 1H Keep Warm Set, Low Noise, Stainless Steel Breadmaker Recipe-Green |
|
| 10 | KBS Pro 710W 2LB Bread Maker, Stainless Steel 17-in-1 Smart Bread Machine with Healthy Ceramic Pan, Automatic Nut Dispenser, Tempered Glass Touch Panel, 3 Crust Colors, 15H Timer& Keep-Warm, Recipes |
|
Essential Features to Consider
Once you understand your needs, look for these important features:
- Capacity and Loaf Shape: As mentioned, capacities vary. Also, consider if you prefer a tall, squarish vertical loaf or a longer, more traditional horizontal loaf. Some machines offer both.
- Number of Programs: Most bread makers offer a range of pre-programmed cycles for different bread types, dough, jam, and sometimes even cake. More programs offer greater versatility.
- Delay Timer and Keep Warm Function: A delay timer is crucial for scheduling your bake. The keep-warm function ensures your bread stays at an optimal serving temperature after baking.
- Crust Color Control: Most models allow you to select light, medium, or dark crust settings, catering to personal preferences.
- Automatic Dispensers: Some advanced bread makers feature automatic dispensers for fruit, nuts, or yeast, ensuring these ingredients are added at the perfect time during the cycle without manual intervention.
- Kneading Paddles: Machines with dual kneading paddles often provide more thorough mixing, especially for heavier doughs. Collapsible paddles are a nice bonus as they minimize the hole left in the finished loaf.
- Material and Durability: Look for a machine with a sturdy build and a non-stick bread pan that is easy to remove and clean. A longer warranty period can indicate the manufacturer’s confidence in the machine’s durability.
- Viewing Window and Interior Light: These allow you to monitor the baking process without opening the lid, which can affect the bread’s rise.
Top Bread Maker Brands
The market features several reliable brands known for their quality bread makers.
- Zojirushi: Often lauded for its consistent results, especially with traditional horizontal loaves, and innovative features like dual kneading paddles and top lid heating elements. Models like the Virtuoso Plus are popular for their robust performance.
- Breville: Known for its customizable settings and intelligent design, including collapsible paddles and automatic ingredient dispensers. The Custom Loaf model is a favorite for those who want precise control.
- Panasonic: A long-standing brand offering a wide array of programs, including excellent gluten-free options and features for sourdough starters.
- Cuisinart: Offers reliable performance at a mid-range price point, often including convection fans for even baking and a variety of loaf sizes.
- Hamilton Beach & Amazon Basics: Excellent budget-friendly options for beginners or those seeking basic functionality without compromising too much on quality.
Comparing Popular Bread Maker Models
To help you visualize the differences, here’s a general comparison of types of bread makers you’ll encounter:
| Feature | Budget-Friendly Basic | Mid-Range Versatile | Premium Advanced |
|---|---|---|---|
| Price Range | $60 – $120 | $120 – $300 | $300 – $500+ |
| Loaf Sizes | 1 lb, 1.5 lb, 2 lb | 1 lb, 1.5 lb, 2 lb | 1 lb, 1.5 lb, 2 lb, 2.5 lb |
| Programs | 10-14 basic (white, whole wheat, dough, quick) | 12-20+ (gluten-free, French, sweet, jam, cake) | 20-30+ (sourdough starter, custom, specialty) |
| Crust Settings | Light, Medium, Dark | Light, Medium, Dark | Light, Medium, Dark |
| Delay Timer/Keep Warm | Yes | Yes | Yes |
| Auto Dispenser | Rare | Some models | Often included (fruit/nut/yeast) |
| Kneading Paddles | Single, fixed | Single or dual, fixed | Dual, sometimes collapsible |
| Loaf Shape | Vertical or horizontal | Vertical or horizontal | Often horizontal, traditional loaf shape |
| Special Features | Simple interface | Convection fan, some custom settings | Top heating element, extensive customization |
| Ideal User | Beginners, occasional bakers | Regular home bakers, diverse recipes | Enthusiasts, precise control desired |
Mastering Your Bread Maker: A Step-by-Step Guide
Using a bread maker is remarkably straightforward, but a few tips can ensure consistent success.
Steps Before You Begin
- Read the Manual: Each bread maker is unique. Familiarize yourself with your specific model’s instructions, programs, and capacity limits.
- Gather Ingredients: Ensure all ingredients are at room temperature unless the recipe specifies otherwise. Precision is key in bread making.
- Clean Pan: Make sure your bread pan and kneading paddle(s) are clean and properly inserted.
Choosing and Measuring Ingredients
- Order Matters: Most bread maker recipes instruct you to add liquids first, followed by dry ingredients, with yeast added last, often in a small well on top of the flour. This prevents premature activation of the yeast.
- Accuracy: Use proper measuring cups for liquids and dry ingredients, and ideally a kitchen scale for flour and yeast for the most accurate results. Even slight variations can impact the loaf.
Setting the Program and Timer
- Select Cycle: Choose the appropriate program for your recipe (e.g., “Basic White,” “Whole Wheat,” “Gluten-Free,” “Dough”).
- Loaf Size and Crust: Adjust the loaf size (if applicable) and select your desired crust color.
- Delay Start (Optional): If you want bread later, set the delay timer. Remember to calculate the total time, including the baking cycle.
- Start: Close the lid and press start. The machine will do the rest!
Tips for Delicious and Successful Bakes
- Fresh Yeast: Always use fresh, active yeast. Old yeast is a common culprit for bread that doesn’t rise.
- Ingredient Quality: High-quality flour makes a noticeable difference.
- Don’t Open Lid: Avoid opening the lid during the kneading and rising cycles, as this can affect the dough’s temperature and structure.
- Remove Promptly: Once the bread is done, remove the pan from the machine immediately and turn the loaf out onto a wire rack to cool completely before slicing. This prevents condensation and keeps the crust crisp.
Cleaning and Maintenance
After each use, clean the bread pan and kneading paddle(s) with warm, soapy water. Avoid abrasive scrubbers that could damage the non-stick coating. Wipe down the interior and exterior of the machine with a damp cloth. Regular cleaning ensures longevity and prevents residue buildup.
Delicious Recipes for Your Bread Maker
Your bread maker is a gateway to a world of homemade bread. Here are a few popular recipe ideas:
- Basic White Bread: The perfect starting point. Typically requires water, milk (or milk powder), butter, sugar, salt, bread flour, and active dry yeast. It yields a soft, versatile loaf ideal for sandwiches and toast.
- Whole Wheat Loaf: A healthier alternative, using whole wheat flour, which is denser and provides a richer, nuttier flavor. Often includes a touch of honey or molasses to enhance the taste.
- Sweet Bread: Think cinnamon swirl, brioche, or challah. These recipes incorporate more sugar, eggs, and butter, resulting in a richer, softer crumb, perfect for breakfast or dessert.
- Dough-Only Cycles: Many bread makers excel at mixing and kneading dough, which you can then remove, shape, and bake in a conventional oven. This is fantastic for homemade pizza dough, focaccia, dinner rolls, or baguettes, allowing for more artisanal shapes.
Troubleshooting Common Bread Maker Issues
Even with the best machines, occasional issues can arise. Here’s how to tackle some common problems:
- Bread Not Rising:
- Check Yeast: Ensure your yeast is fresh and active.
- Water Temperature: Water that’s too hot can kill yeast; too cold can hinder activation. Aim for lukewarm (around 105-115°F or 40-46°C).
- Expired Flour: Old flour can sometimes affect yeast activity.
- Salt/Sugar Placement: Salt directly touching yeast can inhibit it. Add salt on one side, sugar on the other, and yeast last.
- Bread is Burnt on Top/Sides:
- Crust Setting: Double-check you haven’t accidentally selected the “dark crust” setting.
- Ingredient Balance: Too much sugar can lead to darker browning.
- Machine Calibration: If it’s a persistent issue, your machine might be running hot; some advanced models allow for temperature adjustments.
- Bread is Dry or Crumbly:
- Too Much Flour: Accurately measure flour, preferably by weight.
- Not Enough Liquid: Ensure you’re using the correct amount of water or milk. Humidity can also play a role.
- Too Long in Machine: Remove the bread promptly after the cycle finishes to prevent it from drying out.
- Machine Not Operating:
- Power Supply: Check if it’s plugged in and the outlet is working.
- Lid Closed: Ensure the lid is properly closed and latched.
- Pan Insertion: Confirm the bread pan is correctly seated in the machine.
Where to Buy Your Homemade Bread Maker
Ready to invest in a homemade bread maker? You have several options for purchasing:
- Major Electronics and Appliance Stores: Retailers like Best Buy, Target, Walmart, and specialty kitchen stores often carry a selection of bread makers. This allows you to see models in person and sometimes speak with sales associates.
- Online Marketplaces: Amazon, eBay, and the official websites of brands like Zojirushi, Breville, and Panasonic offer a vast selection, competitive pricing, and user reviews that can be incredibly helpful in your decision-making.
- Department Stores: Many department stores with home goods sections also stock various bread maker brands.
Always compare prices across different retailers and check for ongoing sales or promotions.
Bread Maker Buying Guide: Making an Informed Choice
Making an informed decision about your bread maker involves synthesizing the features, your needs, and practical considerations.
- Prioritize Functionality: Focus on the core functions you need rather than being swayed by excessive “bells and whistles” you might never use. A reliable basic cycle, a dough-only setting, and a timer are often the most important features.
- Consider Longevity and Warranty: A good warranty (e.g., 1-3 years) provides peace of mind. Investing a little more in a reputable brand often translates to better durability.
- Read User Reviews: While individual experiences vary, a consistent pattern in user reviews can highlight strengths or weaknesses of a particular model. Pay attention to comments regarding loaf texture, crust quality, noise level, and ease of cleaning.
- Compare Prices: Don’t just settle for the first price you see. Use online tools to compare prices from various retailers.
- Assess Counter and Storage Space: Bread makers, especially larger models, can take up a significant amount of counter space. Measure your available space and consider where you’ll store it when not in use.
“A bread maker isn’t just about making bread; it’s about reclaiming the simple joy of fresh, wholesome food in your home, without the fuss.”
Conclusion
A homemade bread maker is an invaluable addition to any kitchen, offering a straightforward path to enjoying fresh, delicious, and customized loaves of bread. By understanding the different types, key features, and benefits, you can confidently select a machine that perfectly fits your baking habits and culinary desires. Embrace the convenience, savor the taste, and take control of your ingredients with this wonderful appliance. What kind of fresh bread will you create first?
Frequently Asked Questions
Can I make gluten-free bread in a standard bread maker?
Many modern bread makers include a specific gluten-free program, which adjusts kneading, rising, and baking times to accommodate the unique properties of gluten-free flours. Always check the machine’s specifications and your recipe for best results.
How much electricity does a bread maker use compared to a conventional oven?
Bread makers are generally more energy-efficient for baking a single loaf than a large conventional oven. They are smaller, insulated, and only heat a compact chamber, making them a more economical choice for daily bread baking.
